Featured image for how to care for damaged nails after acrylics
Image source: i.ytimg.com
Immediately stop using acrylics and give your nails time to breathe to begin healing and prevent further damage. Focus on hydrating with cuticle oil and a nourishing nail treatment daily to restore moisture, strength, and flexibility. Consistent care, gentle handling, and avoiding harsh chemicals are key to helping your natural nails recover fully.
Key Takeaways
- Moisturize daily: Apply cuticle oil and hand cream to hydrate and repair nail beds.
- Go bare: Allow nails to breathe by skipping polish for 1-2 weeks.
- Use strengtheners: Apply nail hardeners with keratin or biotin to rebuild structure.
- File gently: Use a fine-grit file to avoid further splitting or peeling.
- Protect nails: Wear gloves during chores to shield from water and chemicals.
- Eat for nails: Boost protein, vitamins A and C, and omega-3s for faster recovery.
📑 Table of Contents
- Understanding the Damage: Why Acrylics Weaken Your Nails
- Immediate Steps to Take After Removing Acrylics
- Nutrition and Supplements: Feeding Your Nails from Within
- Professional Treatments and At-Home Regimens
- Long-Term Maintenance: Preventing Future Damage
- Tracking Progress and Setting Realistic Expectations
Understanding the Damage: Why Acrylics Weaken Your Nails
Acrylic nails have long been a popular choice for those seeking long-lasting, glamorous nails. Whether you’re a fan of bold colors, intricate nail art, or simply enjoy the confidence that comes with a flawless manicure, acrylics offer a quick fix to achieve the look you desire. However, beneath the polished surface lies a potential problem: nail damage. The process of applying and removing acrylics can strip the natural nail of essential moisture, weaken its structure, and leave it brittle, peeling, or even infected. According to dermatologists, up to 60% of clients who frequently wear acrylics report some form of nail damage, including thinning, splitting, and discoloration.
The damage occurs during both application and removal. Acrylics are bonded using harsh chemicals and require filing down the natural nail to create adhesion. This mechanical stress, combined with the use of solvents like acetone during removal, can dehydrate the nail plate and disrupt the keratin structure. Over time, repeated exposure to these processes leads to cumulative trauma. The nail matrix—the living tissue beneath the cuticle—may also suffer from oxygen deprivation due to the occlusive nature of acrylic overlays. As a result, when you finally remove your acrylics, you’re often left with nails that are fragile, sensitive, and in need of serious rehabilitation. This is where proper post-acrylic nail care becomes not just beneficial but essential.
The Science Behind Nail Damage from Acrylics
Nails are composed primarily of keratin, a tough protein that gives them strength and flexibility. However, they also contain lipids and water—up to 18% moisture content—which keep them resilient. Acrylic application often involves buffing the nail surface to remove the natural shine, which also removes the protective top layer and exposes the porous nail plate. This makes the nail more susceptible to chemical penetration and water loss. During removal, soaking in acetone for 20–30 minutes further dehydrates the nail, sometimes causing it to temporarily lift from the nail bed (onycholysis).
Additionally, improper application techniques—such as applying acrylic too close to the cuticle or skin—can lead to chemical burns, allergic reactions, or fungal infections. The pressure applied during sculpting can also cause microtrauma to the nail matrix, leading to irregular nail growth patterns or ridges. In severe cases, chronic acrylic use has been linked to nail dystrophy, a condition where the nail becomes misshapen, thickened, or discolored. Understanding these mechanisms is the first step in reversing the damage and restoring your natural nails to health.
Immediate Steps to Take After Removing Acrylics
Once you’ve removed your acrylics, your nails are in a vulnerable state. The immediate post-removal phase is critical—how you care for your nails in the first 7–10 days can determine how quickly they recover. Rushing into another set of acrylics or even gel polish without proper recovery can worsen existing damage and delay healing. Instead, focus on hydration, protection, and gentle handling.
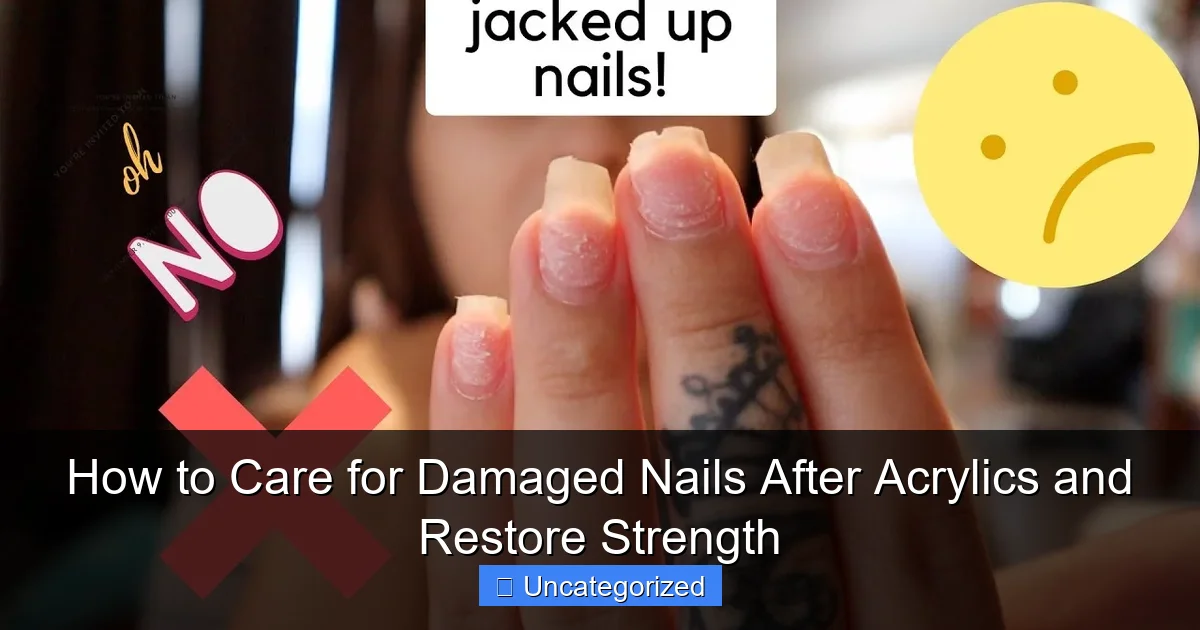
Visual guide about how to care for damaged nails after acrylics
Image source: i.ytimg.com
Stop All Chemical Exposure
The first rule of post-acrylic care is to give your nails a complete break from all nail enhancements, including gels, dip powders, and even regular polish if possible. This allows the nail bed to “breathe” and rehydrate naturally. Avoid acetone-based removers for at least two weeks. If you must remove polish, opt for an acetone-free formula and apply a nourishing cuticle oil immediately afterward. Chemical exposure during this recovery phase can further dry out the nail and delay healing.
Hydrate with Intensive Moisturizers
Moisture is your best friend during recovery. Start using a nail and cuticle oil at least three times a day. Look for oils rich in natural emollients like jojoba, argan, or vitamin E, which mimic the nail’s natural lipids and help restore the moisture barrier. For example, Jojoba oil closely resembles human sebum, making it easily absorbed and highly effective. Apply a few drops to each nail and gently massage into the cuticle and nail plate for 30 seconds to enhance blood flow and absorption.
In addition to oils, use a thick, non-greasy hand and nail cream at night. Products containing shea butter, hyaluronic acid, or ceramides provide deep hydration without clogging pores. Consider applying a cream and wearing cotton gloves overnight—this “occlusive therapy” traps moisture and accelerates healing. One user reported that after just one week of nightly glove treatments, her nails stopped peeling and regained a healthy shine.
Protect Your Nails from Physical Stress
Damaged nails are more prone to chipping, splitting, and snagging. Avoid using your nails as tools—no opening cans, peeling off stickers, or scraping surfaces. Wear gloves when doing household chores, especially when handling water or cleaning products. Even simple tasks like washing dishes can expose your nails to prolonged water immersion, which causes them to swell and weaken further.
Keep your nails short during recovery. While it may be tempting to grow them out, short nails are less likely to catch on clothing or break during daily activities. Use a soft-grit file (180+ grit) to shape your nails gently, and file in one direction to prevent further splitting. Never use metal files or harsh emery boards, as they can create micro-tears in the nail surface.
Nutrition and Supplements: Feeding Your Nails from Within
While external care is crucial, true nail recovery starts from the inside. Nails are living tissues, and their growth and strength depend on a steady supply of nutrients. Just like skin and hair, nails respond to a balanced diet rich in specific vitamins, minerals, and proteins. If your nails remain brittle or slow-growing despite good external care, nutritional deficiencies may be the culprit.
Essential Nutrients for Nail Health
- Protein: Nails are made of keratin, a type of protein. Without adequate dietary protein, your body cannot produce strong nails. Include lean meats, eggs, legumes, tofu, and Greek yogurt in your meals. A 150-pound adult should aim for at least 56 grams of protein daily.
- Biotin (Vitamin B7): Often hailed as the “nail vitamin,” biotin supports keratin infrastructure. Studies show that 2.5 mg of biotin daily can reduce splitting and improve nail thickness in 6 months. Natural sources include eggs, almonds, sweet potatoes, and spinach. Many over-the-counter nail supplements contain biotin, but always consult a doctor before starting any supplement.
- Iron: Iron deficiency is a common cause of brittle, spoon-shaped nails (koilonychia). Include iron-rich foods like red meat, lentils, spinach, and fortified cereals. Pair with vitamin C-rich foods (e.g., oranges, bell peppers) to enhance absorption.
- Zinc: Zinc plays a role in cell division and protein synthesis. Low zinc levels are linked to white spots (leukonychia) and slow nail growth. Oysters, pumpkin seeds, and chickpeas are excellent sources.
- Omega-3 Fatty Acids: Found in fatty fish, flaxseeds, and walnuts, omega-3s help maintain nail flexibility and reduce inflammation in the nail matrix.
Sample Daily Meal Plan for Nail Recovery
To illustrate, here’s a one-day meal plan designed to support nail healing:
- Breakfast: Greek yogurt with chia seeds, blueberries, and a sprinkle of almonds. Glass of orange juice (vitamin C for iron absorption).
- Lunch: Grilled salmon salad with spinach, avocado, and pumpkin seeds. Quinoa side.
- Snack: Hard-boiled eggs with a few walnuts.
- Dinner: Stir-fried tofu with bell peppers, broccoli, and brown rice. Side of lentil soup.
- Hydration: Drink at least 2 liters of water daily. Herbal teas like nettle or horsetail (rich in silica) can also support nail strength.
Supplements: When to Consider Them
While food sources are ideal, some people may benefit from targeted supplementation. Consider a high-quality nail support supplement that includes biotin, zinc, iron, and vitamins A, C, and E. For example, brands like Nutrafol Nails or Nature’s Bounty Hair, Skin & Nails combine these nutrients in clinically studied doses. However, avoid megadoses—excess biotin can interfere with lab tests, and too much iron can be toxic. Always choose third-party tested supplements and consult a healthcare provider, especially if you have underlying health conditions.
Professional Treatments and At-Home Regimens
While home care is essential, professional treatments can accelerate recovery and provide targeted solutions for severe damage. Dermatologists, nail technicians, and aestheticians offer services designed to repair, strengthen, and protect weakened nails. Combining these treatments with your at-home routine can yield faster, more noticeable results.
Professional Services to Consider
- Paraffin Wax Treatments: A spa favorite, paraffin therapy deeply moisturizes nails and cuticles. Warm wax is applied to the hands, sealing in oils and increasing blood circulation. Many salons offer this as part of a “recovery manicure.” A 2021 study found that weekly paraffin treatments improved nail hydration by 32% in 4 weeks.
- Medical-Grade Nail Peels: For clients with discoloration or fungal concerns, dermatologists may recommend a lactic acid or urea-based peel. These exfoliate the nail surface, removing damaged layers and promoting healthy regrowth.
- Low-Level Light Therapy (LLLT): Emerging technology, LLLT uses red or infrared light to stimulate cellular repair in the nail matrix. Some clinics offer this as a non-invasive treatment for slow-growing or brittle nails.
- Nail Hardening Injections (for severe cases): In extreme cases of nail dystrophy, a dermatologist may inject hyaluronic acid or platelet-rich plasma (PRP) into the nail fold to stimulate healing. This is typically a last resort after other methods fail.
At-Home Strengthening Treatments
Between salon visits, maintain progress with these effective at-home regimens:
- Weekly Nail Soaks: Create a healing soak by mixing 1 cup warm water, 2 tbsp olive oil, 1 tbsp honey, and 5 drops of tea tree oil (antifungal). Soak nails for 15 minutes, then gently push back cuticles. This combo hydrates, fights bacteria, and soothes inflammation.
- Nail Strengthening Base Coats: Use a formaldehyde-free strengthening base coat with ingredients like calcium, keratin, or silk proteins. Brands like OPI Nail Envy or Sally Hansen Hard as Nails provide temporary reinforcement. Apply every 3–4 days, removing with acetone-free remover.
- Cuticle Oil Routine: Establish a strict 3x/day oil application schedule. Keep a bottle at your desk, in your bag, and by your bed. Consistency is key—users who apply oil 3+ times daily report 50% faster recovery than those who skip doses.
- Silicone Nail Wraps: For severely cracked nails, silicone wraps (like Nail Tek’s Wraps) provide a protective shield while allowing the nail to heal underneath. Wear for 24–48 hours, then remove and reapply as needed.
Long-Term Maintenance: Preventing Future Damage
Once your nails begin to recover, the goal shifts from repair to prevention. Long-term nail health depends on sustainable habits that protect your natural nails while still allowing you to enjoy occasional enhancements. Think of this as building a “nail resilience plan”—a lifestyle approach to keeping your nails strong and damage-free.
Smart Acrylic Use (If You Choose to Reapply)
If you decide to return to acrylics, do so wisely. Follow these best practices to minimize future damage:
- Take Regular Breaks: Never wear acrylics continuously for more than 2–3 months. Allow a 4–6 week recovery period between sets.
- Choose a Skilled Technician: A qualified nail artist will avoid over-filing, apply acrylics away from the cuticle, and use proper curing techniques. Ask about their sanitation practices and product brands.
- Opt for Soak-Off Gels Instead: When possible, choose gel extensions over traditional acrylics. They are generally less damaging and easier to remove without acetone.
- Use a Bonding Primer: A nail dehydrator and primer (like CND Scentsations) helps acrylics adhere without excessive filing. This preserves the natural nail structure.
- Request a “Soft” Acrylic Formula: Some brands offer flexible, lightweight acrylics that reduce stress on the nail bed.
Daily Habits for Strong, Healthy Nails
- Moisturize Relentlessly: Continue using cuticle oil and hand cream daily, even when your nails look healthy. Prevention is easier than repair.
- Wear Gloves: Make gloves a habit—not just for chores, but also during cold, dry weather when nails lose moisture quickly.
- Stay Hydrated: Dehydration shows up in your nails first. Aim for 8–10 glasses of water daily.
- Protect from UV: Sun exposure can dry out nails and fade polish. Apply sunscreen to your hands or wear gloves when driving.
- Trim and File Regularly: Keep nails short and smooth to prevent snags. Use a glass or crystal file for a gentle finish.
Tracking Progress and Setting Realistic Expectations
Nail recovery is a slow process—healthy nails grow at an average rate of 3 mm per month, so visible improvement may take 2–3 months. To stay motivated, track your progress with photos and notes. Take a “before” photo after removing acrylics, then weekly or monthly photos to monitor changes. Look for signs like reduced peeling, smoother texture, and increased flexibility.
Data Table: Expected Recovery Timeline
| Time Frame | Expected Changes | Recommended Actions |
|---|---|---|
| Week 1–2 | Reduced pain, less peeling, cuticles soften | Apply oil 3x/day, use overnight gloves, avoid water |
| Week 3–4 | Visible nail growth, ridges may appear (temporary) | Start strengthening base coat, increase protein intake |
| Month 2 | Improved flexibility, reduced brittleness | Introduce light hand exercises, continue hydration |
| Month 3–6 | Full recovery of nail plate, healthy shine | Consider professional treatments, resume acrylics (if desired) |
Remember, every person’s recovery is different. Age, genetics, health conditions, and lifestyle all play a role. If your nails aren’t improving after 3 months, consult a dermatologist to rule out underlying issues like fungal infections, psoriasis, or thyroid disorders.
Ultimately, caring for damaged nails after acrylics is a journey of patience and consistency. By combining immediate care, nutrition, professional support, and long-term habits, you can restore strength and beauty to your natural nails. The key is to listen to your body, respect the healing process, and celebrate every small victory along the way. With time, dedication, and the right approach, your nails can emerge stronger, healthier, and more resilient than ever before.
Frequently Asked Questions
How can I repair damaged nails after acrylics naturally?
Focus on hydration and protein-rich treatments. Apply cuticle oil daily and use a nail strengthener with keratin or biotin to rebuild natural nail layers.
What’s the best way to care for damaged nails after acrylics?
Keep nails short, avoid harsh chemicals, and wear gloves during chores. Moisturize with a urea-based cream to replenish lost moisture and prevent splitting.
How long does it take for nails to recover after acrylic damage?
Nails grow ~3mm per month, so visible recovery takes 2–4 months. Consistent care for damaged nails after acrylics speeds up healing and reduces peeling.
Can I use nail polish while recovering from acrylic damage?
Opt for breathable, formaldehyde-free polishes and limit use to 5–7 days. Always use a nourishing base coat to protect fragile nails.
Are there vitamins that help strengthen damaged nails?
Yes—take biotin (B7), collagen, and iron supplements. These support keratin production, which is vital for restoring strength to nails weakened by acrylics.
Why do my nails feel thin and bendy after removing acrylics?
Acrylic removal often strips the nail plate of natural oils and layers. Rehydrate with jojoba oil and avoid excessive water exposure to regain flexibility.