Featured image for how to care for press on nails
Image source: i.pinimg.com
Proper application and gentle handling are essential to maximize the lifespan of your press on nails. Avoid water exposure and harsh chemicals by wearing gloves during chores, and always apply cuticle oil daily to maintain adhesion and shine. With consistent care, your press ons can stay flawless for up to two weeks or more.
Key Takeaways
- Prep nails properly: Clean and dry nails ensure better adhesion and longer wear.
- Use adhesive tabs: They’re reusable and protect natural nails from damage.
- Avoid water exposure: Keep hands dry for the first 2 hours after application.
- Limit harsh chemicals: Wear gloves when cleaning to prevent lifting or peeling.
- Remove gently: Soak in warm water and peel off slowly to avoid breakage.
- Store extras safely: Keep unused nails in their case to maintain shape and stickiness.
📑 Table of Contents
- How to Care for Press On Nails for Long Lasting Glamour
- 1. Preparing Your Natural Nails for Optimal Adhesion
- 2. Choosing the Right Adhesive and Application Method
- 3. Daily Care and Maintenance for Longevity
- 4. Avoiding Common Mistakes That Shorten Wear Time
- 5. Removing Press On Nails Safely Without Damage
- 6. Maximizing Glamour: Styling and Customization Tips
How to Care for Press On Nails for Long Lasting Glamour
Press on nails have surged in popularity, transforming from a quick fix into a go-to beauty solution for those seeking salon-quality nails without the time, expense, or commitment. Whether you’re prepping for a wedding, a night out, or simply want to elevate your everyday look, press on nails offer versatility, style, and convenience. From intricate designs and bold colors to minimalist elegance, the options are virtually endless. But while they’re easy to apply, many people struggle with making them last more than a few days. The truth is, press on nails can last up to two weeks—or even longer—with the right care and attention.
Unlike traditional nail enhancements, press ons don’t require UV curing, harsh chemicals, or professional removal. They’re beginner-friendly, reusable (if removed properly), and gentle on natural nails when applied and maintained correctly. However, their longevity hinges on more than just the adhesive used. It’s about preparation, application technique, daily habits, and removal methods. In this comprehensive guide, we’ll walk you through every step to ensure your press on nails stay flawless, chip-free, and stunning for as long as possible. Whether you’re a first-time user or a seasoned enthusiast, these expert-backed tips will help you achieve long-lasting glamour with minimal effort.
1. Preparing Your Natural Nails for Optimal Adhesion
Why Preparation Matters
The foundation of long-lasting press on nails begins long before you open the package. Just like painting a wall, the surface must be clean, dry, and smooth for the finish to adhere properly. If your natural nails are oily, have residual polish, or are uneven, the press ons will lift, chip, or fall off prematurely. Proper prep ensures maximum contact between the adhesive and your nail plate, reducing the risk of early failure.
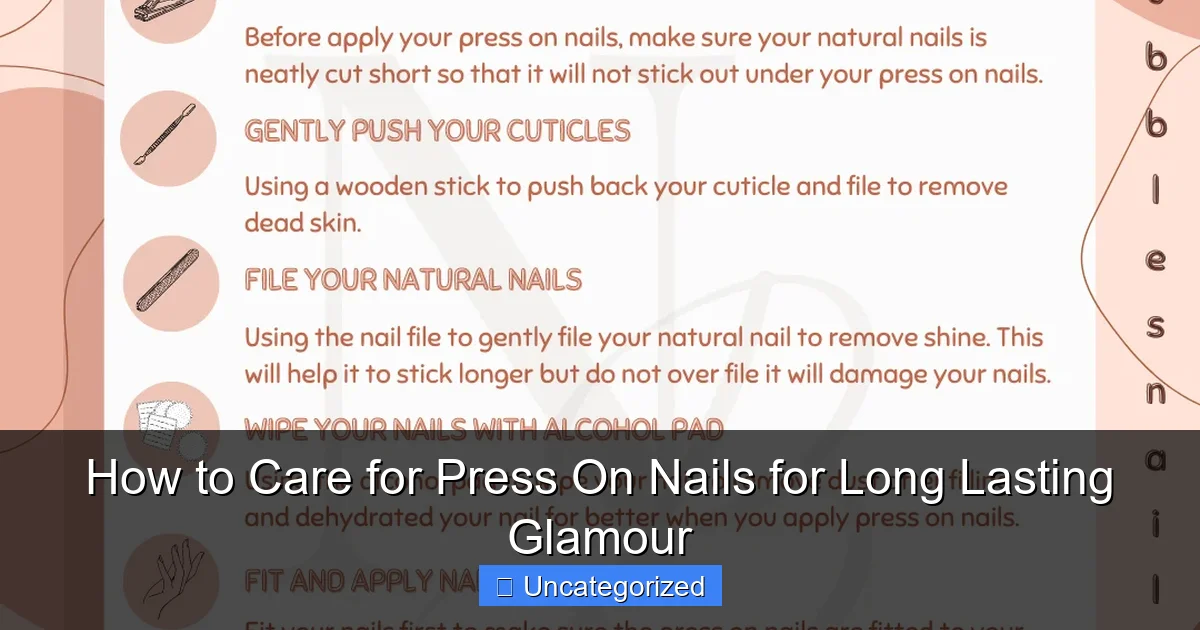
Visual guide about how to care for press on nails
Image source: i.ytimg.com
Studies show that up to 70% of press on nail failures are due to inadequate nail prep. This includes failing to remove oils, old polish, or debris that create a barrier between the press on and your natural nail. Think of it this way: even the strongest glue won’t stick to a greasy surface. The same applies to your nails.
Step-by-Step Nail Prep Guide
- Remove old polish: Use an acetone-free nail polish remover to strip any old color or residue. Acetone can dry out your nails and make them brittle, so opt for gentler formulas.
- Shape and file: Use a glass or crystal nail file to gently shape your natural nails. Avoid sawing back and forth—this weakens the edges. Instead, file in one direction from the side to the center. Aim for a slightly rounded or square shape that matches your press ons.
- Push back cuticles: Use a cuticle pusher (preferably rubber-tipped) to gently push back your cuticles. Never cut them, as this increases the risk of infection and creates uneven edges for the press ons to sit on.
- Buff the surface: Lightly buff your natural nails with a 180/240 grit buffer. This removes the shine and creates a slightly textured surface for better adhesion. Do not over-buff—this thins your nails and makes them more prone to damage.
- Clean and dehydrate: Wipe each nail with a lint-free pad soaked in rubbing alcohol (70% isopropyl). This removes oils, dust, and any remaining moisture. Let your nails air dry completely—no touching!
Pro Tip: For extra adhesion, consider using a nail dehydrator or primer. These products are designed to remove oils and create a tacky surface for glue or adhesive tabs. While not always necessary, they’re a game-changer for oily nails or humid environments.
2. Choosing the Right Adhesive and Application Method
Adhesive Options: Glue vs. Tabs
The adhesive you choose directly impacts how long your press ons last. There are two main options: nail glue (liquid adhesive) and adhesive tabs (pre-cut stickers). Each has pros and cons, and the best choice depends on your lifestyle, nail health, and desired wear time.
- Nail Glue: Offers the strongest hold and can last 7–14 days. Ideal for special events or when you need maximum durability. Use a small amount—too much glue can seep out and irritate the skin. Brands like Kiss, Elegant Touch, and Static Nails offer reliable options.
- Adhesive Tabs: Reusable, easy to apply, and gentle on natural nails. They typically last 3–7 days, making them perfect for short-term wear or frequent style changes. They’re also ideal for beginners or those with sensitive skin.
Example: If you’re attending a 5-day vacation, adhesive tabs may be sufficient. But for a wedding weekend followed by a workweek, opt for nail glue for a more secure hold.
Application Techniques for a Flawless Finish
Applying press ons correctly is just as important as the adhesive. Follow these steps for a seamless, professional-looking finish:
- Select the right size: Press ons come in multiple sizes. Match each nail to your natural nail—don’t force a too-small nail, as this can cause pressure and lifting.
- Apply adhesive: For glue: squeeze a tiny drop (about the size of a grain of rice) in the center of the press on. For tabs: peel and stick one tab per nail.
- Align and press: Starting at the cuticle, gently press the nail onto your natural nail. Apply firm, even pressure for 15–30 seconds. This ensures full contact and prevents air pockets.
- Seal the edges: Use a cuticle stick to press down the sides and corners. This creates a watertight seal and prevents lifting.
- File the free edge: If the press on is too long, file it to your desired length. Always file in one direction to avoid splitting.
Pro Tip: Apply press ons right before bed. This gives the adhesive time to fully cure without interference from water or daily activities.
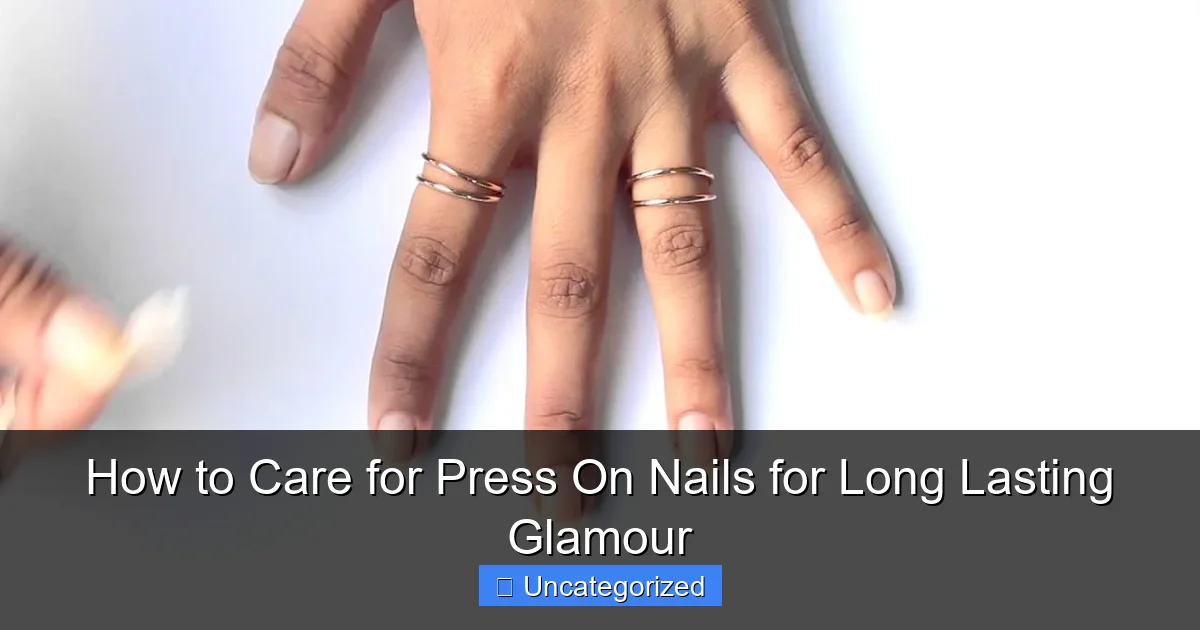
3. Daily Care and Maintenance for Longevity
Protecting Your Press Ons from Damage
Once applied, your press ons are vulnerable to everyday wear and tear. Simple habits can make a huge difference in how long they last. The goal is to minimize stress on the nail edges, especially the corners and sides, which are most prone to lifting.
- Wear gloves: When washing dishes, cleaning, or using harsh chemicals, always wear rubber gloves. Water and cleaning products weaken adhesives and cause lifting.
- Avoid excessive water exposure: Limit long showers, baths, and swimming. Prolonged water exposure softens the adhesive and lifts the edges. If you must swim, use waterproof bandages on your nails.
- Use your knuckles, not your nails: Open cans, peel labels, or scratch off stickers with your knuckle or a tool—not your press ons. This prevents chipping and breaking.
- Keep hands moisturized: Dry, cracked cuticles can cause the press ons to lift. Apply cuticle oil daily and use hand cream, but avoid getting oil or lotion on the nail bed, as it can loosen the adhesive.
Touch-Ups and Minor Repairs
Even with the best care, minor issues can arise. Here’s how to fix them:
- Lifting at the edges: Gently press down the lifted area. If the adhesive is still tacky, it may reseal. For stubborn lifting, add a tiny drop of glue underneath and press firmly for 30 seconds.
- Chipping or cracking: Use a fine nail file to smooth the damaged area. If the chip is small, you can paint over it with a matching polish. For larger chips, consider removing the nail and replacing it.
- Stained or dull press ons: Wipe with a cotton pad soaked in rubbing alcohol. Avoid acetone, as it can damage the finish.
Pro Tip: Keep a mini repair kit with glue, tabs, a file, and cuticle oil. This makes touch-ups easy and prevents small issues from becoming big problems.
4. Avoiding Common Mistakes That Shorten Wear Time
Over-Application of Adhesive
One of the most common mistakes is using too much glue or adhesive tabs. Excess adhesive can seep out, stick to your skin, and cause irritation. It also creates a bulky layer that makes the press ons look unnatural and increases the risk of lifting. Remember: less is more. A small amount of glue or a single tab per nail is sufficient.
Ignoring Nail Shape and Fit
Press ons that are too small or too large won’t adhere properly. A too-small nail puts pressure on the edges, causing them to lift. A too-large nail can snag and peel off. Always match the press on to your natural nail—don’t stretch or force it. If your nail bed is narrow, look for brands that offer petite sizes (e.g., Static Nails, Glamnetic).
Skipping the Prep Step
We’ve said it before, but it’s worth repeating: skipping nail prep is the #1 reason press ons fail. Even if you’re in a rush, take 5 minutes to clean, dehydrate, and buff your nails. It’s the difference between 2 days and 2 weeks of wear.
Using Low-Quality Products
Not all press on nails are created equal. Cheap brands often use thin materials, weak adhesives, or poor-quality designs that chip easily. Invest in reputable brands like Kiss, Elegant Touch, Olive & June, or Chillhouse. These brands use durable materials, strong adhesives, and trendy designs that last.
Neglecting Hand Hygiene
Dirty hands can transfer bacteria to your nails, leading to lifting or infections. Wash your hands regularly, but avoid harsh soaps that dry out your skin. After washing, dry your hands thoroughly—moisture under the press ons weakens the adhesive.
5. Removing Press On Nails Safely Without Damage
When to Remove Press On Nails
Even the best press ons won’t last forever. Most start to lift after 7–14 days. Signs it’s time to remove them include:
- Lifting at the edges
- Visible gaps between the press on and natural nail
- Discomfort or pressure on the nail bed
- Natural nails growing out significantly
Safe Removal Techniques
Removing press ons improperly can damage your natural nails. Never pull, pry, or bite them off. Instead, follow these steps:
- Soak in warm soapy water: Fill a bowl with warm water and mild soap. Soak your hands for 10–15 minutes to soften the adhesive.
- Use an oil-based remover: Apply cuticle oil or olive oil around the edges. Let it sit for 5 minutes to penetrate the adhesive.
- Gently lift the edges: Use a cuticle stick or orangewood stick to lift the press ons from the sides. If it doesn’t budge, soak for another 5 minutes.
- Peel slowly: Once the adhesive is soft, gently peel the press ons off. If resistance is felt, stop and soak longer.
- Clean your nails: Wipe with rubbing alcohol to remove residual adhesive or oil. Moisturize your nails and cuticles.
For glue-on nails: If soaking doesn’t work, use a nail glue remover (available at beauty supply stores). Apply it under the lifted edge and wait for the glue to dissolve.
Reusing Press On Nails
High-quality press ons can often be reused 2–3 times if removed carefully. After removal, clean them with rubbing alcohol, let them dry, and store them in their original packaging or a small container. Reapply with fresh adhesive tabs or glue.
6. Maximizing Glamour: Styling and Customization Tips
Choosing the Right Design for Your Lifestyle
Press ons come in endless styles—glossy, matte, glitter, ombre, French tips, 3D designs, and more. Choose a design that fits your daily activities:
- Office-friendly: Opt for neutral shades, short lengths, and subtle designs (e.g., nude, soft pink, French tips).
- Party-ready: Go bold with glitter, rhinestones, or vibrant colors. Long stilettos or almond shapes add drama.
- Everyday wear: Medium-length press ons with a matte or satin finish are practical and stylish.
Customizing Your Press Ons
Want a unique look? Customize your press ons:
- Painting: Use nail polish to add accents, ombre effects, or hand-painted designs. Seal with a top coat for longevity.
- Decals and stickers: Apply small decals, rhinestones, or foils before the top coat dries.
- Filing: Shape your press ons with a file to match your preferred style (e.g., coffin, stiletto, square).
Seasonal and Thematic Ideas
Match your press ons to the season or occasion:
- Summer: Bright colors, floral designs, or tropical prints.
- Fall: Deep reds, burnt oranges, and matte finishes.
- Winter: Glitter, metallics, or snowflake designs.
- Holidays: Red and green for Christmas, pastels for Easter, etc.
| Adhesive Type | Wear Time | Best For | Removal Difficulty |
|---|---|---|---|
| Nail Glue | 7–14 days | Long wear, special events | Moderate (soak + oil) |
| Adhesive Tabs | 3–7 days | Short wear, sensitive skin | Easy (peel off) |
| Double-Sided Tape | 1–3 days | Quick changes, travel | Very Easy |
With the right care, press on nails can be a stunning, long-lasting beauty accessory. By preparing your nails properly, choosing the right adhesive, avoiding common mistakes, and removing them safely, you can enjoy flawless, salon-worthy nails at home. Whether you’re a busy professional, a bride-to-be, or just someone who loves a fresh manicure, these tips will help you achieve maximum glamour with minimal effort. So go ahead—experiment with bold colors, intricate designs, and trendy shapes. Your press on nails are more than a temporary fix—they’re a statement of style, confidence, and self-expression. With this guide, you’re all set to rock your press ons with pride and longevity.
Frequently Asked Questions
How long do press on nails last with proper care?
With proper care, press on nails can last up to 7–14 days. Avoiding water exposure and using glue tabs or adhesive strips correctly helps maintain their longevity.
How do I remove press on nails without damaging my natural nails?
Soak a cotton pad in acetone, place it on the nail, and wrap foil around it for 10–15 minutes to loosen the adhesive. Gently peel off the press ons—never force them off to avoid damage.
Can I reuse press on nails, and how do I care for them between uses?
Yes, reusable press on nails can be worn multiple times if cleaned and stored properly. After removal, gently wipe the adhesive side with rubbing alcohol and store them in a dry, flat case.
How to care for press on nails to keep them shiny and chip-free?
Apply a clear top coat every 2–3 days to maintain shine and prevent chipping. Avoid using your nails as tools to preserve their finish and structure.
Why are my press on nails lifting, and how can I prevent it?
Lifting occurs due to moisture, oil, or improper application. Press firmly on each nail for 10–15 seconds and keep them dry during the first hour after application to prevent this.
Can I wear press on nails while washing dishes or swimming?
Prolonged water exposure weakens the adhesive, so it’s best to wear gloves while washing dishes or avoid submerging them in water. Quick showers are fine, but limit soaking for how to care for press on nails effectively.