Featured image for how to disinfect nail care tools
Image source: imgv2-1-f.scribdassets.com
Properly disinfecting nail care tools is essential to prevent infections and ensure client safety. Always start by cleaning tools with soap and water to remove debris, then soak them for 10 minutes in an EPA-registered disinfectant or 70% isopropyl alcohol. Never skip sterilization—autoclaving or UV-C light further guarantees germ-free instruments when used correctly.
Key Takeaways
- Clean tools first: Wash with soap and water to remove debris before disinfecting.
- Use EPA-approved disinfectants: Ensure they’re effective against viruses and bacteria.
- Soak for 10+ minutes: Follow product guidelines for proper disinfection time.
- Store dry and sealed: Prevent contamination with airtight containers after cleaning.
- Inspect regularly: Check for damage or wear that compromises tool safety.
- Disinfect after each use: Maintain hygiene between clients or personal manicures.
📑 Table of Contents
- Why Proper Nail Tool Disinfection Matters
- Understanding the Difference Between Cleaning, Disinfecting, and Sterilizing
- Choosing the Right Disinfectant for Nail Tools
- Step-by-Step Guide to Disinfecting Nail Tools at Home and in Salons
- Advanced Methods: Autoclaving and UV Sterilization
- Maintaining a Disinfection Routine: Best Practices and Common Mistakes
- Conclusion: Safe Nail Care Starts with Clean Tools
Why Proper Nail Tool Disinfection Matters
Every time you pick up a pair of cuticle nippers, a nail file, or a metal pusher, you’re handling tools that come into direct contact with the most sensitive areas of the body. Whether you’re a professional nail technician or a home care enthusiast, disinfecting nail care tools is not just a best practice—it’s a health imperative. Bacteria, fungi, and viruses can survive on metal and non-porous surfaces for hours, even days. A single unsterilized tool can transmit infections such as Staphylococcus aureus, nail fungus (onychomycosis), or even herpes simplex virus (HSV-1), leading to painful, long-term complications.
According to the Centers for Disease Control and Prevention (CDC), improper disinfection of personal care tools is a leading cause of skin and nail infections in both clinical and home settings. The good news? With the right knowledge, products, and procedures, you can disinfect nail care tools safely and effectively—protecting yourself, your clients, and your reputation. This guide walks you through every step, from understanding why disinfection matters to mastering advanced sterilization techniques used in professional salons. Whether you’re maintaining your home kit or managing a high-traffic nail studio, these best practices ensure your tools remain germ-free and ready for use.
Understanding the Difference Between Cleaning, Disinfecting, and Sterilizing
Before diving into disinfection methods, it’s crucial to understand the three key stages of tool hygiene: cleaning, disinfecting, and sterilizing. These terms are often used interchangeably, but they represent distinct processes with different outcomes. Misunderstanding them can lead to false confidence in tool safety.
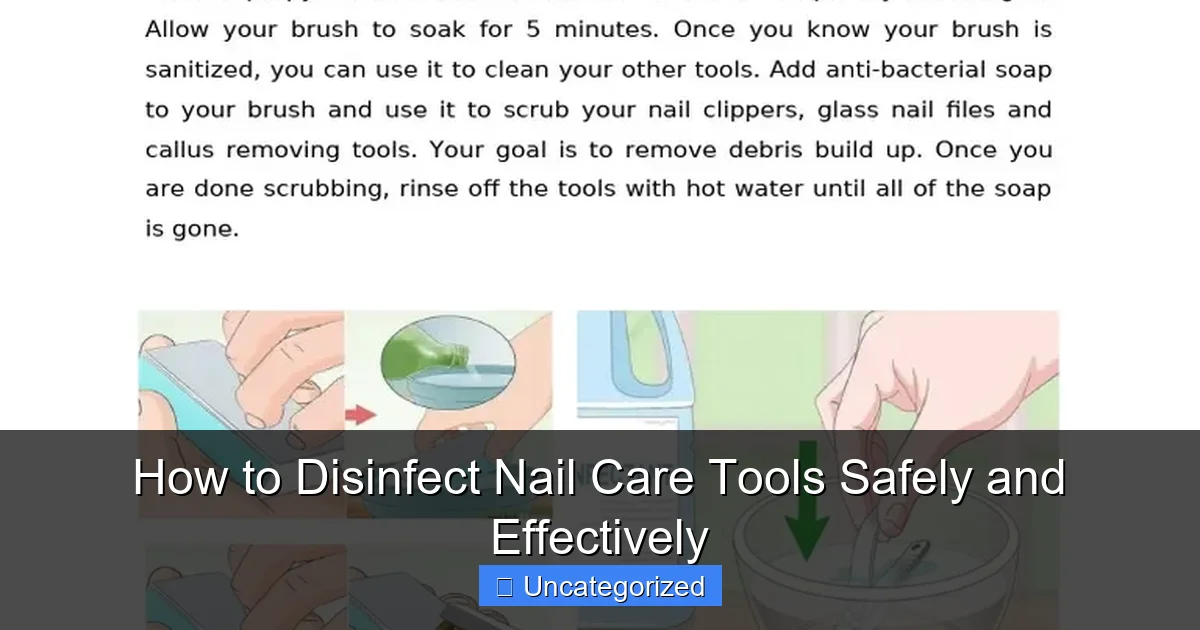
Visual guide about how to disinfect nail care tools
Image source: i.ytimg.com
1. Cleaning: The First Essential Step
Cleaning removes visible dirt, oils, nail polish residue, and organic material (like skin cells and blood) from tools. Without this step, disinfectants cannot penetrate to kill pathogens effectively. Think of it as preparing a surface before painting—you wouldn’t apply paint to a dusty wall. The same applies to disinfecting tools.
- Use warm water and mild soap (dish soap works well) to scrub tools with a soft brush or toothbrush.
- Pay special attention to crevices in cuticle nippers, under the blade of clippers, and around screw hinges.
- Rinse thoroughly to remove all soap residue, which can interfere with disinfectants.
- Dry tools completely before moving to the next stage—water dilutes disinfectants and reduces efficacy.
Example: After a manicure, a technician notices dried polish on the edge of a nail clipper. Simply wiping it with alcohol won’t suffice. The clipper must first be soaked in warm, soapy water for 5–10 minutes, then scrubbed and rinsed.
2. Disinfecting: Killing Harmful Microorganisms
Disinfection reduces the number of viable pathogens to a safe level, but it doesn’t eliminate all microorganisms (unlike sterilization). The goal is to kill bacteria, viruses, and fungi—especially those associated with skin and nail infections.
- Use EPA-registered disinfectants labeled as effective against bacteria, viruses, and fungi.
- Common options include quaternary ammonium compounds (quats), isopropyl alcohol (70% or higher), and bleach solutions.
- Always follow manufacturer instructions for contact time (typically 10–30 minutes).
Note: Disinfection is suitable for non-critical tools (those that contact intact skin), but not for tools that break the skin (e.g., lancets, cuticle nippers used on bleeding cuticles).
3. Sterilizing: The Gold Standard for Invasive Tools
Sterilization destroys all microbial life, including bacterial spores. This is required for tools that penetrate the skin or come into contact with blood or bodily fluids.
- Autoclaving (using steam under pressure) is the most effective and widely used method in professional settings.
- Chemical sterilants like glutaraldehyde or hydrogen peroxide solutions can be used if autoclaving isn’t available.
- Home users should avoid attempting sterilization without proper equipment—improper use can damage tools or fail to kill pathogens.
Tip: For home use, consider investing in a small tabletop autoclave (available for $200–$500) if you frequently perform cuticle trimming or ingrown nail treatments.
Choosing the Right Disinfectant for Nail Tools
Not all disinfectants are created equal. The choice depends on the type of tool, material, and level of contamination. Using the wrong product can damage tools, leave toxic residues, or fail to kill pathogens.
Top Disinfectant Options and Their Pros/Cons
Below is a breakdown of the most effective and widely used disinfectants for nail care tools:
| Disinfectant Type | Best For | Contact Time | Pros | Cons |
|---|---|---|---|---|
| 70% Isopropyl Alcohol | Non-invasive metal tools (files, pushers, buffers) | 10 minutes | Fast-acting, evaporates quickly, inexpensive | Evaporates too fast if not covered; not sporicidal; can dry out rubber grips |
| Quaternary Ammonium (Quats) | Metal and plastic tools; salon-grade disinfection | 10–30 minutes | Non-toxic, non-corrosive, leaves residue for ongoing protection | Can be inactivated by organic material; must be diluted correctly |
| Bleach Solution (10%) | Emergency disinfection; high-risk contamination | 10 minutes | Kills bacteria, viruses, fungi, and spores; very effective | Corrosive to metal; toxic fumes; must be rinsed after use |
| Hydrogen Peroxide (3%) | Non-porous tools; eco-friendly option | 10 minutes | Non-toxic, breaks down into water and oxygen | Less effective against some fungi; degrades over time |
| Glutaraldehyde (2%) | Professional sterilization; autoclave alternative | 10 hours (for sterilization) | High-level disinfectant; effective against spores | Toxic; requires ventilation; long exposure time |
How to Prepare and Use Disinfectants Correctly
- Always dilute quats and bleach according to manufacturer instructions. Using full-strength bleach can corrode metal and damage plastic.
- Use a closed, labeled container to soak tools. Open containers reduce alcohol concentration over time.
- Never mix disinfectants (e.g., bleach + ammonia or alcohol + hydrogen peroxide), as this can create toxic gases.
- Change disinfectant solutions daily or after each use, especially if they become cloudy or contaminated.
- Wear gloves and eye protection when handling concentrated chemicals.
Practical Tip: Create a disinfectant station in your salon or home kit: a labeled, airtight container filled with fresh quat solution. Soak tools immediately after use, then remove and air-dry on a clean towel. Label the container with the date and solution type for accountability.
Step-by-Step Guide to Disinfecting Nail Tools at Home and in Salons
Whether you’re working in a professional salon or maintaining a personal nail kit, the disinfection process should be systematic, consistent, and thorough. Below is a comprehensive, step-by-step guide tailored to different settings.
For Home Users: Simple and Effective Routine
Even if you only do your nails once a week, proper disinfection prevents infections and extends tool life.
- Clean after every use: Wash tools with warm, soapy water. Use a toothbrush for crevices.
- Rinse and dry: Rinse under running water, then pat dry with a clean towel or air-dry completely.
- Disinfect: Soak in 70% isopropyl alcohol or quat solution for 10–15 minutes. Cover the container to prevent evaporation.
- Rinse (if required): Bleach and some quats require rinsing with sterile water or alcohol to remove residue.
- Air-dry and store: Place tools on a clean paper towel or in a UV sanitizing case. Store in a sealed, dry container.
Pro Tip: Use a UV-C sanitizing box (available for $30–$80) to store tools between uses. These devices emit ultraviolet light that kills surface bacteria and viruses—ideal for home kits.
For Professional Salons: High-Volume, High-Standard Protocol
Salons handle multiple clients daily, so disinfection must be fast, reliable, and compliant with state regulations (e.g., State Board of Cosmetology rules).
- Pre-cleaning station: Set up a sink or basin with warm water and soap. Clients’ tools are cleaned immediately after use.
- Ultrasonic cleaning (optional but recommended): Use an ultrasonic cleaner with a cleaning solution to remove microscopic debris from hinges and crevices.
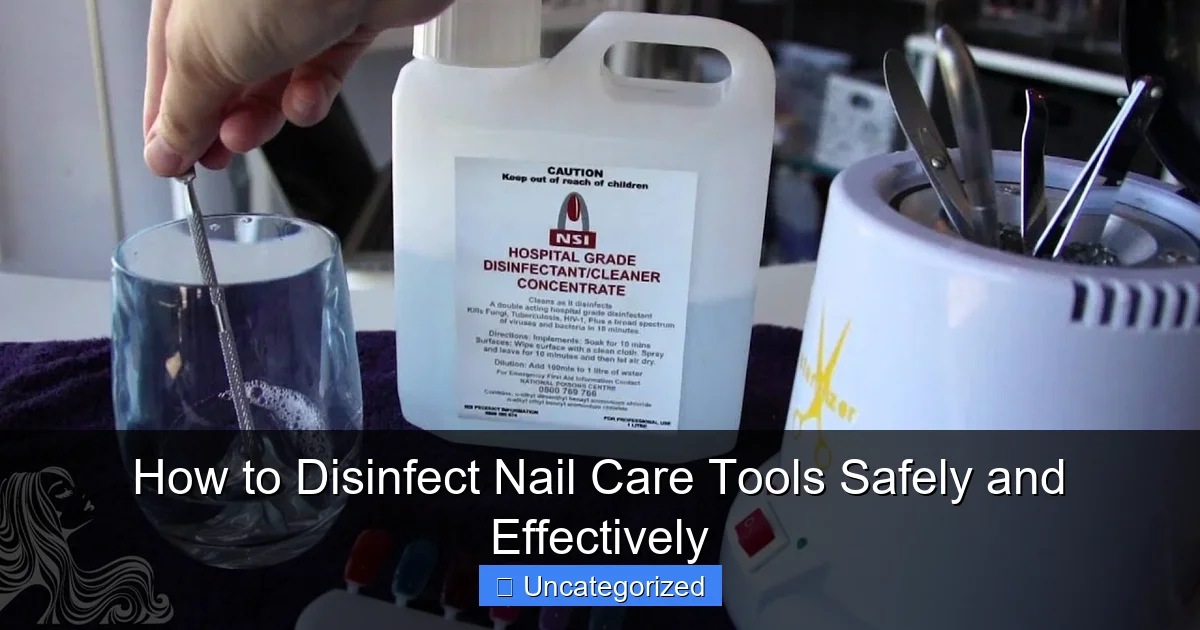
- Disinfect in a closed container: Use EPA-registered quat solution (e.g., Barbicide, CaviCide) in a labeled, covered jar. Soak for 10 minutes.
- Inspect for damage: Check for rust, dull blades, or loose hinges. Damaged tools should be discarded or repaired.
- Autoclave for invasive tools: Tools that break the skin (e.g., lancets, cuticle nippers) must be sterilized in an autoclave. Wrap tools in sterilization pouches and run a full cycle (121°C for 15–20 minutes).
- Store in sterile pouches: After autoclaving, tools remain sterile for up to 30 days if stored in sealed pouches.
Example: A nail technician uses a metal cuticle pusher on a client with a small cut. After cleaning, the tool is placed in a quat solution for 10 minutes, then autoclaved for 20 minutes. It is stored in a sterilization pouch until the next use.
Special Considerations for Different Tool Types
- Metal tools (clippers, nippers, pushers): Can withstand alcohol, quats, and autoclaving. Avoid bleach unless absolutely necessary.
- Glass/crystal files: Non-porous; disinfect with alcohol or quats. Avoid soaking in water to prevent chipping.
- Disposable tools (buffers, files): Never reuse. Dispose after one use to prevent cross-contamination.
- Electric nail drills: Wipe the handpiece with alcohol-soaked wipes. Do not submerge. Replace drill bits after each client.
Advanced Methods: Autoclaving and UV Sterilization
For those seeking hospital-grade sterilization, advanced methods like autoclaving and UV sterilization offer superior protection. These are especially valuable for professionals or individuals with compromised immune systems.
Autoclaving: The Professional Standard
An autoclave uses pressurized steam (121°C at 15 psi) to sterilize tools. It’s the most reliable method for killing all microorganisms, including spores like C. difficile.
- Process: Wrap tools in sterilization pouches with indicator tape. Load into the autoclave and run a full cycle (typically 20–30 minutes).
- Validation: Use chemical indicators (tape that changes color) and biological spore tests (monthly) to ensure effectiveness.
- Maintenance: Clean the autoclave chamber weekly and replace seals annually.
Tip: For small salons, a tabletop autoclave (e.g., Prestige Medical or SciCan) is a cost-effective investment. It fits on a countertop and processes 4–6 tools per cycle.
UV-C Sterilization: A Convenient Home Option
UV-C light (wavelength 254 nm) damages microbial DNA, rendering pathogens unable to replicate. UV sanitizing boxes are popular for home use.
- How it works: Place tools inside the box, close the lid, and run a 5–10 minute cycle.
- Effectiveness: Kills up to 99.9% of surface bacteria and viruses (e.g., E. coli, influenza).
- Limitations: UV light only works on exposed surfaces. Shadows or crevices may remain contaminated. Best used after cleaning and chemical disinfection.
Example: A home user soaks a nail file in alcohol, dries it, then places it in a UV box for 8 minutes. The tool is now ready for next use—clean, disinfected, and UV-sterilized.
When to Use Advanced Methods
- Autoclaving: For tools that break the skin, salons, or high-risk individuals.
- UV sterilization: For non-invasive tools, home kits, or as a secondary step after chemical disinfection.
- Combination approach: Clean → disinfect with quats → autoclave → store in UV case. This is the gold standard for maximum safety.
Maintaining a Disinfection Routine: Best Practices and Common Mistakes
Consistency is key. A one-time deep clean won’t protect you long-term. Establishing a routine prevents infections and ensures compliance with health regulations.
Creating a Disinfection Schedule
- Daily: Clean and disinfect tools after each use. Change disinfectant solutions.
- Weekly: Inspect tools for damage, rust, or dullness. Replace disposable tools.
- Monthly: Deep clean ultrasonic cleaner, autoclave, or UV box. Run biological tests on autoclaves.
- After each client (salons): Full disinfection and sterilization of all tools used.
Common Mistakes to Avoid
- Skipping the cleaning step: Disinfectants can’t work through dirt or nail polish.
- Using expired disinfectants: Check expiration dates. Alcohol and hydrogen peroxide degrade over time.
- Reusing disposable tools: Buffers, files, and drill bits should never be reused.
- Storing wet tools: Moisture breeds bacteria. Always air-dry before storage.
- Ignoring manufacturer guidelines: Some tools (e.g., electric drills) have specific cleaning instructions.
Storage Tips for Long-Term Hygiene
- Use sealed, labeled containers to prevent dust and contamination.
- Store in a cool, dry place—humidity promotes rust and mold.
- Consider UV sanitizing storage boxes for added protection.
- Label tools if used by multiple people (e.g., family members).
Conclusion: Safe Nail Care Starts with Clean Tools
Disinfecting nail care tools is not optional—it’s a non-negotiable part of responsible nail hygiene. From simple home kits to bustling salons, the principles remain the same: clean first, disinfect thoroughly, and sterilize when necessary. By understanding the difference between cleaning, disinfecting, and sterilizing, choosing the right products, and following a consistent routine, you protect yourself and others from preventable infections.
Remember, the cost of a quality disinfectant or autoclave is far less than the cost of treating a nail infection, losing a client’s trust, or facing legal action. Whether you use 70% alcohol for a quick clean or invest in a full autoclave setup, every step you take toward proper disinfection is a step toward healthier, safer nail care. Your tools are only as safe as your last cleaning—make it count.
Frequently Asked Questions
How do I disinfect nail care tools at home safely?
To disinfect nail care tools at home, clean them with soap and water first, then soak in 70% isopropyl alcohol or a bleach solution (1 part bleach to 9 parts water) for 10 minutes. Rinse and air-dry to ensure no residue remains.
What is the best way to sterilize nail tools between clients?
The most effective method is using an autoclave or hospital-grade disinfectant like EPA-registered quaternary ammonium. For non-electric tools, soak in disinfectant for 10 minutes, ensuring full coverage to kill bacteria and viruses.
Can I use hydrogen peroxide to disinfect nail care tools?
Yes, hydrogen peroxide (3%) can disinfect nail tools, but it’s less effective than alcohol or bleach. Soak tools for 15–20 minutes, then rinse thoroughly to avoid corrosion, especially on metal tools.
How often should I disinfect my nail tools to prevent infections?
Disinfect nail care tools after every use, especially if shared between people. For salon settings, sterilize tools between clients and store them in sealed pouches to maintain hygiene.
Are UV sanitizers effective for disinfecting nail tools?
UV sanitizers can kill surface microbes but won’t remove debris or reach crevices. Use them as a secondary step after chemical disinfection for added protection, not as a standalone method.
How to disinfect nail files and buffers that can’t be soaked?
Wipe disposable files and buffers with 70% alcohol or replace them after each client. For reusable ones, brush off debris, wipe with disinfectant, and let dry completely before reuse.