Featured image for how to get nail polish out of car seat
Image source: i.ytimg.com
Act quickly and blot the stain immediately with a clean cloth to prevent the nail polish from setting into the car seat fabric. Use a nail polish remover with acetone (for synthetic materials) or a gentle, non-acetone formula (for delicate fabrics), testing it first on a hidden area to avoid damage. Gently dab—don’t rub—to lift the stain, then wipe with a damp cloth and air dry.
Key Takeaways
- Act fast: Fresh spills are easier to remove before drying.
- Blot, don’t rub: Prevents spreading and fabric damage.
- Use acetone sparingly: Test first to avoid discoloration.
- Dish soap works: Gentle yet effective for minor stains.
- Always vacuum after: Removes residue and restores texture.
- Check care labels: Follow manufacturer’s cleaning instructions closely.
- Prevent future spills: Use travel bottles with secure caps.
📑 Table of Contents
- How to Get Nail Polish Out of Car Seat Fast and Easy
- Act Fast: The Critical First 5-10 Minutes
- Choosing the Right Cleaning Solution & Tools
- Step-by-Step Cleaning Process by Material
- Dealing with Dried or Old Stains
- Prevention, Aftercare & Knowing When to Seek Help
- Summary of Cleaning Solutions & Tools
- Conclusion: Reclaiming Your Spotless Ride
How to Get Nail Polish Out of Car Seat Fast and Easy
We’ve all been there: a relaxing drive home after a manicure, only to realize you’ve accidentally spilled a bottle of nail polish onto your pristine car seat. The vibrant red, shimmering purple, or even the dreaded black polish can quickly turn a minor mishap into a full-blown crisis. The fear of permanent staining, the worry about damaging your vehicle’s upholstery, and the sheer frustration of the situation can be overwhelming. But before you panic and start considering expensive professional cleaning or even replacing your car seat, take a deep breath. Removing nail polish from a car seat is absolutely possible, and with the right approach, you can restore your upholstery to its former glory—often with household items you already have on hand.
This comprehensive guide will walk you through every step of the process, from the crucial immediate actions to the most effective long-term solutions. Whether you’re dealing with a fresh spill or a dried, stubborn stain, we’ll provide you with a range of methods tailored to different types of car seat materials—from delicate leather to durable fabric. We’ll cover everything from the essential tools and cleaning solutions to expert tips for avoiding damage and achieving the best possible results. Say goodbye to the stress and hello to a spotless car seat. With patience, the right techniques, and a little elbow grease, you can conquer this common household challenge and get back to enjoying your ride. Let’s dive into the practical, proven methods that will help you get that nail polish out—fast and easy.
Act Fast: The Critical First 5-10 Minutes
The single most important factor in successfully removing nail polish from your car seat is speed. The longer the polish sits, the more it penetrates the fibers or surface of the material, making removal exponentially more difficult. Think of it like a water stain on wood—the quicker you act, the better the outcome. Your window of opportunity for the easiest and most effective removal is within the first 5 to 10 minutes after the spill. During this time, the polish is still wet and hasn’t had a chance to bond with the upholstery.
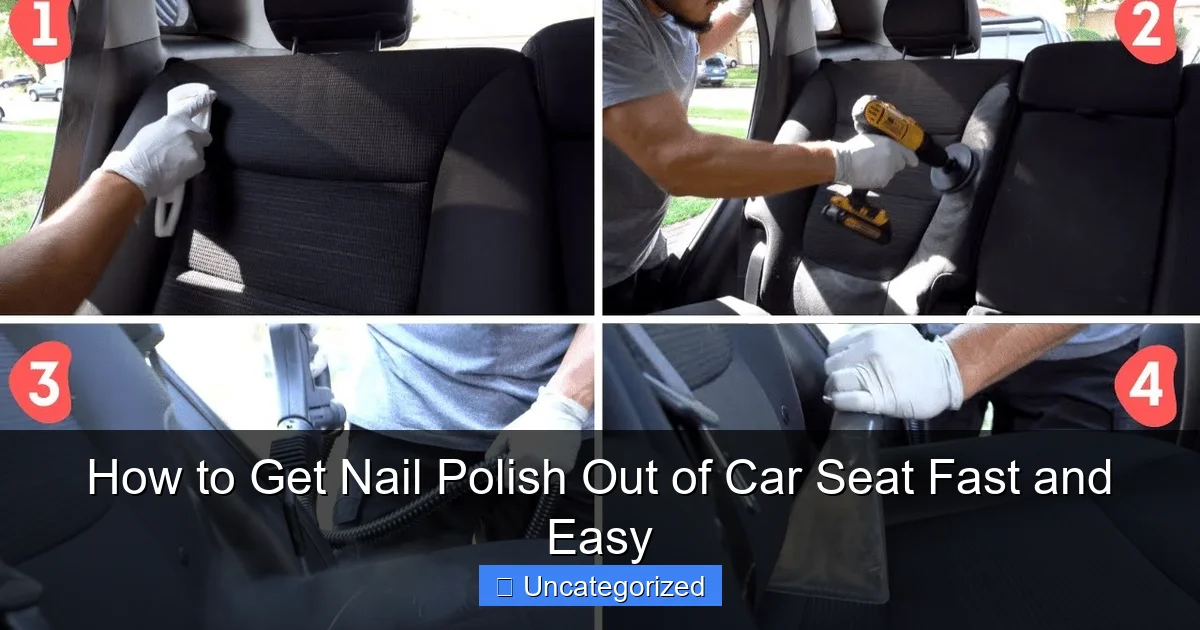
Visual guide about how to get nail polish out of car seat
Image source: i.ytimg.com
Immediate Steps to Take
Here’s exactly what to do the *second* you notice the spill:
- Contain the Spill: If the polish is still pooled or running, use a clean, dry microfiber cloth or a stack of paper towels to gently **blot** (don’t rub!) the area. Apply light pressure to absorb as much of the excess liquid as possible. Think of it like blotting a wine spill—rubbing will spread the stain and grind it deeper. Work from the outside of the spill inwards to prevent it from spreading further.
- Assess the Damage: Quickly determine the type of car seat material (fabric, leather, vinyl, Alcantara) and the size of the stain. This will dictate your next steps. A small drop on fabric is far easier to handle than a large spill on delicate leather.
- Remove Loose Debris: If there are any dried flakes or clumps of polish (common with older spills or thick polishes), carefully pick them up with a dry, stiff-bristled brush or a clean, dry toothbrush. Never use water at this stage—it can set the stain further.
- Prepare Your Cleaning Station: While blotting, have your chosen cleaning solution (see the next section) and clean, white, absorbent cloths (microfiber is ideal) ready. Avoid colored cloths, as the dye could transfer to your seat. Having everything prepped minimizes the time the polish spends on the seat.
- Ventilation is Key: Open your car windows or doors immediately. Nail polish removers contain strong solvents (like acetone) that can be irritating to breathe. Good airflow prevents fumes from building up and protects your respiratory system.
Real-World Example: Sarah was driving home when her open bottle of glitter nail polish tipped over. She immediately pulled over, grabbed the microfiber cloth she keeps in her glovebox, and blotted the spill for about 30 seconds. This removed over 70% of the excess polish, making the subsequent cleaning process much more manageable. The key was her immediate action and having the right tool ready.
Why Speed Matters: The Science Behind the Stain
Nail polish is formulated to adhere strongly to your nails. It contains polymers and solvents that, when exposed to air, begin to polymerize (harden) and bond with surfaces. On porous materials like fabric, the solvents can quickly wick deep into the fibers. On non-porous surfaces like leather or vinyl, the polish forms a film that adheres tightly. The longer it sits, the more these bonds strengthen. Within minutes, the polish starts to “cure,” making it resistant to simple wiping. This is why the initial blotting phase is so critical—it removes the bulk of the uncured, mobile polish before it can fully bond. Waiting even 30 minutes can turn a potentially simple cleanup into a much more complex and time-consuming process requiring stronger solvents and more aggressive (and potentially damaging) techniques.
Choosing the Right Cleaning Solution & Tools
Selecting the correct cleaning solution is paramount—using the wrong one can damage your car seat, spread the stain, or even create a bigger mess. The ideal solution depends entirely on your car seat’s material. Using a harsh solvent on delicate leather can strip its natural oils and cause cracking, while a mild solution might not be effective on a thick, dried fabric stain. Let’s break down the best options for each material.
For Fabric Car Seats (Cloth, Polyester, Nylon)
Fabric is generally more forgiving and porous, so the goal is to dissolve and lift the polish from the fibers.
- Best Option: Acetone-Based Nail Polish Remover (with caution): This is the most effective solvent for nail polish. However, **use it sparingly and only on colorfast, durable fabrics**. Test on a hidden area (like under the seat) first. Acetone can bleach or damage some fabrics. Apply a small amount (a few drops) to a clean, white microfiber cloth—never directly onto the stain. Gently dab and lift the polish. Work in small sections. Rinse the area immediately with a clean, damp cloth (water only) after each application to remove acetone residue, then blot dry. Repeat as needed. *Caution: Acetone can also damage some plastic or vinyl components near the seat, so be precise.*
- Gentle Alternative: Non-Acetone Nail Polish Remover: Safer for most fabrics, especially delicate ones or those with dyes that might run. It’s less harsh but may require more applications. Apply to a cloth and dab gently. Rinse well with water after.
- DIY Fabric Solution (for fresh, light stains or sensitive fabrics): Mix 1 part clear dish soap (like Dawn) with 2 parts warm water. Add 1 tablespoon of white vinegar (helps break down the polish slightly). Apply to the stain with a clean cloth, blotting gently. Rinse thoroughly with water and blot dry. This is less aggressive but safer for colored fabrics.
For Leather Car Seats (Genuine or Synthetic)
Leather is delicate and requires a gentler approach. Harsh solvents like acetone can strip the protective finish and natural oils, leading to dryness, cracking, and discoloration.
- Best Option: Leather-Safe Nail Polish Remover (specifically formulated for leather): These are readily available at auto parts stores or online. They contain solvents that target polish but are pH-balanced and often contain conditioners to protect the leather. Follow the product instructions carefully—usually involving applying to a cloth and dabbing, not soaking.
- Safe Alternative: Rubbing Alcohol (Isopropyl Alcohol, 70%): Less harsh than acetone. Apply a *tiny* amount to a clean, white cloth and gently dab the stain. **Test on a hidden area first.** Alcohol can dry out leather, so use sparingly and condition the area *immediately* after cleaning with a high-quality leather conditioner. This is better for small, fresh stains.
- DIY Leather Solution (for very light, fresh stains): Mix 1 part white vinegar with 1 part water. Apply to a cloth and dab *very* gently. Rinse immediately with a clean, damp cloth and blot dry. Condition thoroughly afterward. *Use this only if you have no leather-specific cleaner.*
- Never Use: Pure acetone, bleach, ammonia, or harsh household cleaners. They will damage the leather.
For Vinyl & Alcantara (Suede-like fabric)
Vinyl is more durable than leather but still sensitive to harsh solvents. Alcantara is a delicate microfiber that requires extreme care.
- Vinyl: Use a **vinyl-specific cleaner** or a **non-acetone nail polish remover**. Test on a hidden area. Apply to a cloth and dab. Rinse well with water and dry. Avoid excessive scrubbing.
- Alcantara: This is the most delicate. **Do NOT use acetone or alcohol.** Use a **specialized Alcantara cleaner** (available at auto parts stores) or the **mild DIY fabric solution (dish soap, water, vinegar)** described above. Blot *very* gently with a microfiber cloth. Never scrub. Conditioning is usually not needed but follow the cleaner’s instructions.
Essential Tools Checklist
Having the right tools makes the process easier and safer:
- Clean, White Microfiber Cloths (multiple): Crucial for blotting and cleaning. Use a fresh cloth for each step to avoid reapplying the stain.
- Clean, Dry Toothbrush (soft or medium bristle): For gently agitating the solution in fabric or lifting dried flakes (use dry for flakes).
- Spray Bottle (optional): For applying water or diluted solutions evenly.
- Latex or Nitrile Gloves: Protect your hands from solvents and dyes.
- Small Bowl or Container: For mixing DIY solutions.
- Leather Conditioner (for leather seats): Essential after using any solvent or cleaner on leather.
- Vacuum Cleaner (with upholstery attachment): For removing loose debris before cleaning and drying after.
Step-by-Step Cleaning Process by Material
Now that you have your solution and tools, let’s apply them with a clear, safe process tailored to each material. Remember: **Patience is key. Work in small sections. Never soak the area.**
Cleaning Fabric Car Seats
- Prep: Blot excess polish (as described in Section 2). Vacuum the area to remove loose debris.
- Test: Apply your chosen solution (acetone-based, non-acetone, or DIY) to a hidden area (e.g., under the seat). Wait 5-10 minutes. Check for colorfastness, fiber damage, or texture change. If no adverse effects, proceed.
- Apply Solution: Dampen a corner of a clean microfiber cloth with the solution. Do not oversaturate. Gently dab the stain. Work from the outside edge towards the center to prevent spreading. Use a light, lifting motion—don’t scrub.
- Blot & Lift: After dabbing for 10-15 seconds, use a clean, dry section of the microfiber cloth to blot the area, lifting the dissolved polish. This is crucial—you’re transferring the stain from the seat to the cloth.
- Rinse & Dry: Immediately dampen a clean, white cloth with **plain water**. Blot the cleaned area thoroughly to rinse away any residual solvent or cleaner. This prevents solvent damage and residue. Use a clean, dry cloth to blot until the area is as dry as possible.
- Repeat: If the stain remains, repeat steps 3-5. Use a fresh section of the cleaning cloth each time. You may need 2-5 applications for stubborn stains. Allow the area to air dry completely (open windows, use a fan) between applications if needed.
- Final Dry & Vacuum: Once the stain is gone, ensure the area is completely dry. Vacuum the seat thoroughly to restore the fabric texture.
Pro Tip: For large stains, work in a grid pattern (e.g., 2×2 inch sections) to ensure even cleaning and prevent missing spots. Change the cleaning cloth frequently.
Cleaning Leather Car Seats
- Prep & Test: Blot excess polish. Vacuum. Test your chosen leather-safe remover, alcohol, or DIY vinegar solution on a hidden area. Wait 10 minutes. Check for discoloration, stickiness, or texture change.
- Apply Solution: Dampen a clean microfiber cloth with the **leather-safe** solution or a *tiny* amount of 70% alcohol. Gently dab the stain. Use minimal pressure. Leather fibers are delicate.
- Blot & Lift: Immediately use a clean, dry microfiber cloth to blot the area, lifting the polish and solution. This step is critical to prevent the solvent from sitting on the leather.
- Rinse (Alcohol/Vinegar Only): If using alcohol or vinegar, dampen a clean cloth with **plain water** and blot the area to rinse. Dry immediately with a clean, dry cloth.
- Repeat (if necessary): For stubborn stains, repeat steps 2-4 with a fresh cloth. Use extreme caution and minimal solution each time.
- Condition IMMEDIATELY: This is non-negotiable. Once the area is completely dry, apply a high-quality leather conditioner according to the product instructions. Work it in gently with a clean microfiber cloth. This restores moisture and protects the leather from drying out and cracking. Allow the conditioner to absorb fully (usually 15-30 minutes) before using the seat.
Pro Tip: Use a leather conditioner *before* cleaning if the stain is fresh and the leather is very dry—this can create a protective barrier, but only if you’re using a mild solution like vinegar. Never condition before using alcohol or acetone.
Cleaning Vinyl & Alcantara Seats
- Prep & Test: Blot excess. Vacuum. Test your vinyl cleaner, non-acetone remover, or Alcantara cleaner on a hidden area.
- Apply Solution: Spray or apply the cleaner to a microfiber cloth (not directly on the stain). Gently dab the stain.
- Blot & Lift: Use a clean, dry microfiber cloth to blot and lift the solution and polish.
- Rinse (Vinyl Only): For vinyl, use a damp (water only) cloth to blot and rinse. Dry thoroughly. For Alcantara, skip rinsing if using a specialized cleaner; blot dry only.
- Repeat & Dry: Repeat as needed. Ensure complete drying. Vacuum Alcantara gently with the upholstery attachment.
Dealing with Dried or Old Stains
Unfortunately, not every spill gets caught immediately. Dried nail polish is significantly harder to remove because the solvents have evaporated, and the polymers have fully bonded with the material. Don’t despair—it’s still possible, but it requires more patience, gentler techniques, and potentially multiple attempts.
Pre-Softening the Dried Polish
The key is to rehydrate and soften the dried film before attempting to lift it. This makes it more receptive to solvents.
- Steam (Best for Fabric): Use a garment steamer or a clean kettle of boiling water held a safe distance (12+ inches) over the stain. The steam helps soften the dried polish. Work in short bursts (10-15 seconds) and immediately blot with a clean, dry microfiber cloth. Repeat 2-3 times. *Caution: Steam can damage leather and vinyl. Use only on fabric.*
- Warm, Damp Cloth (Fabric, Vinyl, Alcantara): Place a clean, white microfiber cloth soaked in warm (not hot) water directly over the dried stain. Cover it with a plastic bag or cling wrap to create a steam effect and prevent evaporation. Leave it for 10-15 minutes. Remove the cloth and plastic, then gently try to lift the softened polish with a clean, dry toothbrush (dry bristles) or your fingernail. Blot immediately. Repeat if needed.
- Olive Oil or Coconut Oil (Gentle, for Leather & Fabric – Use with Caution): Apply a *tiny* drop of olive oil or coconut oil to a clean microfiber cloth. Gently rub it into the dried stain in a circular motion. Let it sit for 15-30 minutes. The oil can help loosen the bond. Then, proceed with your chosen cleaning method (e.g., non-acetone remover for fabric, leather-safe cleaner for leather). *Test oil on a hidden area first—it can stain some fabrics or leave a residue.*
Modified Cleaning Process for Dried Stains
After pre-softening, follow the cleaning steps from Section 3, but with these modifications:
- Use a Gentler Solvent: Avoid harsh acetone on dried stains, especially on fabric or leather. Opt for non-acetone remover, the DIY dish soap/vinegar solution (fabric), or a specialized cleaner. Strong solvents can sometimes *set* dried stains further.
- Increase Dwell Time: After applying the solution, let it sit on the softened stain for 30-60 seconds (not longer) to penetrate the dried film before blotting.
- Agitate Gently: After the dwell time, use the clean, dry toothbrush to *very gently* agitate the surface in small circles. This helps break up the softened polish. Don’t press hard.
- Multiple Applications: You will likely need many more applications (5-10+) than for a fresh stain. Be patient. Work in small areas. Change the cleaning cloth frequently.
- Rinse Thoroughly: Rinsing with water (for fabric, vinyl) is even more critical after each application to remove dissolved residue.
- Condition (Leather): Conditioning after cleaning dried stains is absolutely essential, as the leather is more likely to be dried out.
Real-World Example: Mark discovered a dried purple polish stain on his fabric seat that was about 3 days old. He used the warm, damp cloth method for 15 minutes, which visibly softened the stain. He then used non-acetone remover, letting it dwell for 45 seconds, gently agitated with a toothbrush, and repeated the process 6 times with rinsing. It took 2 hours, but the stain was completely gone. The key was the pre-softening and the patience with multiple gentle applications.
Prevention, Aftercare & Knowing When to Seek Help
Successfully removing a stain is only half the battle. Preventing future accidents and knowing the limits of DIY cleaning are crucial for maintaining your car’s interior.
Preventing Future Nail Polish Spills
- Secure Storage: Use a dedicated, spill-proof container (like a small, sealed makeup bag or a hard case) for nail polish bottles in your car. Avoid keeping them loose in the glovebox or center console.
- Cap Tightness: Ensure the cap on the nail polish bottle is screwed on *very* tightly. A loose cap is the most common cause of spills.
- Drive Carefully: Avoid sudden stops, sharp turns, or driving on rough terrain when you have open or loose bottles in the car.
- Post-Manicure Protocol: Make it a habit to immediately store the bottle in its secure container *before* driving. Don’t leave it on the seat or dashboard.
- Use a Travel Tray:** Place a small, non-slip tray or silicone mat on the passenger seat or console to hold the bottle, adding an extra layer of spill protection.
Aftercare: Maintaining Your Cleaned Seat
Proper aftercare ensures the cleaned area doesn’t degrade prematurely and prevents new stains.
- Leather Seats:** Condition the *entire* seat (not just the cleaned area) every 3-6 months to maintain its moisture and protect against future stains. Use a quality leather protectant spray after conditioning.
- Fabric Seats:** Consider applying a fabric protector (like Scotchgard) after the area is completely dry. This creates a hydrophobic barrier that repels spills, making future cleanups much easier. Reapply according to the product instructions (usually every 6-12 months).
- Vinyl Seats:** Use a vinyl protectant to prevent drying and cracking. It also helps repel dirt and spills.
- Regular Cleaning:** Vacuum your car seats regularly (at least once a month) to remove dust and debris that can grind into the material and make it more susceptible to staining. Spot clean spills immediately, no matter how small.
- Inspect the Area:** Check the cleaned area periodically for signs of fading, texture change, or residue. Address any issues promptly.
When to Call in the Professionals
DIY methods are effective for most stains, but there are times when professional intervention is necessary. Don’t waste time on a stain that could cause further damage.
- Large, Deep Stains:** If the polish has deeply penetrated the fabric or foam padding, or if the stain covers a very large area (e.g., an entire seat section), professional upholstery cleaning is often the only way to achieve complete removal without damaging the underlying structure.
- Delicate Materials:** For extremely delicate fabrics like Alcantara, or for antique or high-end leather, the risk of DIY damage (bleaching, discoloration, texture change) might outweigh the potential benefit. Professionals have specialized tools and solutions for these materials.
- Failed DIY Attempts:** If you’ve tried multiple methods (including pre-softening) for 2-3 hours and the stain is still visible or has spread, it’s time to stop. Further attempts might make it worse. A professional can assess the damage and use stronger, controlled methods.
- Structural Damage:** If the spill involved a large amount of solvent (like acetone) that might have damaged the foam padding or the seat’s frame (rare but possible), a professional can inspect for hidden damage.
- Warranty Concerns:** If your car is under warranty, check the terms. Some warranties might be voided by DIY cleaning attempts on certain materials. A professional service is usually the safer option.
Professional auto upholstery cleaners use industrial-grade steam cleaners, specialized solvents, and extraction tools that can remove deeply embedded stains and restore the seat’s appearance without the risk of home methods. They also have the expertise to handle different materials correctly.
Summary of Cleaning Solutions & Tools
The right approach depends heavily on your seat material. Use this table as a quick reference guide:
| Car Seat Material | Best Cleaning Solution | Alternative Solutions | Critical Tools | Aftercare | When to Avoid DIY |
|---|---|---|---|---|---|
| Fabric (Cloth) | Acetone-based remover (test first) or Non-acetone remover | Dish soap + water + vinegar (mild) | Microfiber cloths, toothbrush, water, vacuum | Fabric protector (e.g., Scotchgard) | Large/deep stains, failed attempts |
| Leather (Genuine/Synthetic) | Leather-safe nail polish remover | 70% Isopropyl Alcohol (sparingly), Vinegar+Water (mild) | Microfiber cloths, leather conditioner | Leather conditioner, leather protectant | Delicate leather, large stains, failed attempts |
| Vinyl | Vinyl-specific cleaner | Non-acetone nail polish remover | Microfiber cloths, water | Vinyl protectant | Large stains, failed attempts |
| Alcantara | Specialized Alcantara cleaner | Dish soap + water + vinegar (mild, test) | Microfiber cloths, vacuum | None usually needed, follow cleaner instructions | All stains (high risk of damage) |
Conclusion: Reclaiming Your Spotless Ride
Getting nail polish out of your car seat doesn’t have to be a nightmare. By acting quickly, choosing the right cleaning solution for your specific seat material, using the correct tools and techniques, and exercising patience—especially with dried stains—you can achieve remarkable results. Remember the golden rule: **Blot, don’t rub. Test, don’t guess. Work gently, and rinse thoroughly.** The immediate action within the first 5-10 minutes is your biggest ally, drastically increasing your chances of success.
This guide has equipped you with the knowledge to tackle fresh spills confidently, handle the more challenging dried stains with pre-softening techniques, and understand the crucial differences between treating fabric, leather, vinyl, and delicate Alcantara. We’ve emphasized the importance of using the correct solvents to avoid damaging your upholstery, the necessity of conditioning leather, and the power of preventative measures to avoid future mishaps. The data table provides a clear, actionable summary for quick reference.
While DIY methods are powerful and cost-effective for most situations, recognizing when to call in a professional upholstery cleaner is a sign of wisdom, not defeat. For large, deep, or stubborn stains on delicate materials, professional help ensures the best outcome without risking further damage. Ultimately, the goal is a clean, undamaged car seat, not just a removed stain.
So, the next time you hear that dreaded *plink* of a nail polish bottle tipping over, don’t panic. Take a deep breath, grab your microfiber cloth and the appropriate cleaner, and follow the steps outlined here. With the right approach, you can transform a potential disaster into a minor, easily resolved incident. Your car’s interior deserves care and attention, and now you have the tools and knowledge to provide it. Drive safely, keep those bottles secure, and enjoy a spotless, stain-free ride. The power to get that nail polish out—fast and easy—is now firmly in your hands.
Frequently Asked Questions
How do I get nail polish out of a car seat without damaging the fabric?
Blot the stain with a cloth soaked in rubbing alcohol or acetone-free nail polish remover, then gently dab with a mix of mild soap and water. Avoid scrubbing to prevent spreading the stain or harming the fabric.
What’s the fastest way to remove dried nail polish from a car seat?
Apply a small amount of acetone-based nail polish remover to a cotton ball and hold it on the stain for 30 seconds to soften the polish. Wipe gently with a clean cloth, then rinse with water.
Can I use household products to get nail polish out of car seat upholstery?
Yes, mix dish soap, baking soda, and water into a paste, apply it to the stain, and let it sit for 10 minutes before scrubbing lightly with a soft brush. Wipe away with a damp cloth.
How to remove nail polish from leather car seats safely?
Use a leather-safe cleaner or a dab of isopropyl alcohol on a microfiber cloth to gently lift the polish. Always condition the leather afterward to prevent drying or cracking.
Does vinegar help get nail polish out of car seat fabric?
While vinegar isn’t strong enough for dried polish, it can help loosen fresh spills. Mix equal parts vinegar and water, blot the stain, and follow with soapy water to clean the area.
How to prevent stains when trying to get nail polish out of a car seat?
Act quickly and always test cleaners on a hidden spot first. Blot—don’t rub—the stain to avoid pushing it deeper into the fabric or spreading it.