
Featured image for how to remove liquid nails from car paint
Image source: i.ytimg.com
Removing Liquid Nails from car paint requires immediate action and the right solvent—like isopropyl alcohol or a dedicated adhesive remover—to avoid damaging the finish. Gently apply the solution, let it sit for a few minutes to soften the adhesive, then carefully scrape with a plastic razor blade to lift the residue without scratching the paint. Always finish with a thorough car wash and wax to restore protection and shine.
Key Takeaways
- Act fast: Remove Liquid Nails immediately to prevent paint damage.
- Use heat: A hairdryer softens adhesive for easier removal.
- Try oils: Coconut or olive oil dissolves residue safely.
- Scrape carefully: Use plastic tools to avoid scratching paint.
- Test first: Always patch-test removers on hidden areas.
- Wax after: Restore shine with wax post-cleanup for protection.
📑 Table of Contents
- Understanding Liquid Nails and Why Removal Is Tricky
- Assessing the Damage and Preparing for Removal
- Step-by-Step Removal Methods Based on Adhesive Age
- Advanced Techniques for Stubborn or Large Spills
- Restoring and Protecting Your Car’s Paint
- Preventing Future Accidents and Quick Response Tips
- Conclusion: Patience and Precision Win the Day
Understanding Liquid Nails and Why Removal Is Tricky
Liquid Nails is a powerful construction adhesive known for its strong bonding capabilities, often used for heavy-duty projects like installing trim, baseboards, or even securing car accessories. Its strength comes from a blend of synthetic rubber, solvents, and bonding agents that create a durable, weather-resistant seal. While this makes it excellent for construction, it becomes a nightmare when accidentally spilled or applied to a car’s painted surface. Unlike regular glue or tape residue, Liquid Nails forms a rigid, tenacious bond that adheres not just to the paint but can penetrate microscopic imperfections, making removal without damage a significant challenge.
When Liquid Nails gets on car paint, the stakes are high. Car paint is a delicate, multi-layered system—typically consisting of a primer, base coat (color), and clear coat—designed to protect the metal beneath while maintaining a glossy, attractive finish. Any abrasive or chemically aggressive removal method risks scratching, dulling, or even stripping the paint, which can lead to costly professional repairs. The key to success lies in a methodical, patient approach that breaks down the adhesive without harming the underlying paint. In this guide, we’ll walk you through safe, proven techniques to remove Liquid Nails from car paint, whether it’s a small spot or a large smear, and how to restore your car’s finish to its original luster.
Assessing the Damage and Preparing for Removal
Identifying the Extent of the Adhesive Spill
Before jumping into removal, take time to assess the situation. Is the Liquid Nails fresh and still tacky, or has it cured for hours or days? Fresh adhesive is often easier to remove because it hasn’t fully bonded with the paint’s surface. Look for signs of spreading: has the adhesive seeped into seams, door gaps, or under trim? Use a magnifying glass or flashlight to inspect edges where the adhesive might have crept under the paint layer. If the spill is small (under 1 inch in diameter), you’re in luck—it’s manageable with household items. Larger spills, especially those that have cured for more than 24 hours, may require more aggressive (but still paint-safe) methods.
Visual guide about how to remove liquid nails from car paint
Image source: i.ytimg.com
Another critical factor is the age of your car’s paint. Older vehicles with faded or oxidized clear coats are more vulnerable to chemical damage. If your car is over 10 years old and has visible swirl marks or dullness, extra caution is needed. Newer cars with well-maintained paint are more resilient but still require gentle handling. Always test any removal method on a small, inconspicuous area first—like behind the license plate or on the inside of a wheel well—to ensure it doesn’t cause discoloration or hazing.
Gathering the Right Tools and Supplies
Preparation is half the battle. You’ll need the following items to safely remove Liquid Nails from car paint:
- Plastic razor blades or credit card: For gently scraping cured adhesive without scratching paint.
- Isopropyl alcohol (70% or higher): Dissolves adhesive without harming most clear coats.
- Mineral spirits or odorless paint thinner: Effective on stubborn, cured Liquid Nails.
- Goo Gone or adhesive remover (automotive-safe): Commercial products formulated for paint-safe residue removal.
- Microfiber towels (lint-free): For wiping and buffing—never use paper towels or abrasive cloths.
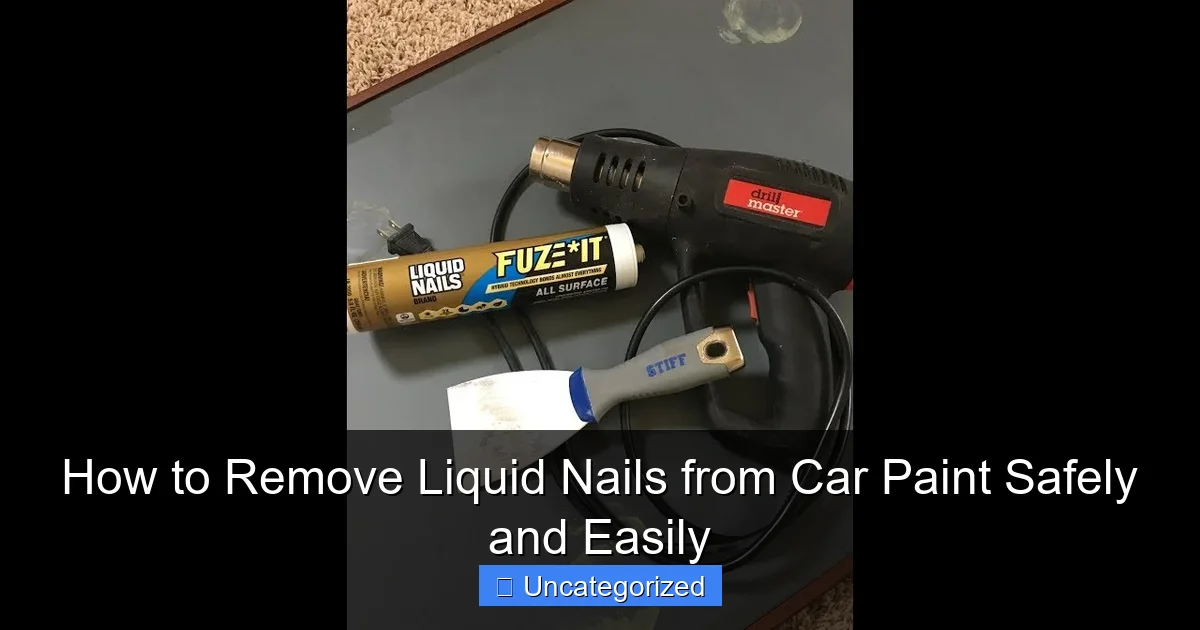
- Heat gun or hairdryer: To soften cured adhesive for easier removal.
- Plastic wrap: To contain solvents and increase dwell time.
- Protective gloves and eye protection: Especially important when using chemical solvents.
Keep a spray bottle with water and a bucket nearby for rinsing. Avoid metal tools (like steel razor blades) at all costs—they can scratch or gouge paint. Also, never use acetone, brake cleaner, or gasoline, as these can strip paint and damage plastic trim.
Step-by-Step Removal Methods Based on Adhesive Age
Removing Fresh (Wet) Liquid Nails
If you catch the spill within minutes, you’re in the best possible position. Fresh Liquid Nails is still pliable and hasn’t bonded deeply. Here’s what to do:
- Blot, don’t rub: Use a dry microfiber towel to gently blot the area. Avoid spreading the adhesive by wiping in circular motions.
- Apply isopropyl alcohol: Dampen a corner of the towel with 70% isopropyl alcohol and lightly dab the adhesive. Alcohol breaks down the solvent base of Liquid Nails without harming paint.
- Wait 2–3 minutes: Let the alcohol penetrate. You’ll notice the adhesive becoming tacky and less rigid.
- Wipe with a fresh towel: Use a clean section of the microfiber towel to wipe away the softened adhesive. Repeat if necessary.
- Rinse with water: Once removed, rinse the area with water to neutralize any residual alcohol.
Pro tip: For tight spaces (e.g., near emblems or trim), use a cotton swab dipped in alcohol. This allows precision without oversaturation.
Handling Semi-Cured (Tacky) Adhesive
If the Liquid Nails has been sitting for 30 minutes to a few hours, it will be semi-cured—sticky but not rock-hard. This stage is ideal for using heat to soften the bond:
- Apply heat: Use a hairdryer on low heat (never high, which can damage paint) and hold it 6–8 inches from the adhesive for 1–2 minutes. The goal is to make the adhesive pliable, not melt it.
- Use a plastic scraper: Gently lift the edge of the adhesive with a plastic razor blade. Work slowly—don’t force it. If resistance is high, apply more heat.
- Switch to alcohol: Once the bulk is removed, dab the residue with isopropyl alcohol on a microfiber towel to dissolve the remaining tackiness.
- Buff with a dry towel: Finish by buffing the area to restore shine.
Example: A user on a car forum shared that after a DIY license plate frame installation, Liquid Nails dripped onto their hood. By using a hairdryer and a credit card, they removed 90% of the adhesive in 10 minutes, then finished with Goo Gone for the residue—no paint damage.
Removing Fully Cured (Hard) Adhesive
For adhesive that’s cured for 24+ hours, you’ll need a multi-step approach combining heat, solvents, and patience:
- Apply heat: Use a heat gun (low setting) or hairdryer to warm the adhesive for 2–3 minutes. Move the tool constantly to avoid hot spots.
- Cover with plastic wrap: Lay plastic wrap over the adhesive. This traps heat and prevents solvents from evaporating too quickly.
- Apply mineral spirits: Dampen a microfiber towel with mineral spirits and lay it over the adhesive (on top of the plastic). Let it sit for 10–15 minutes.
- Scrape gently: Remove the plastic and towel. The adhesive should be softer. Use a plastic scraper to lift it off in layers. Repeat the process if needed.
- Neutralize residue: Clean the area with isopropyl alcohol, then rinse with water.
Warning: Never leave mineral spirits on paint for more than 15 minutes—prolonged exposure can dull the clear coat. Always follow with rinsing.
Advanced Techniques for Stubborn or Large Spills
Using Automotive Adhesive Removers (e.g., Goo Gone Pro, 3M Adhesive Remover)
For large spills or adhesive that resists DIY methods, specialized automotive adhesive removers are your best bet. These products are formulated to break down industrial adhesives while being safe for paint and plastic trim. Here’s how to use them:
- Choose the right product: Look for “automotive-safe” on the label. Avoid citrus-based removers (e.g., standard Goo Gone) on large areas—they can dry out paint over time.
- Apply with a brush: Use a soft-bristled brush to apply the remover in a thick layer over the adhesive.
- Cover with plastic wrap: This increases dwell time and prevents evaporation.
- Wait 10–20 minutes: Check the adhesive periodically. It should lift easily with a plastic scraper when ready.
- Rinse thoroughly: Wash the area with soapy water to remove all chemical residue.
Real-world example: A mechanic shared that a customer spilled a full tube of Liquid Nails on their fender while installing a spoiler. Using 3M Adhesive Remover and plastic wrap, the team removed the entire spill in 30 minutes without a single scratch.
Mechanical Removal for Extreme Cases
In rare cases where adhesive has bonded for weeks or months, mechanical removal may be necessary. This is a last resort and should only be done by someone experienced with paint care:
- Wet sanding (800–1000 grit): Only for cured adhesive that’s thicker than the paint layer. Use water and a sanding block, moving in straight lines (not circles) to avoid swirls. Stop immediately if you see metal.
- Clay bar treatment: After chemical removal, use a clay bar to lift any remaining microscopic residue. Lubricate with detailing spray to prevent scratching.
- Buffing and polishing: Restore shine with a dual-action polisher and a light cutting compound. Finish with wax or sealant to protect the paint.
Caution: Mechanical methods risk paint damage. If you’re unsure, consult a professional detailer.
Restoring and Protecting Your Car’s Paint
Cleaning and Decontaminating the Area
After removing the adhesive, the area may appear dull or hazy due to residue or micro-abrasions from scraping. To restore clarity:
- Wash with car shampoo: Use a pH-balanced shampoo and a microfiber mitt to clean the entire panel. This removes any lingering solvents or debris.
- Clay bar treatment: Glide a lubricated clay bar over the surface to pick up embedded contaminants. Fold the clay frequently to expose a clean side.
- Inspect under bright light: Check for scratches, hazing, or discoloration. If the paint looks cloudy, proceed to polishing.
Polishing and Waxing for a Flawless Finish
Even minor removal efforts can leave the paint looking less vibrant than the surrounding areas. Here’s how to blend the repaired zone:
- Polish the area: Use a mild polish (e.g., Meguiar’s Ultimate Polish) with a foam pad on a dual-action polisher. Work in small sections with moderate pressure. This removes light oxidation and restores gloss.
- Apply a paint sealant or wax: Seal the area with a synthetic sealant (e.g., Chemical Guys JetSeal) or carnauba wax. This protects the paint and ensures uniform sheen.
- Blend the edges: Extend the polish and wax slightly beyond the repaired zone to avoid a noticeable “patch” effect.
Pro tip: Avoid using abrasive polishes (e.g., compound) unless you’re experienced. Over-polishing can thin the clear coat.
Preventing Future Accidents and Quick Response Tips
Best Practices for Working Near Car Paint
Prevention is far easier than removal. Follow these guidelines to avoid future Liquid Nails mishaps:
- Mask off areas: Use painter’s tape to protect paint when applying adhesives near the car.
- Use a drip tray: Place a cardboard sheet or plastic tray under your work area to catch drips.
- Work in a clean environment: Avoid windy or dusty conditions that can blow adhesive onto the car.
- Choose the right adhesive: For car projects, use automotive-specific adhesives (e.g., 3M Super Weatherstrip Adhesive) that are easier to remove.
Emergency Kit for Adhesive Spills
Keep a small emergency kit in your garage or car trunk for quick response:
| Item | Use Case | Why It’s Important |
|---|---|---|
| Microfiber towels (2–3) | Blotting spills, wiping residue | Prevents scratches during cleanup |
| Isopropyl alcohol (travel-sized) | Dissolving fresh adhesive | Fast-acting, paint-safe solvent |
| Plastic scraper | Removing cured adhesive | Gentle on paint, effective on edges |
| Hairdryer | Softening semi-cured adhesive | Reduces need for aggressive scraping |
| Automotive adhesive remover (travel-sized) | Stubborn residue | Professional-grade solution for tough jobs |
With this kit, you can address spills immediately—even on the go—minimizing damage and saving time.
Conclusion: Patience and Precision Win the Day
Removing Liquid Nails from car paint is a delicate process that demands patience, the right tools, and a methodical approach. Whether you’re dealing with a fresh spill or a stubborn, cured mess, the key is to work slowly and prioritize paint safety over speed. Start with the gentlest method (isopropyl alcohol for fresh adhesive), escalate to heat and solvents for tougher cases, and always finish with proper paint care to restore shine. Never rush—rushing leads to scratches, chemical burns, or irreversible damage.
Remember, your car’s paint is an investment. A few hours of careful removal is far cheaper than a professional paint job. By following the steps outlined here—assessing the damage, using the right tools, and restoring the finish—you can tackle even the most daunting Liquid Nails spill with confidence. Keep your emergency kit handy, practice preventive measures, and your car will stay looking showroom-ready for years to come. When in doubt, consult a professional detailer, but rest assured: with this guide, you’re equipped to handle most situations safely and easily.
Frequently Asked Questions
How can I remove Liquid Nails from car paint without damaging the finish?
To remove Liquid Nails from car paint safely, use a plastic scraper to gently lift the adhesive, followed by a specialized adhesive remover or isopropyl alcohol. Always test the solution on a small, hidden area first to avoid paint damage.
What household products help remove Liquid Nails from car paint?
Common household items like warm soapy water, vinegar, or cooking oil can soften the adhesive for easier removal. Apply the solution, let it sit for 10–15 minutes, then wipe away with a microfiber cloth.
Is it safe to use a razor blade to remove Liquid Nails from car paint?
Using a razor blade is not recommended, as it can scratch the paint. Instead, opt for a plastic razor or credit card to gently scrape off the adhesive while keeping the surface intact.
How long should I let a remover sit on Liquid Nails before cleaning?
Let the adhesive remover or solvent sit for 5–10 minutes to soften the glue, but avoid letting it dry on the paint. Wipe it off promptly with a soft cloth to prevent residue buildup.
Can WD-40 help remove Liquid Nails from car paint?
Yes, WD-40 can break down Liquid Nails adhesive. Spray it on, wait a few minutes, then wipe with a clean cloth. Follow up with car soap and water to remove any oily residue.
How do I prevent damage when removing Liquid Nails from car paint?
Always use non-abrasive tools and pH-balanced cleaners to avoid stripping wax or paint. Work in a shaded area and avoid excessive pressure to minimize the risk of scratches.