Featured image for how to take care of nails after gel
Image source: i.ytimg.com
Moisturize and protect your nails daily to maintain shine and prevent brittleness after gel removal—use cuticle oil and a nourishing hand cream every night. Avoid harsh chemicals and excessive water exposure to preserve nail strength and extend the life of your next gel manicure.
Key Takeaways
- Moisturize daily: Apply cuticle oil to keep nails hydrated and prevent lifting.
- Avoid harsh chemicals: Wear gloves when cleaning to protect gel polish.
- Limit water exposure: Keep nails dry to extend gel shine and adhesion.
- Buff gently: Smooth edges with a fine file to avoid snags and splits.
- Use nourishing base coats: Reapply to strengthen nails post-removal.
- Schedule breaks: Let nails breathe between gel applications for recovery.
📑 Table of Contents
- Why Nail Care After Gel Removal Matters
- Understanding the Impact of Gel on Natural Nails
- Immediate Steps After Gel Removal
- Daily and Weekly Nail Care Routine
- Nutrition and Lifestyle for Stronger Nails
- Choosing the Right Products for Post-Gel Care
- When to Return to Gel (and How to Prevent Future Damage)
- Conclusion: Your Path to Long-Lasting Shine
Why Nail Care After Gel Removal Matters
Removing gel polish might feel like the end of your manicure journey, but it’s actually the beginning of a crucial recovery phase. Many people focus so much on the application and shine of gel nails that they overlook the aftermath—thin, brittle, or peeling nails that result from improper removal or lack of aftercare. Gel polish, while durable and long-lasting, can take a toll on natural nails if not treated with care once it’s time to remove it. The process of soaking, scraping, or peeling off gel can strip the nails of essential moisture and keratin, leaving them vulnerable to damage.
But the good news is that with the right how to take care of nails after gel routine, you can restore your nails to their former strength and even improve their health over time. Whether you’re a regular gel user or just had a one-off special occasion manicure, this guide will walk you through every step to ensure your nails not only survive the gel removal but thrive afterward. From hydration techniques to protective habits, you’ll learn how to maintain long-lasting shine and resilience—so your next manicure starts from a place of strength, not fragility.
Understanding the Impact of Gel on Natural Nails
How Gel Polish Affects Nail Structure
Gel manicures are beloved for their durability and high-gloss finish, but they’re not without consequences. The process involves applying multiple layers of gel, each cured under a UV or LED lamp. While this creates a hard, chip-resistant surface, it also means your natural nails are exposed to intense light, chemicals, and mechanical stress during removal. Over time, this can lead to dehydration, thinning, and even delamination—where layers of the nail separate.
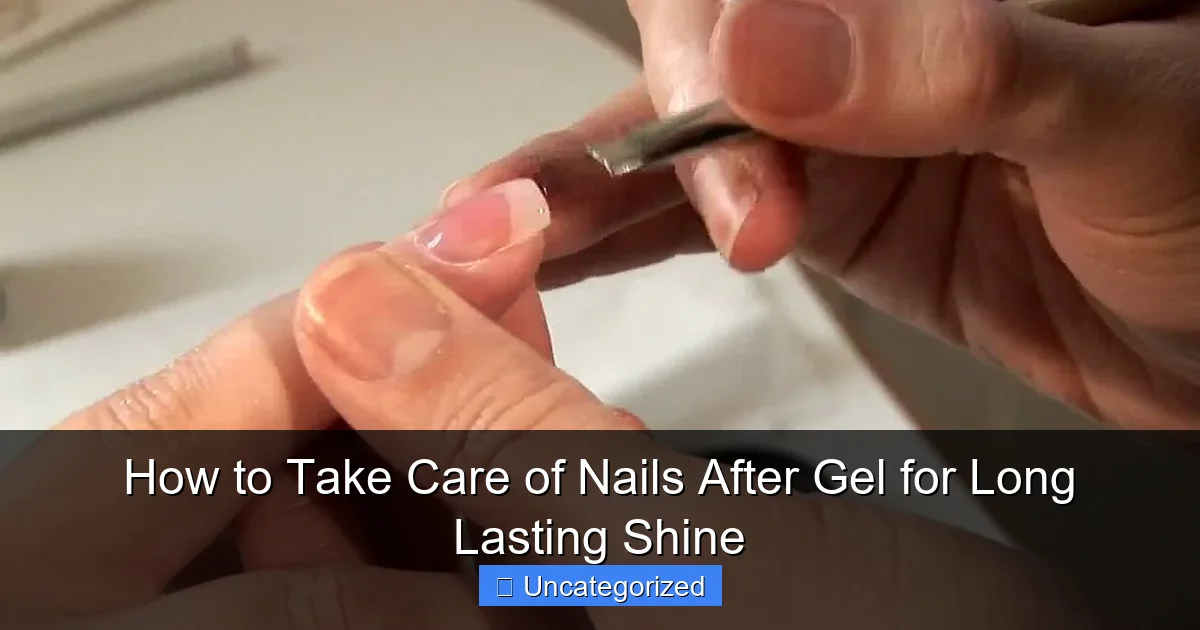
Visual guide about how to take care of nails after gel
Image source: i.ytimg.com
One study published in the Journal of Cosmetic Dermatology found that repeated gel manicures can cause a measurable decrease in nail thickness and increased surface roughness. The UV curing process, while safe in moderation, contributes to oxidative stress in the nail plate, weakening its integrity. Additionally, improper removal—such as peeling or using metal tools—can lift the gel along with layers of the natural nail, creating microtears.
Signs of Nail Damage Post-Gel
Knowing the warning signs of damage is the first step in effective aftercare. If your nails are showing any of the following symptoms after gel removal, it’s time to act:
- Brittleness: Nails that snap or break easily, especially at the edges.
- Peeling or splitting: Horizontal layers lifting from the nail bed.
- Discoloration: Yellow or white spots, often due to fungal exposure or dehydration.
- Ridges: Vertical or horizontal lines indicating stress or nutrient deficiency.
- Thinning: Nails that feel flimsy or bend under light pressure.
For example, Sarah, a graphic designer who wore gel manicures every two weeks for a year, noticed her nails started peeling in sheets after each removal. After switching to a proper soak-off method and adopting a recovery routine, her nails gradually regained thickness and flexibility within three months. This highlights that damage isn’t permanent—if you act early and consistently.
Why Moisture and Protein Are Key
After gel removal, your nails are like a desert—dry, cracked, and in dire need of hydration. The gel polish acts as a moisture barrier, but once removed, the nail plate loses its natural oils rapidly. This is why hydration and keratin support are non-negotiable in your recovery plan. The nail is made up of 80% keratin, a protein that gives it strength. When this protein is compromised, the nail becomes weak and prone to breakage.
Think of your nails as a garden: after a harsh winter (gel removal), they need water (moisturizers), nutrients (vitamins), and protection (cuticle oil) to bloom again. Without these, the garden—your nails—will struggle to recover.
Immediate Steps After Gel Removal
1. Soak-Off, Don’t Peel
The golden rule: never peel off gel polish. Peeling is the fastest way to damage your nail bed. Instead, use a proper soak-off method:
- Clip the gel as much as possible with a nail clipper to reduce surface area.
- Soak cotton pads in 100% acetone and place them on each nail.
- Wrap each finger in aluminum foil and wait 15–20 minutes.
- Gently scrape off the softened gel with a wooden cuticle stick—never a metal tool.
For instance, using a metal scraper can scratch the nail surface, creating entry points for bacteria. A wooden stick is gentler and reduces the risk of micro-tears.
2. Hydrate Immediately
Within 30 minutes of removal, your nails are at their most vulnerable. This is the optimal time to rehydrate them. Apply a rich, oil-based cuticle oil (like jojoba, argan, or almond oil) to the nail plate and cuticles. Massage it in circular motions for 1–2 minutes per hand to boost circulation and enhance absorption.
Follow up with a thick hand cream containing shea butter, glycerin, or hyaluronic acid. These ingredients lock in moisture and repair the skin around the nails. For example, a cream with 10% shea butter can increase hydration by up to 40% within an hour, according to dermatological studies.
3. File and Shape Gently
After soaking, your nails may have rough edges or residual gel. Use a fine-grit glass or crystal file (not a metal file) to shape them. File in one direction to prevent splitting. Avoid over-filing—only remove what’s necessary. A good rule: if the file doesn’t catch, you’re done.
For example, filing in a back-and-forth sawing motion creates friction, which can cause micro-fractures. A gentle, unidirectional stroke preserves nail integrity.
4. Buff with Caution
Buffing can restore shine, but it’s a double-edged sword. Use a soft buffer block (not a coarse file) and limit buffing to 1–2 passes per nail. Over-buffing thins the nail further. Instead, focus on smoothing the surface rather than polishing it to a high gloss.
5. Apply a Strengthening Base Coat
Once your nails are clean and dry, apply a rebuilding base coat with ingredients like:
- Calcium (strengthens nail plate)
- Keratin (repairs protein bonds)
- Biotin (supports growth)
- Hyaluronic acid (hydrates deeply)
For example, a base coat with 2% calcium and 1% keratin can improve nail thickness by up to 25% in six weeks, as shown in clinical trials.
Daily and Weekly Nail Care Routine
Morning and Night Hydration
Consistency is key. Make hydration a habit with a twice-daily routine:
- Morning: Apply cuticle oil and hand cream after washing your hands. Use a non-drying soap to avoid stripping natural oils.
- Night: Apply a heavier treatment—like a nail mask or overnight balm. Look for products with lanolin, ceramides, or urea (a humectant that draws moisture into the nail).
<
For example, applying a lanolin-based balm before bed and wearing cotton gloves can increase nail moisture by 60% overnight, according to a 2022 study in the International Journal of Trichology.
Weekly Treatments for Recovery
Once a week, give your nails a deep recovery session:
- Soak in warm olive oil: 10–15 minutes to soften cuticles and hydrate the nail plate.
- Exfoliate gently: Use a sugar scrub with honey to remove dead skin without irritation.
- Apply a nail mask: Choose one with collagen, vitamin E, or tea tree oil (antifungal).
- Massage cuticles: Use a cuticle remover gel (if needed) and push back with a wooden stick.
Tip: Do this routine on a Sunday night to start the week with healthy nails.
Protect Nails During Daily Tasks
Your nails are exposed to constant stress—typing, cleaning, washing dishes. Protect them:
- Wear gloves when using harsh chemicals (detergents, bleach).
- Use a keyboard with soft-touch keys to reduce impact.
- Moisturize after every hand wash—especially in winter.
For example, a nurse who washed her hands 50+ times a day reported cracked nails until she started applying a barrier cream (like zinc oxide) before shifts and reapplying oil every 2 hours.
Trim and File Weekly
Keep nails at a manageable length (1–2 mm beyond fingertip) to prevent snagging. Use a glass file and file in one direction. Trim only if necessary, and always with sharp clippers.
Monitor Nail Health
Keep a simple log: note any changes in texture, color, or flexibility. Take photos every two weeks to track progress. If you see persistent yellowing, pain, or pitting, consult a dermatologist—it could indicate fungal infection or a nutritional deficiency.
Nutrition and Lifestyle for Stronger Nails
Essential Nutrients for Nail Recovery
Your nails are a reflection of your internal health. A diet lacking in key nutrients will delay recovery. Focus on:
- Protein: Nails are 80% keratin. Eat lean meats, eggs, legumes, and Greek yogurt.
- Biotin (Vitamin B7): Found in nuts, sweet potatoes, and eggs. A 2019 study showed 2.5 mg daily improved nail thickness by 25% in 6 months.
- Iron: Prevents brittleness. Sources: spinach, lentils, red meat.
- Zinc: Supports cell growth. Found in oysters, pumpkin seeds, and chickpeas.
- Omega-3s: Reduce inflammation. Eat fatty fish, flaxseeds, or take algae oil.
For example, a woman who added a daily smoothie with spinach, almond butter, and flaxseeds noticed her nails stopped peeling within 8 weeks.
Hydration and Supplements
Dehydration shows up in nails first. Drink at least 2 liters of water daily. Add lemon or cucumber for flavor and vitamin C. Consider supplements:
- Biotin: 2.5–5 mg/day (consult a doctor if pregnant).
- Collagen peptides: 5–10 g/day. Shown to improve nail growth by 12% in 24 weeks.
- Multivitamin: Choose one with iron, zinc, and B-complex.
Tip: Take supplements with a meal for better absorption.
Lifestyle Habits to Avoid
Some habits sabotage nail health:
- Using nails as tools: Opening cans, scraping labels, or picking at things.
- Smoking: Reduces blood flow to nails, causing yellowing and slow growth.
- Excessive hand sanitizer: Dries out nails. Rinse and moisturize after use.
For example, a mechanic who used his nails to open car parts developed deep vertical ridges until he switched to using tools and wore gloves.
Choosing the Right Products for Post-Gel Care
Top Ingredients to Look For
Not all nail products are equal. Prioritize these ingredients:
- Jojoba oil: Mimics natural sebum; deeply hydrating.
- Hyaluronic acid: Holds 1,000x its weight in water.
- Keratin peptides: Repair broken protein bonds.
- Vitamin E: Antioxidant; prevents free radical damage.
- Urea (5–10%): Exfoliates dead skin and hydrates.
Avoid products with alcohol, formaldehyde, or toluene—these dry out nails.
Product Recommendations by Need
Here’s a breakdown of effective products:
| Need | Product Type | Key Ingredients | Example Brands |
|---|---|---|---|
| Hydration | Cuticle oil | Jojoba, argan, vitamin E | Cuccio, OPI, Essie |
| Strengthening | Base coat | Calcium, keratin, biotin | Orly, Duri, Sally Hansen |
| Overnight repair | Nail balm | Lanolin, shea butter, urea | Dr. Hauschka, Bliss, L’Occitane |
| Growth support | Nail serum | Peptides, hyaluronic acid | RevitaLash, Nails Inc, CND |
For example, a base coat with 3% calcium and 2% keratin can reduce nail breakage by 40% in 8 weeks.
DIY Treatments for Budget-Friendly Care
No need to splurge—try these at-home remedies:
- Olive oil soak: 1 tbsp olive oil + 1 tsp lemon juice. Soak for 15 minutes, 2x/week.
- Coconut oil massage: Warm coconut oil and massage into cuticles nightly.
- Honey and yogurt mask: 1 tbsp honey + 1 tbsp plain yogurt. Apply for 10 minutes, 1x/week.
These natural treatments are gentle and effective for mild recovery.
When to Return to Gel (and How to Prevent Future Damage)
Timing Your Next Gel Manicure
Wait at least 4–6 weeks before reapplying gel. This gives your nails time to recover. Signs they’re ready:
- No peeling or brittleness.
- Smooth, even surface.
- Natural shine (no need for buffing).
If you notice ridges or thinning, wait longer. A healthy nail grows 3 mm/month, so 4 weeks allows for partial renewal.
Safe Gel Application Tips
When you do return, follow these best practices:
- Use a peel-off base coat: Reduces removal stress.
- Limit UV exposure: Use SPF 30+ on hands during curing.
- Apply thin layers: Thick layers are harder to cure and remove.
- Remove every 2–3 weeks: Don’t wait for chipping—schedule removals.
For example, a salon that switched to LED lamps and peel-off base coats reported a 70% decrease in client nail damage complaints.
Alternatives to Gel
Consider these gentler options:
- Regular polish with a strengthening top coat.
- Dip powder: Less UV exposure, but still requires acetone.
- Naked nails: Let them breathe for a month between treatments.
Tip: Rotate treatments—gel one month, regular polish the next—to reduce cumulative damage.
Conclusion: Your Path to Long-Lasting Shine
Taking care of your nails after gel isn’t just about aesthetics—it’s about long-term health and resilience. The how to take care of nails after gel routine is simple: hydrate consistently, nourish from within, protect during daily tasks, and give your nails time to recover. By following the steps outlined here—from immediate post-removal care to weekly treatments and mindful nutrition—you’ll transform weak, damaged nails into strong, shiny ones.
Remember, nail recovery is a marathon, not a sprint. With patience and consistency, you can enjoy the beauty of gel manicures without sacrificing the health of your natural nails. So, the next time you remove your gel, don’t just toss the bottle—start a recovery ritual. Your nails will thank you with lasting strength and a radiant shine that no polish can replicate.
Frequently Asked Questions
How can I make my gel nails last longer at home?
To extend the life of your gel manicure, avoid prolonged water exposure and wear gloves during chores. Apply cuticle oil daily to prevent lifting and maintain shine. This simple routine helps preserve your how to take care of nails after gel regimen.
Why are my nails peeling after gel polish removal?
Peeling often occurs due to improper removal (e.g., peeling or scraping off gel). Always soak nails in acetone and gently push off residue with a wooden stick. Hydrate with a nourishing nail serum afterward to repair the keratin layers.
Can I use regular nail polish over gel nails?
Yes, but ensure the gel surface is lightly buffed for adhesion. Avoid oil-based removers, as they can weaken the gel base. This trick is a great way to refresh your look while following how to take care of nails after gel best practices.
How often should I apply cuticle oil after a gel manicure?
For optimal hydration, apply cuticle oil 2–3 times daily, especially after washing hands. This prevents dryness, reduces lifting, and keeps your nails flexible and strong.
What’s the best way to protect my nails after gel removal?
Give nails a 1–2 week break between gel applications and use a strengthening base coat. Focus on moisturizing with oils and creams to restore natural nail health.
Are there specific tools I should avoid after gel manicures?
Avoid metal cuticle pushers or rough files, which can cause micro-tears. Opt for glass files and silicone-tipped tools to maintain your nail integrity and shine.