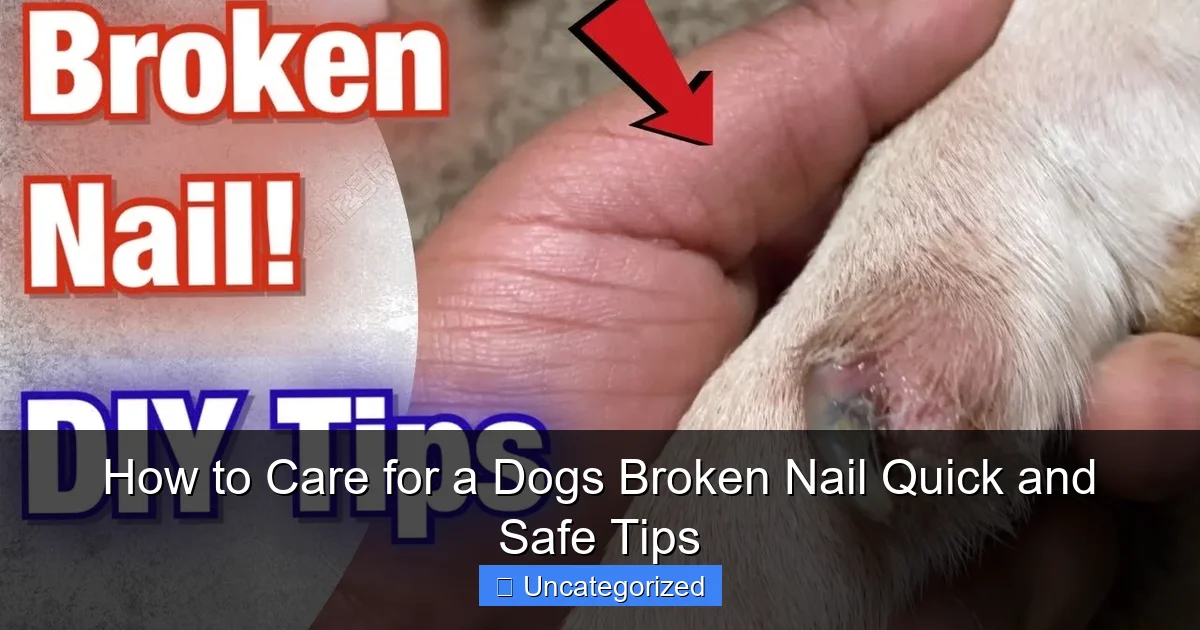
Featured image for how to care for a dog’s broken nail
Image source: i.ytimg.com
Act quickly and calmly to stop bleeding and prevent infection by applying styptic powder or cornstarch to your dog’s broken nail, then gently wrapping the paw with a clean cloth. Seek immediate veterinary care if the break is severe, painful, or involves the quick, as proper trimming, pain relief, and antibiotics may be needed to ensure safe healing.
Key Takeaways
- Trim carefully: Use clean clippers to shorten the nail and prevent further tearing.
- Stop bleeding fast: Apply styptic powder or cornstarch immediately to the nail.
- Clean the wound: Gently wash with mild soap and water to avoid infection.
- Protect the nail: Cover with a bandage or bootie to limit licking and dirt.
- Limit activity: Restrict running or jumping until the nail fully heals.
- Monitor closely: Watch for swelling, pus, or pain as signs of infection.
📑 Table of Contents
How to Care for a Dog’s Broken Nail: Quick and Safe Tips
Few things are as distressing as seeing your beloved dog limping, whining, or licking their paws in discomfort. One common cause of such pain is a broken nail—a surprisingly frequent issue for dogs of all breeds, sizes, and ages. Whether your dog snagged their nail on carpet, cracked it during a vigorous game of fetch, or simply suffered a split due to brittle nails, knowing how to care for a dog’s broken nail is essential for any responsible pet owner. A broken nail can cause significant pain, lead to infection, and even affect your dog’s mobility if left untreated. The good news? With prompt action and proper care, most broken nails heal quickly and without complications.
Understanding the anatomy of your dog’s nail is the first step toward effective care. Each nail contains a sensitive, blood-rich core called the quick, which extends from the base of the nail toward the tip. When a nail breaks—especially if it’s torn or split near the quick—it can result in bleeding, swelling, and intense pain. The key to managing a broken nail lies in staying calm, acting quickly, and providing the right first aid. This guide will walk you through everything you need to know: from immediate first aid and pain management to long-term healing strategies and preventive measures. Whether you’re dealing with a minor chip or a full-on torn nail, these quick and safe tips will help you keep your dog comfortable and on the road to recovery.
Recognizing the Signs of a Broken Nail
Before you can treat a broken nail, you need to identify it correctly. Dogs are experts at hiding pain, but there are several telltale signs that a nail may be injured. Early detection is crucial to prevent complications such as infection or further tearing.
Visual guide about how to care for a dog’s broken nail
Image source: i.ytimg.com
Common Symptoms to Watch For
- Limping or favoring a paw: If your dog suddenly starts hopping on three legs or refuses to put weight on one paw, a broken nail is a likely culprit. For example, a Labrador retriever playing fetch in the backyard might limp home with a dangling nail caught in the grass.
- Licking or chewing at the paw: Dogs instinctively try to soothe pain by licking. If your pup won’t stop licking one paw, especially after a walk or play session, inspect the nails closely.
- Bleeding from the paw: A visible trail of blood on the floor, carpet, or grass is a clear sign of a nail injury. The blood may appear bright red if the quick is exposed.
- Swelling or redness around the nail bed: Inflammation can develop within hours of the injury and may be accompanied by warmth to the touch.
- Visible nail damage: Look for cracks, splits, or a nail that is partially or fully detached. A broken nail might hang loosely, making it prone to catching on furniture or flooring.
Differentiating Between a Broken Nail and Other Paw Injuries
Not all paw discomfort stems from a broken nail. Other conditions—such as foreign objects (thorns, glass), torn pads, or even arthritis—can mimic the symptoms. To differentiate:
- Use a flashlight to examine the paw in a well-lit area. Gently spread the toes to get a clear view of each nail.
- If the dog flinches or pulls away when you touch a specific nail, that’s a strong indicator of a break.
- Check for debris in the paw crevices. A thorn or splinter will require a different treatment approach.
Tip: Keep a magnifying glass and pet-safe disinfectant in your dog’s first aid kit for easier inspection and cleaning.
Immediate First Aid: What to Do When You Spot a Broken Nail
Time is of the essence when treating a broken nail. The faster you act, the lower the risk of infection and the more comfortable your dog will be. Here’s a step-by-step guide to providing immediate care.
Step 1: Calm and Restrain Your Dog
Start by speaking in a calm, soothing voice. If your dog is anxious or in pain, they may resist handling. Use treats or a favorite toy to distract them. For larger or more excitable dogs, consider enlisting help from another person to gently hold them in place. If your dog is extremely agitated or aggressive when hurt, muzzle them (using a proper dog muzzle) to prevent accidental bites.
Step 2: Stop the Bleeding
If the nail is bleeding, apply pressure with a clean gauze pad or cotton ball for 3–5 minutes. Do not lift the pad to check—this disrupts clot formation. If blood soaks through, add another layer on top. For stubborn bleeding:
- Use styptic powder or a styptic pencil—available at pet stores. Apply directly to the nail tip. The powder contains clotting agents like potassium alum and works quickly.
- If styptic powder isn’t available, cornstarch or a mix of baking soda and water can help clot the blood. Press a small amount onto the nail and hold for 3–5 minutes.
- Commercial pet-safe hemostats (like Kwik Stop) are also effective and often include a mild anesthetic to reduce pain.
Example: A 10-pound Chihuahua with a torn nail might stop bleeding within 2 minutes using styptic powder, while a larger dog like a German Shepherd may take longer due to higher blood flow in the quick.
Step 3: Clean the Area
Once bleeding has stopped, gently clean the area with warm water and a mild antiseptic solution. Use a pet-safe disinfectant like chlorhexidine (0.05%) or diluted povidone-iodine (Betadine). Avoid hydrogen peroxide or alcohol, which can damage tissue and delay healing. Use a soft cloth or gauze to wipe around the nail and between the toes.
Step 4: Trim or Remove the Damaged Nail (If Necessary)
Only trim a broken nail if part of it is loose or dangling—never cut into a stable, attached nail. Use sharp, clean nail clippers or scissors:
- Grasp the loose portion firmly and cut straight across at the point where it’s broken.
- If the nail is partially attached but wobbly, it may need to be removed by a vet to prevent further injury.
- Do not attempt to pull off a partially attached nail—this can tear the quick and cause more bleeding.
Tip: If you’re unsure, skip trimming and cover the paw instead. It’s safer to seek professional help than risk making the injury worse.
Home Care and Pain Management During Recovery
After initial treatment, your focus shifts to pain relief, preventing infection, and promoting healing. Most broken nails heal within 7–14 days, but proper care is essential to avoid complications.
Managing Pain and Discomfort
Dogs feel pain just like humans, and a broken nail can be excruciating—especially if the quick is involved. To help your dog feel better:
- Use vet-approved pain relief: Never give human painkillers like ibuprofen, acetaminophen, or aspirin to dogs—they are toxic. Instead, ask your vet for a safe prescription, such as carprofen (Rimadyl) or gabapentin.
- Apply a cold compress: Wrap an ice pack in a towel and hold it against the paw for 10–15 minutes to reduce swelling. Do this 2–3 times daily for the first 24–48 hours.
- Limit activity: Keep your dog on leash walks and restrict running, jumping, or rough play. A crate or small room can help enforce rest.
Example: A senior dog with arthritis and a broken nail will need extra support—use a ramp for stairs and a soft orthopedic bed to reduce pressure on the injured paw.
Preventing Infection: The Role of Bandages and Paw Protection
Infection is a major risk with broken nails, especially if the nail bed is exposed. To protect the wound:
- Apply a thin layer of pet-safe antibiotic ointment (like Neosporin without pain relief) to the nail bed.
- Wrap the paw with a sterile gauze pad, securing it with medical tape or a self-adhering wrap (like VetWrap). Avoid wrapping too tightly—check for swelling or discoloration of the toes.
- Cover the bandage with a dog bootie or sock to keep it clean and dry. Change the bandage daily or whenever it gets wet or dirty.
- Use a cone (Elizabethan collar) or soft recovery collar to prevent licking. A dog that constantly licks the paw can reopen the wound and introduce bacteria.
Tip: For dogs that hate cones, try a T-shirt with the sleeves tied around the chest to cover the front paws.
Monitoring for Complications
Watch for signs that the injury isn’t healing properly:
- Increased redness, swelling, or pus (yellow/green discharge)
- Persistent bleeding after 24 hours
- Foul odor from the paw
- Refusal to bear weight on the leg
- Fever (normal dog temp: 101–102.5°F; above 103°F is concerning)
If any of these occur, contact your vet immediately.
When to See a Veterinarian
While many broken nails can be managed at home, some require professional intervention. Knowing when to seek help can prevent long-term damage.
Signs You Need Veterinary Care
- Heavy or persistent bleeding: If the nail continues to bleed after 10–15 minutes of pressure and styptic use, the injury may be too deep for home care.
- Exposed bone or tendon: If you can see bone, tissue, or the nail has torn all the way to the quick, your dog needs immediate medical attention.
- Signs of infection: As mentioned earlier, pus, fever, or worsening swelling require antibiotics and possibly wound debridement.
- Multiple broken nails or recurring injuries: This could indicate underlying issues like poor nutrition, fungal infections, or autoimmune diseases.
- Your dog is in severe pain: If your dog is whining, panting, or refusing to move, pain management from a vet is essential.
What to Expect at the Vet
Your veterinarian will:
- Examine the paw under sedation if needed (to reduce stress and pain).
- Trim or remove the damaged nail safely, using tools designed for precision.
- Clean the wound thoroughly and apply a medicated dressing.
- Prescribe antibiotics (oral or topical) and pain medication.
- Recommend follow-up visits to monitor healing.
- In rare cases, perform a minor surgical procedure to stabilize the nail bed or remove a deeply embedded fragment.
Example: A 5-year-old Border Collie with a torn nail that exposed the quick was treated with a vet-applied bandage, oral antibiotics (Clavamox), and a 10-day course of carprofen. The nail healed completely in 12 days with no complications.
Preventing Future Broken Nails: Long-Term Strategies
Once your dog’s nail has healed, focus on prevention to avoid repeat injuries. Many broken nails are preventable with proper care and attention to your dog’s environment.
Regular Nail Trimming and Maintenance
Overgrown nails are more prone to splitting and breaking. Trim your dog’s nails every 3–4 weeks (or as needed):
- Use sharp, dog-specific nail clippers or a grinder (Dremel).
- Trim just beyond the curve of the nail, avoiding the quick. In dark nails, look for a small black dot—the beginning of the quick.
- If you’re unsure, trim small amounts frequently rather than risking a deep cut.
- Reward your dog with treats and praise to create a positive association.
Tip: For dogs with thick or brittle nails, soak their paws in warm water for 5 minutes before trimming to soften the nails.
Nutrition and Nail Health
Brittle nails can break easily. Support nail strength with a balanced diet rich in:
- Protein: Essential for keratin production (the main component of nails).
- Omega-3 fatty acids: Found in fish oil, they improve skin and nail health. A study by the Journal of the American Veterinary Medical Association found that dogs supplemented with omega-3s had 25% fewer nail-related injuries over 6 months.
- Zinc and biotin: These nutrients promote strong, flexible nails. Look for dog foods labeled “skin and coat support” or add vet-approved supplements.
Environmental Adjustments
Reduce the risk of snags and tears:
- Keep floors and carpets free of debris, loose threads, and rough surfaces.
- Trim long grass or thorny plants in your yard.
- Use paw wax or balm on dry, cracked pads to improve grip and reduce nail stress.
- Consider dog boots for outdoor adventures on rough terrain.
Table: Common Causes of Broken Nails and Prevention Tips
| Cause | Prevention Strategy | Recommended Product |
|---|---|---|
| Overgrown nails | Trim every 3–4 weeks | Pet nail grinder or clippers |
| Brittle nails | Omega-3 supplements, moisturizing paw balm | Fish oil capsules, Musher’s Secret |
| Rough surfaces | Use dog boots on trails | Ruffwear Grip Trex |
| Indoor snags | Remove loose carpet threads, secure rugs | Non-slip rug pads |
| Excessive licking | Use recovery collars, address anxiety | Soft cone, calming treats |
Conclusion
Caring for a dog’s broken nail doesn’t have to be a stressful ordeal. With the right knowledge and tools, you can provide quick, effective first aid and ensure a smooth recovery. From recognizing the signs of injury and stopping bleeding to managing pain and preventing infection, each step plays a vital role in your dog’s comfort and healing. Remember, while many broken nails can be treated at home, never hesitate to seek veterinary help if the injury is severe, bleeding won’t stop, or signs of infection appear.
Beyond treatment, focus on prevention—regular nail trims, a nutrient-rich diet, and a safe environment go a long way in keeping your dog’s paws healthy. By staying proactive and attentive, you can minimize the risk of future injuries and keep your furry friend happy, active, and pain-free. A broken nail is a minor setback, but with your care, it’s one your dog can quickly overcome. After all, a healthy paw means more walks, more playtime, and more of those joyful wags you both love.
Frequently Asked Questions
How do I care for my dog’s broken nail at home?
If your dog has a broken nail, start by gently cleaning the area with warm water and mild soap to prevent infection. Trim any loose, jagged edges with sterilized clippers, and apply styptic powder or cornstarch to stop bleeding if needed.
What are the signs of a broken nail on my dog?
A broken dog nail may show visible cracks, splitting, or bleeding, and your dog might limp, lick, or chew at the affected paw. Swelling or redness around the nail bed could indicate infection or further injury.
Can I use human first aid products for my dog’s broken nail?
No, avoid using human antiseptics like hydrogen peroxide or alcohol, as they can irritate your dog’s skin. Instead, use pet-safe products like styptic powder or saline solution to clean and treat the area.
How can I prevent my dog from re-injuring a broken nail?
Limit your dog’s activity and keep the affected paw clean and dry. Use a protective boot or bandage to shield the nail during healing, and monitor for signs of pain or infection.
When should I take my dog to the vet for a broken nail?
Seek immediate veterinary care if the bleeding doesn’t stop after 10–15 minutes, the nail is severely split, or your dog shows signs of infection like pus or excessive swelling. A vet may need to remove the nail or prescribe antibiotics.
What’s the best way to trim a dog’s nails to avoid future breaks?
Trim your dog’s nails regularly using sharp, pet-specific clippers, cutting just above the quick (the pink area inside the nail). Avoid cutting too close, and file sharp edges to reduce the risk of splitting or snagging.