Featured image for how to care for nails after gel removal
Image source: i.ytimg.com
Moisturize and protect your nails immediately after gel removal to prevent dryness and brittleness, as the acetone used can strip natural oils. Use a nourishing cuticle oil and a strengthening nail treatment daily to promote recovery and maintain nail health during the healing process.
Key Takeaways
- Moisturize daily: Apply cuticle oil and hand cream to restore hydration and prevent brittleness.
- Buff gently: Smooth nail surfaces with a soft buffer to remove ridges without causing damage.
- Limit water exposure: Wear gloves during chores to protect nails from weakening and splitting.
- Use a nail strengthener: Apply a protein-rich treatment to reinforce and protect recovering nails.
- Take a break: Avoid reaplying gel for 1-2 weeks to let nails breathe and recover.
- Stay hydrated: Drink plenty of water to support natural nail growth and health.
📑 Table of Contents
- Introduction: The Hidden Toll of Gel Manicures and the Path to Recovery
- Understanding the Damage: Why Post-Removal Care Matters
- Immediate Post-Removal Care: What to Do in the First 48 Hours
- Long-Term Recovery: Strengthening Nails Over 2–6 Weeks
- Advanced Treatments: When to Seek Professional Help
- Preventing Future Damage: Smart Habits for Gel Manicure Lovers
- Data Table: Recommended Products for Post-Gel Recovery
- Conclusion: Your Nails Deserve a Comeback
Introduction: The Hidden Toll of Gel Manicures and the Path to Recovery
There’s no denying the allure of a gel manicure—its high-gloss finish, chip-resistant durability, and weeks of flawless wear make it a favorite among beauty enthusiasts. However, beneath the shiny surface often lies a less glamorous reality: the toll it takes on natural nails. After repeated gel applications and removals, many people notice their nails becoming brittle, thin, or discolored, sometimes even developing painful ridges or peeling layers. This damage isn’t always visible right away, but over time, the cumulative effects of soaking in acetone, mechanical scraping, and UV exposure during curing can compromise the nail plate’s integrity.
While gel manicures are undeniably convenient, proper aftercare is essential to restore nail health and prevent long-term damage. The removal process, in particular, is a critical window where nails are most vulnerable. Without the right care, the recovery phase can lead to further weakening, making future nail treatments more difficult. This guide will walk you through expert-recommended steps to care for your nails after gel removal, from immediate post-removal treatments to long-term strengthening strategies. Whether you’re a seasoned gel user or just starting to notice signs of wear, these tips will help you rebuild strength, hydration, and resilience—so your nails can bounce back healthier than ever.
Understanding the Damage: Why Post-Removal Care Matters
The Anatomy of a Nail and How Gel Affects It
To truly understand how to care for nails after gel removal, it’s important to recognize what happens beneath the surface. The nail plate—the visible part of your fingernail—is composed of tightly packed keratinized cells. Below it lies the nail bed, which supplies nutrients and moisture, and the cuticle, a protective seal that prevents bacteria and fungi from entering. During a gel manicure, the natural oils and moisture in the nail plate are stripped away through the use of dehydrating primers, prolonged acetone soaking, and UV or LED light exposure. This process disrupts the lipid barrier of the nail, making it more porous and prone to damage.
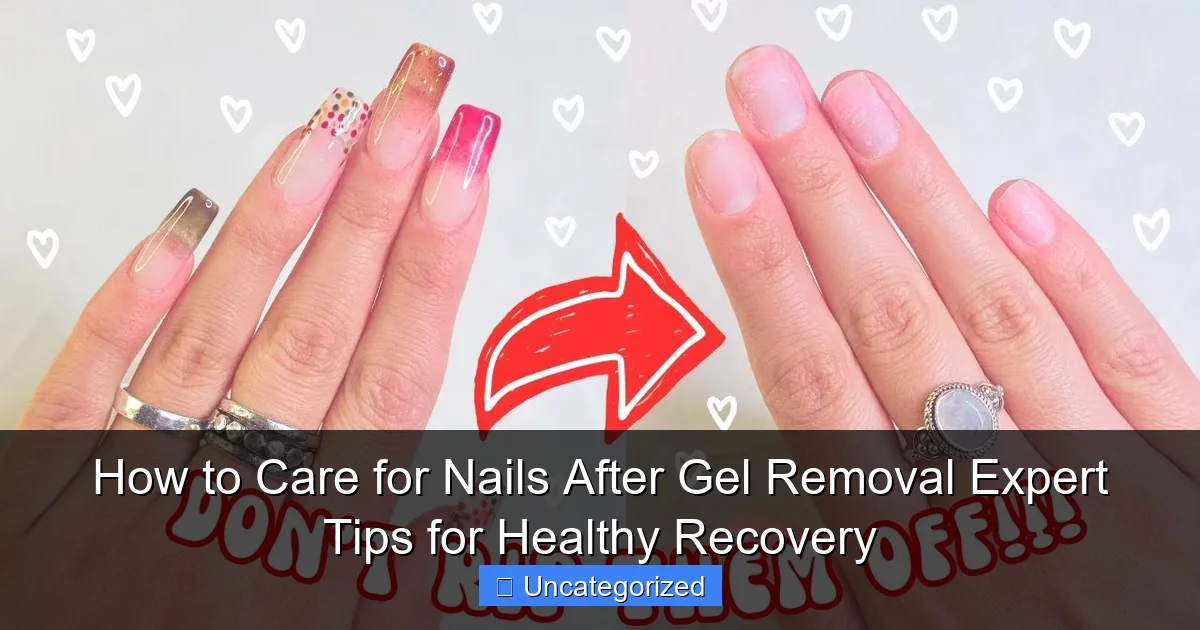
Visual guide about how to care for nails after gel removal
Image source: i.ytimg.com
When gel polish is removed, especially through improper techniques like scraping or peeling, the top layers of the nail plate are often gouged or lifted, leading to thinning and splitting. According to dermatologists, up to 30% of the nail’s natural thickness can be lost after repeated gel applications and removals. This isn’t just a cosmetic issue—thinner nails are more susceptible to breaking, infection, and discomfort during everyday activities.
Common Signs of Nail Damage After Gel Removal
- Peeling or splitting layers: The nail appears to flake or peel from the tip upward, a sign of dehydration and weakened keratin bonds.
- Yellow or white discoloration: Often caused by trapped moisture, fungal overgrowth, or staining from pigments in the gel.
- Ridges and dents: Horizontal ridges (Beau’s lines) may appear due to trauma during removal or nutritional deficiencies.
- Soft, bendy nails: Loss of structural integrity, making nails prone to bending or tearing.
- Red, inflamed cuticles: Irritation from acetone or aggressive scraping can lead to painful hangnails or infection.
Recognizing these signs early is crucial. The first 48 hours after gel removal are the most critical for initiating recovery. During this time, your nails are like sponges—ready to absorb moisture, nutrients, and healing ingredients. Neglecting this phase can prolong recovery and increase the risk of chronic nail issues.
Immediate Post-Removal Care: What to Do in the First 48 Hours
Step 1: Hydrate with a Nourishing Soak
After removing gel polish, your nails are dehydrated and starved for moisture. A warm oil soak is one of the most effective ways to kickstart recovery. Combine 1/4 cup of warm olive oil, 1 tablespoon of jojoba oil, and a few drops of vitamin E oil in a bowl. Soak each hand for 10–15 minutes, twice a day for the first two days. This helps:
- Replenish lost lipids and fatty acids
- Soften cuticles and reduce inflammation
- Improve flexibility and reduce brittleness
For an extra boost, add 1 teaspoon of honey (a natural humectant) or 5 drops of lavender essential oil (anti-inflammatory). Avoid water-based soaks—water alone can further dehydrate the nail plate by causing swelling and contraction.
Step 2: Apply a Healing Cuticle Treatment
The cuticle is your nail’s first line of defense. After gel removal, it’s often dry, cracked, or inflamed. Use a cuticle oil or balm containing:
- Jojoba oil: Mimics the skin’s natural sebum
- Shea butter: Deeply moisturizing and anti-inflammatory
- Vitamin E: Promotes healing and protects against oxidative stress
- Tea tree oil: Antifungal and antimicrobial (use in low concentrations)
Apply the oil with a brush or fingertip, massaging it into the cuticle and surrounding skin. Do this 3–4 times daily for the first week. A popular DIY option: mix 10 drops of tea tree oil, 1 oz of jojoba oil, and 1/2 tsp of shea butter in a rollerball bottle.
Step 3: Protect Nails with a Nail Hardener (Use Wisely)
While it may be tempting to reach for a nail hardener right away, not all hardeners are created equal. Some contain formaldehyde, which can further dehydrate and embrittle nails. Instead, opt for a reconstructive nail treatment with:
- Calcium peptides: Support keratin production
- Biotin (vitamin B7): Strengthens nail matrix
- Hydrolyzed keratin: Fills in gaps in the nail plate
Apply a thin layer of a formaldehyde-free hardener or nail serum every night for 7–10 days. Avoid using it during the day if you’re washing hands frequently, as moisture can reduce its effectiveness.
Bonus Tip: Wear Gloves for Protection
During the first 48 hours, avoid exposing your nails to water, detergents, or chemicals. Wear nitrile or cotton gloves when washing dishes, cleaning, or gardening. This prevents re-dehydration and protects fragile nails from mechanical stress.
Long-Term Recovery: Strengthening Nails Over 2–6 Weeks
Build a Consistent Nail Care Routine
Recovery doesn’t end after the first few days. For optimal results, maintain a daily care regimen for at least 4–6 weeks. Here’s a sample schedule:
- Morning: Apply cuticle oil (2–3 pumps)
- After washing hands: Reapply oil or a lightweight hand cream
- Evening: Soak in warm oil (15 minutes), then apply a keratin-based nail serum or hardener
- Weekly: Use a gentle nail buffer (once per week) to smooth ridges and improve shine
Consistency is key. Just like skincare, nail recovery requires regular attention. Set phone reminders or keep your nail products on your bathroom sink for easy access.
Nutrition: Feed Your Nails from Within
Healthy nails start with a healthy body. A deficiency in key nutrients can manifest as brittle nails, slow growth, or discoloration. Focus on a diet rich in:
- Protein: Keratin is a protein, so aim for 0.8–1.2 grams per pound of body weight daily (e.g., eggs, chicken, tofu)
- Biotin (B7): Found in nuts, seeds, and sweet potatoes; consider a 2.5–5 mg supplement if dietary intake is low
- Iron: Low iron causes spoon-shaped nails (koilonychia); include spinach, lentils, and red meat
- Omega-3 fatty acids: Reduce inflammation and improve nail flexibility (salmon, chia seeds, flaxseed)
- Zinc and magnesium: Support cell turnover and prevent ridges
Hydration is equally important. Drink at least 8–10 glasses of water daily to maintain nail elasticity.
Use Nail-Friendly Products
During recovery, avoid harsh chemicals. Choose:
- Acetone-free nail polish remover: Look for ethyl acetate or soy-based formulas
- Moisturizing hand soap: Avoid sulfates and alcohol; try brands like CeraVe or Eucerin
- Non-acetone base coats: If you resume polish, use a breathable, nourishing base coat (e.g., OPI Nail Envy or CND RescueRXx)
When filing, use a glass or crystal nail file instead of emery boards. Glass files create a smoother edge, reducing the risk of splits.
Advanced Treatments: When to Seek Professional Help
When Home Care Isn’t Enough
While most post-removal damage can be managed at home, some conditions require professional intervention. See a dermatologist or licensed nail technician if you experience:
- Persistent pain or redness: Could indicate infection (paronychia)
- Severe thinning or separation (onycholysis): The nail lifts from the bed, increasing infection risk
- Deep ridges or grooves: May signal underlying health issues (e.g., thyroid problems, iron deficiency)
- Yellow, thickened nails: Possible fungal infection (onychomycosis)
A dermatologist can perform a nail biopsy or prescribe antifungal/antibacterial treatments if needed.
Professional Recovery Treatments
For accelerated healing, consider these in-salon or clinical options:
- Paraffin wax therapy: Deeply hydrates nails and cuticles (ideal for dry, cracked skin)
- Keratin infusion treatments: Inject keratin proteins into the nail plate to rebuild strength
- LED therapy: Low-level light therapy reduces inflammation and promotes cell regeneration
- Custom nail wraps: Provide temporary support for severely damaged nails
These treatments are often covered by medical insurance if prescribed for medical (not cosmetic) reasons.
Preventing Future Damage: Smart Habits for Gel Manicure Lovers
Choose the Right Removal Method
Never peel or scrape gel polish off. Instead, follow these steps for safe removal:
- Buff the top layer of gel with a 180-grit file to break the seal
- Soak cotton pads in 100% acetone, place on each nail, and wrap with aluminum foil
- Wait 10–15 minutes (no longer—acetone can dry nails further)
- Gently push off the gel with an orangewood stick (never scrape)
- Wash hands with mild soap and apply cuticle oil immediately
Space Out Gel Manicures
Limit gel manicures to no more than every 4–6 weeks. Use this time to let nails recover. During “gel-free” periods:
- Apply a strengthening base coat (e.g., NailTek Foundation II)
- Use regular polish or go bare
- Continue oiling and moisturizing
Ask for Nail-Friendly Products at Salons
Not all gels are equal. Choose salons that use:
- Low-irritation primers (acid-free or pH-balanced)
- LED lamps (shorter cure time than UV)
- Breathable gel formulas (e.g., DND, Kiara Sky)
Data Table: Recommended Products for Post-Gel Recovery
| Product Type | Recommended Brands | Key Ingredients | Best For |
|---|---|---|---|
| Cuticle Oil | Essie Apricot Cuticle Oil, CND SolarOil | Jojoba oil, vitamin E, almond oil | Daily hydration, cuticle repair |
| Nail Serum | OPI Nail Envy, CND RescueRXx | Biotin, calcium, hydrolyzed keratin | Strengthening, ridge smoothing |
| Hand Cream | CeraVe Moisturizing Cream, Eucerin Advanced Repair | Ceramides, hyaluronic acid, glycerin | Deep hydration, barrier repair |
| Acetone-Free Remover | Zoya Remove+, Ella+Mila Soy Polish Remover | Ethyl acetate, aloe vera | Safe polish removal |
| Nail File | Dr. Scholl’s Glass Nail File, Kerasal Nail File | Glass/crystal surface | Gentle shaping, no splitting |
Conclusion: Your Nails Deserve a Comeback
Caring for your nails after gel removal isn’t just about aesthetics—it’s about long-term health and resilience. The damage caused by gel manicures is real, but with the right approach, your nails can recover and even thrive. From the moment you remove the gel, prioritize hydration, nourishment, and protection. Use oil soaks, cuticle treatments, and reconstructive serums to rebuild strength. Feed your body with a nutrient-rich diet and stay consistent with your care routine. Don’t hesitate to seek professional help if damage is severe.
Remember: your nails are a reflection of your overall health. Treating them with kindness and patience will pay off in stronger, more beautiful nails for years to come. Whether you’re taking a gel break or preparing for your next manicure, these expert tips will ensure your nails aren’t just surviving—they’re flourishing. After all, true beauty starts with care, not just color.
Frequently Asked Questions
How long should I wait before applying new gel polish after removal?
Wait at least 1-2 weeks before reapplying gel polish to allow your nails to recover. This break helps prevent weakening, peeling, and moisture loss caused by frequent gel use.
What’s the best way to restore moisture after gel nail removal?
Apply cuticle oil or a nourishing hand cream 2-3 times daily to replenish lost moisture. Look for ingredients like jojoba oil, shea butter, or vitamin E to support nail recovery.
How can I strengthen nails after gel removal?
Use a nail strengthener with keratin or calcium to fortify weakened nails. Avoid harsh formulas with formaldehyde—opt for gentle, reparative treatments instead.
Are there signs of damage I should watch for after gel removal?
Check for peeling, white spots, or extreme brittleness—these may indicate nail damage. If symptoms persist beyond two weeks, reduce polish use and consult a dermatologist.
Can I use nail polish remover after gel removal?
Only use acetone-free removers to avoid further drying your nails. Acetone strips natural oils, so switch to gentle removers until your nails regain strength.
How often should I care for nails after gel removal to ensure healthy recovery?
Stick to a daily routine: moisturize, avoid trauma (like picking), and wear gloves for chores. Consistent care speeds up recovery and prevents long-term damage.