Featured image for how to clean nail care tools
Image source: i.pinimg.com
Always disinfect nail care tools before and after each use to prevent infections and maintain hygiene. Clean with warm, soapy water to remove debris, then soak in 70% isopropyl alcohol or a sterilizing solution for at least 10 minutes—this kills bacteria, fungi, and viruses effectively. Store tools in a dry, clean case to preserve sterility and extend their lifespan.
Key Takeaways
- Sanitize tools weekly: Kill bacteria with 70% isopropyl alcohol soaks.
- Disassemble when possible: Clean hidden crevices in clippers and files.
- Use a brush: Scrub tools with a soft toothbrush for deep cleaning.
- Dry thoroughly: Prevent rust by air-drying tools completely post-cleaning.
- Store properly: Keep tools in a clean, dry container to avoid contamination.
- Replace damaged tools: Discard rusted or bent tools to ensure hygiene.
📑 Table of Contents
- The Importance of Clean Nail Care Tools
- Understanding the Types of Nail Care Tools and Their Cleaning Needs
- Step-by-Step Guide to Cleaning and Disinfecting Nail Tools
- Advanced Sterilization Methods for Professionals
- Best Practices for Storing Clean Nail Tools
- Common Mistakes to Avoid and Troubleshooting Tips
- Conclusion: Prioritizing Hygiene for Healthy Nails
The Importance of Clean Nail Care Tools
Imagine this: you’ve just finished painting your nails with a vibrant new color, only to notice a tiny speck of dust or a smudge of old polish on your brush. It’s frustrating, right? But what’s even more concerning is the potential for bacterial growth on your nail tools. Dirty nail care tools can harbor bacteria, fungi, and viruses, leading to nail infections, skin irritation, and even more serious health issues. In fact, studies have shown that improperly cleaned nail tools can contribute to the spread of nail fungus and other infections.
Cleaning your nail care tools isn’t just about aesthetics—it’s about maintaining a hygienic beauty routine that protects your health. Whether you’re a DIY nail enthusiast or a professional nail technician, keeping your tools clean is essential for achieving flawless results and preventing the spread of germs. In this comprehensive guide, we’ll walk you through the best practices for cleaning, disinfecting, and storing your nail care tools, ensuring they’re always ready for your next manicure or pedicure. From clippers and files to cuticle pushers and nail brushes, we’ll cover everything you need to know to keep your tools in top condition.
Understanding the Types of Nail Care Tools and Their Cleaning Needs
Not all nail care tools are created equal, and each type requires a specific cleaning approach to maintain its effectiveness and hygiene. Understanding the differences between tools is the first step in developing a proper cleaning routine.
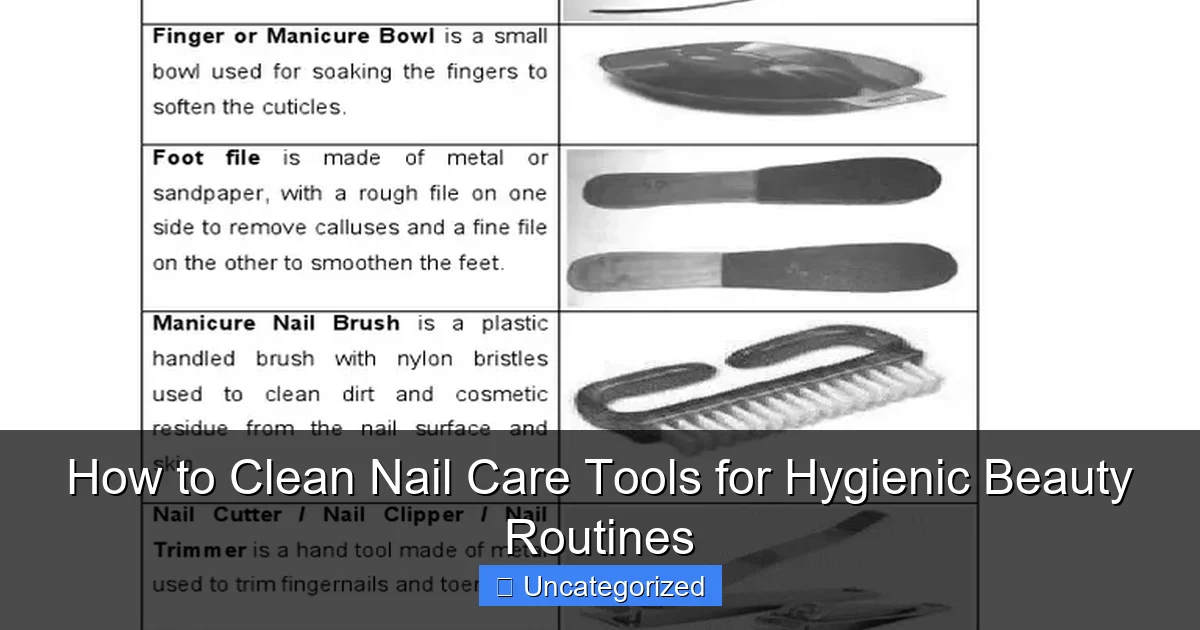
Visual guide about how to clean nail care tools
Image source: imgv2-1-f.scribdassets.com
Metal vs. Non-Metal Tools
Metal tools, such as nail clippers, cuticle nippers, and pushers, are durable and can withstand rigorous cleaning methods. However, they are also prone to rust if not dried properly. Non-metal tools, like emery boards, nail brushes, and some types of files, require gentler handling to avoid damage.
- Metal Tools: Can be soaked in disinfectants, scrubbed with a brush, and sterilized using heat (e.g., boiling water or autoclaving).
- Non-Metal Tools: Should be wiped with a disinfectant or cleaned with mild soap and water. Avoid soaking them for long periods, as this can cause warping or deterioration.
Disposable vs. Reusable Tools
Disposable tools, such as single-use emery boards and foam buffers, are designed for one-time use and should be discarded after each client or personal use. Reusable tools, on the other hand, require regular cleaning and disinfection to prevent cross-contamination.
For example, a professional nail technician might use disposable files for each client to ensure hygiene, while a DIY enthusiast might opt for reusable glass files that can be cleaned and reused multiple times. Always check the manufacturer’s instructions to determine whether a tool is disposable or reusable.
Tools with Porous Surfaces
Tools with porous surfaces, such as wooden cuticle pushers or natural bristle brushes, can absorb moisture and bacteria, making them harder to clean thoroughly. These tools should be cleaned with a disinfectant spray or wipe and allowed to air dry completely. In some cases, it may be best to replace porous tools regularly to maintain hygiene.
Step-by-Step Guide to Cleaning and Disinfecting Nail Tools
Cleaning your nail tools properly involves a multi-step process: removing debris, cleaning, disinfecting, and drying. Skipping any of these steps can compromise the effectiveness of your cleaning routine. Here’s a detailed guide to help you clean your tools effectively.
Step 1: Remove Debris
Before disinfecting your tools, you need to remove any visible debris, such as nail clippings, polish residue, or dead skin. This step is crucial because disinfectants cannot penetrate organic matter effectively.
- For Clippers and Nippers: Use a small brush (like an old toothbrush) to scrub away debris from the blades and hinges.
- For Files and Buffers: Tap them gently to dislodge dust or use a file cleaner to remove buildup.
- For Nail Brushes: Rinse under running water while gently squeezing the bristles to remove polish residue.
Step 2: Clean with Soap and Water
Washing your tools with mild soap and warm water helps remove oils, bacteria, and other contaminants. For metal tools, use a soft brush to scrub all surfaces, including hard-to-reach areas like the hinges of clippers. For non-metal tools, avoid soaking them for more than a few minutes to prevent damage.
Tip: Use a gentle dish soap or a specialized tool cleaner to avoid stripping the metal or damaging delicate surfaces. Rinse thoroughly to remove all soap residue, as leftover soap can interfere with disinfection.
Step 3: Disinfect with a Suitable Solution
Disinfecting your tools kills bacteria, viruses, and fungi that may not be visible to the naked eye. The type of disinfectant you use depends on the material of your tools.
- For Metal Tools: Use a hospital-grade disinfectant, such as a 70% isopropyl alcohol solution, bleach diluted to 1:10, or a commercial disinfectant like Barbicide. Soak the tools for the recommended time (usually 10-30 minutes).
- For Non-Metal Tools: Use a disinfectant spray or wipe designed for sensitive surfaces. Avoid bleach, as it can discolor or weaken certain materials.
- For Porous Tools: Spray with a disinfectant and let it sit for the recommended time, then wipe with a clean cloth.
Note: Always wear gloves when handling disinfectants to protect your skin. Ventilate the area to avoid inhaling fumes.
Step 4: Rinse and Dry Thoroughly
After disinfecting, rinse your tools with clean water to remove any residual disinfectant. For metal tools, dry them immediately with a clean towel to prevent rust. Allow all tools to air dry completely before storing them. Never store tools while they’re still damp, as this creates a breeding ground for mold and bacteria.
Advanced Sterilization Methods for Professionals
For professional nail technicians or those who want to take their hygiene to the next level, advanced sterilization methods can provide an extra layer of protection. These methods go beyond basic disinfection to ensure that tools are completely free of microbes.
Autoclaving: The Gold Standard
An autoclave is a pressurized device that uses steam and high heat (around 250°F or 121°C) to sterilize tools. This method kills all bacteria, viruses, and spores, making it the gold standard for medical and professional settings.
- How to Use: Place metal tools in a sterilization pouch and run them through the autoclave cycle. Follow the manufacturer’s instructions for timing and temperature.
- Pros: Highly effective, leaves no residue.
- Cons: Expensive equipment, not suitable for non-metal or porous tools.
Boiling Water Sterilization
Boiling water is a simple and effective way to sterilize metal tools at home. Submerge the tools in boiling water for 10-15 minutes, then remove and dry thoroughly.
Tip: Add a tablespoon of baking soda to the water to help prevent rust. Avoid boiling non-metal tools, as the heat can damage them.
UV Sterilization Boxes
UV sterilization boxes use ultraviolet light to kill microbes on the surface of tools. These devices are popular among nail technicians because they’re quick and easy to use.
- How to Use: Place tools inside the box and run the UV cycle for the recommended time (usually 5-10 minutes).
- Pros: Fast, no chemicals or heat required.
- Cons: Only sterilizes surfaces exposed to UV light; shadows or crevices may not be fully disinfected.
Chemical Sterilization (Glutaraldehyde)
Glutaraldehyde is a chemical sterilant used in medical settings. It requires a longer soaking time (usually 10 hours) to achieve full sterilization.
Warning: Glutaraldehyde is toxic and should only be used with proper ventilation and protective gear. It’s not recommended for home use.
Best Practices for Storing Clean Nail Tools
Proper storage is just as important as cleaning when it comes to maintaining hygienic nail tools. Storing tools in the right way prevents contamination and extends their lifespan.
Use a Clean, Dry Storage Container
Store your tools in a clean, dry container to protect them from dust, moisture, and bacteria. A dedicated tool organizer or a sealed plastic container works well. For professionals, a sterilized tool tray or autoclave pouch is ideal.
Tip: Line the container with a clean, lint-free cloth or paper towel to absorb any residual moisture.
Separate Tools to Prevent Cross-Contamination
If you have multiple sets of tools (e.g., for manicures and pedicures), store them separately to avoid cross-contamination. Label the containers clearly to keep them organized.
Replace Disposable Tools Regularly
Even if you clean reusable tools properly, they won’t last forever. Replace emery boards, foam buffers, and other disposable tools regularly. For metal tools, inspect them for signs of wear, rust, or dullness, and replace them as needed.
Store in a Cool, Dry Place
Heat and humidity can promote bacterial growth and damage tools. Store your tools in a cool, dry place, away from direct sunlight or steam (e.g., avoid storing them in the bathroom).
Sanitize the Storage Area
Wipe down your storage container or tool tray with a disinfectant weekly to keep it clean. This prevents dust and germs from accumulating.
Common Mistakes to Avoid and Troubleshooting Tips
Even with the best intentions, it’s easy to make mistakes when cleaning nail tools. Here are some common pitfalls to avoid and troubleshooting tips to keep your tools in top condition.
Using Harsh Chemicals on Delicate Tools
Harsh chemicals like undiluted bleach or acetone can damage non-metal tools or strip the coating on metal tools. Always use the appropriate disinfectant for the tool material.
Tip: If you’re unsure, test the disinfectant on a small, inconspicuous area first.
Skipping the Drying Step
Leaving tools damp after cleaning is one of the biggest mistakes people make. Moisture can cause metal tools to rust and porous tools to harbor mold. Always dry tools thoroughly before storing them.
Overlooking Hinges and Crevices
The hinges of clippers and nippers are often overlooked during cleaning, but they can trap debris and bacteria. Use a small brush to clean these areas thoroughly.
Using the Same Disinfectant for All Tools
Not all disinfectants are suitable for all tools. For example, bleach can discolor wooden tools, while alcohol can damage some plastics. Always read the manufacturer’s instructions.
Neglecting to Clean Tools Between Uses
If you use the same tools for multiple clients or on different nails, clean them between uses to prevent cross-contamination. Wipe metal tools with alcohol between clients, and replace disposable tools after each use.
Troubleshooting Rust on Metal Tools
If you notice rust on your metal tools, it’s usually due to improper drying or storage. To remove light rust, soak the tool in white vinegar for 10 minutes, then scrub with a soft brush. For severe rust, replace the tool.
| Tool Type | Cleaning Method | Disinfectant | Drying Time |
|---|---|---|---|
| Nail Clippers | Brush debris, soap and water, disinfect | 70% isopropyl alcohol | Immediate drying, air dry 10 min |
| Emery Boards | Tap debris, wipe with disinfectant | Disinfectant spray | Air dry 5 min |
| Nail Brushes | Rinse, mild soap, disinfect | Alcohol-based disinfectant | Air dry 15-20 min |
| Cuticle Pushers (Wood) | Wipe debris, disinfectant spray | Disinfectant wipe | Air dry 10 min |
| Metal Files | Brush debris, soap and water, disinfect | Boiling water or autoclave | Immediate drying |
Conclusion: Prioritizing Hygiene for Healthy Nails
Cleaning your nail care tools isn’t just a chore—it’s a crucial part of maintaining a hygienic beauty routine. By understanding the different types of tools, following a thorough cleaning process, and storing them properly, you can prevent infections, extend the life of your tools, and achieve flawless nail results every time.
Whether you’re a professional nail technician or a DIY enthusiast, investing time in cleaning your tools is an investment in your health. Remember, clean tools lead to clean nails, and clean nails are the foundation of a beautiful manicure or pedicure. So, the next time you reach for your nail clippers or file, take a moment to ensure they’re clean and ready for use. Your nails will thank you!
Frequently Asked Questions
How do I properly disinfect nail care tools after each use?
To clean nail care tools, first wipe off debris with a dry cloth, then soak them in 70% isopropyl alcohol or a hospital-grade disinfectant for 10 minutes. Rinse with sterile water and dry thoroughly to prevent rusting. This ensures hygienic beauty routines and kills bacteria or fungi.
What’s the best way to clean nail clippers and files?
Scrub metal nail clippers with a soft brush and soapy water, then soak in rubbing alcohol for 10 minutes. For files, use a toothbrush to remove buildup, then wipe with alcohol—avoid soaking porous materials like foam. Properly cleaning nail care tools prevents cross-contamination.
Can I sterilize nail tools in boiling water?
Yes, but only for metal tools: submerge them in boiling water for 10 minutes, then air-dry. Avoid boiling plastic or wooden tools, as heat can warp or weaken them. Boiling is an effective, chemical-free method to sanitize tools.
How often should I clean my nail care tools?
Disinfect tools after every use, especially if sharing with others or using on infected nails. For personal use, a weekly deep clean (soaking + scrubbing) is ideal. Regular cleaning nail care tools maintains hygiene and tool longevity.
Is there a difference between cleaning and sterilizing nail tools?
Cleaning removes visible debris (scrubbing/soaking), while sterilizing destroys all microbes (autoclaving/boiling). For home use, disinfecting with alcohol is sufficient unless tools contact broken skin. Prioritize sterilization in professional settings.
What household products can I use to clean nail tools?
Rubbing alcohol, hydrogen peroxide, white vinegar, or diluted bleach (1:10 ratio) work well. Soak tools for 10 minutes, then rinse and dry. Avoid harsh chemicals like ammonia, which can corrode metal over time.