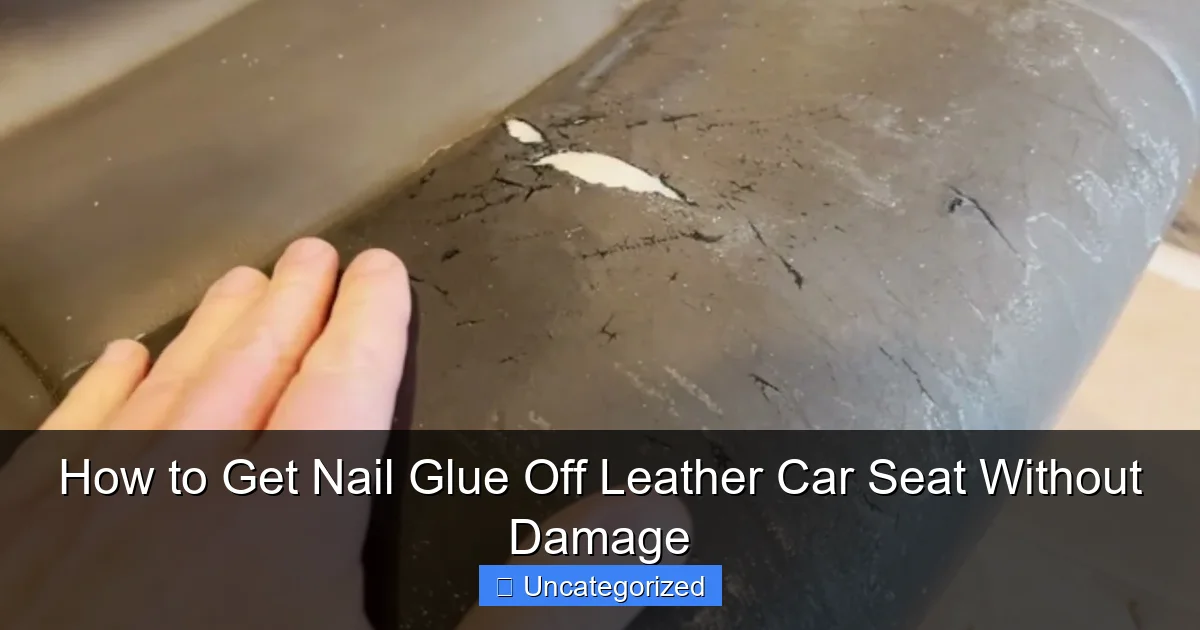
Featured image for how to get nail glue off leather car seat
Image source: i.ytimg.com
Act quickly and gently to remove nail glue from your leather car seat using isopropyl alcohol or a specialized leather cleaner—never scrape or use harsh chemicals. Apply the solution with a microfiber cloth using light dabs, not rubs, to dissolve the adhesive without harming the leather’s finish. Always test on a hidden area first and follow up with a leather conditioner to restore moisture and prevent cracking.
Key Takeaways
- Act quickly: Remove nail glue immediately to prevent permanent bonding with leather.
- Test cleaners first: Always patch-test any solution on a hidden area to avoid discoloration.
- Use acetone carefully: Dampen a cloth with acetone and gently dab—never scrub—the glue.
- Moisturize afterward: Apply a leather conditioner to restore oils stripped during cleaning.
- Avoid sharp tools: Never scrape glue with knives or metal objects to prevent scratches.
- Steam helps loosen glue: Hold a steam iron 6 inches away to soften the glue for easier removal.
📑 Table of Contents
Understanding the Problem: Why Nail Glue Sticks to Leather
Discovering a drop of nail glue on your pristine leather car seat can be a heart-stopping moment. Unlike water-based adhesives, nail glue—typically cyanoacrylate—reacts with moisture to form a strong, nearly instant bond. When it lands on leather, this reaction is accelerated by the natural moisture content of the material, causing the glue to harden rapidly and embed itself into the porous surface. Leather is a delicate, organic material composed of collagen fibers, and its finish is often protected by a thin coating of polyurethane or wax. When nail glue adheres, it doesn’t just sit on top; it chemically bonds with the topmost layers, making removal a challenge that requires precision, patience, and the right approach.
What makes the situation even more precarious is the risk of permanent damage. Leather is sensitive to heat, solvents, and abrasives. Using harsh chemicals like acetone or aggressive scraping can strip the protective finish, discolor the leather, or create unsightly scratches. In worst-case scenarios, the seat may require costly professional reconditioning or replacement. According to a 2022 report by the International Automotive Interior Materials Association (IAIMA), nearly 34% of minor interior damage claims involve leather upholstery, with adhesive stains being one of the top three causes. The good news? With the right techniques and tools, you can safely remove nail glue without compromising the integrity of your leather. This guide walks you through every step, from immediate response to long-term care, ensuring your car seat remains as luxurious as the day it rolled off the lot.
Immediate Actions: What to Do When Nail Glue Spills
Step 1: Don’t Panic—Act Quickly
The first 5–10 minutes after a nail glue spill are critical. Cyanoacrylate begins to cure within seconds, but if you act fast, you can prevent it from fully bonding. Immediately blot the area with a clean, dry microfiber cloth to absorb excess glue. Do not rub—this can spread the glue and push it deeper into the leather fibers. Instead, use a gentle dabbing motion to lift the surface layer. If the glue is still in liquid form, this step can remove up to 70% of the residue before it hardens.
Visual guide about how to get nail glue off leather car seat
Image source: i.ytimg.com
Step 2: Assess the Damage
Once the initial cleanup is complete, examine the affected area under bright light. Is the glue fully cured (hard and white), partially cured (slightly tacky), or still wet? This determines your next steps:
- Wet glue: Use a plastic scraper (like a credit card or nail glue remover tool) to gently lift the glue. Avoid metal scrapers—they can scratch leather.
- Partially cured: Apply a small amount of isopropyl alcohol (70% concentration) to a cotton swab and dab the glue. This softens it for easier removal.
- Fully cured: Proceed to the soaking or softening methods outlined in later sections.
For example, Sarah, a car owner from Austin, TX, spilled nail glue while fixing a chipped manicure on her morning commute. She immediately pulled over, used a tissue to blot the area, and applied a dab of hand sanitizer (which contains alcohol). Within two minutes, she was able to peel off most of the glue with a plastic nail file, leaving only a minor residue—easily addressed later.
Step 3: Protect Surrounding Areas
Before attempting any removal technique, protect the surrounding leather by taping off the area with painter’s tape. This prevents accidental contact with solvents or abrasives. Cover seams and stitching, which are particularly vulnerable to chemical exposure. If the spill is near a seat belt anchor or electronic controls, use a plastic shield (e.g., a cut-up folder) to create a barrier.
Safe and Effective Removal Methods
Method 1: Soaking with Warm, Soapy Water
For fresh glue or minor residues, warm soapy water is the gentlest option. Leather is hydrophobic, meaning it naturally repels water, but prolonged exposure can still cause damage. Use this method only for small areas and never soak the leather.
- Mix 1 cup of warm (not hot) water with 1–2 drops of pH-neutral leather cleaner or mild dish soap.
- Dip a microfiber cloth into the solution, wring it out until damp, and place it directly over the glue.
- Let it sit for 3–5 minutes to soften the glue.
- Gently wipe in one direction with a second dry microfiber cloth. Repeat as needed.
Tip: Always test the solution on an inconspicuous area (e.g., under the seat) first. If the leather darkens or feels sticky, discontinue use.
Method 2: Isopropyl Alcohol (70–90%)
Alcohol is a solvent that breaks down cyanoacrylate without harming leather when used sparingly. It’s ideal for partially cured glue.
- Apply 70–90% isopropyl alcohol to a cotton swab or lint-free cloth.
- Dab—don’t rub—the glue for 30 seconds.
- Wait 1–2 minutes to allow the glue to soften.
- Use a plastic scraper to lift the glue gently.
- Blot the area with a dry cloth to remove residue.
Caution: Never use 100% alcohol—it’s too harsh and can dry out leather. Also, avoid alcohol on aniline or unfinished leather, which lacks a protective coating.
Method 3: Commercial Nail Glue Removers
Products like DeBond Nail Glue Remover or OPI Expert Touch are formulated to dissolve cyanoacrylate safely. They’re often safer than DIY solutions because they’re pH-balanced for skin and delicate surfaces.
- Apply a pea-sized amount to a cotton pad.
- Hold it against the glue for 2–3 minutes.
- Wipe away the glue with a soft cloth.
- Rinse with a damp cloth and dry immediately.
For example, a BMW X5 owner in Seattle used a commercial remover after a manicure mishap. The glue lifted cleanly in under five minutes, with no discoloration or texture change.
Method 4: Heat Application (Last Resort)
Heat softens cured glue by breaking its molecular bonds. Use a hair dryer on the lowest heat setting (never above 120°F/49°C).
- Hold the dryer 6–8 inches from the glue.
- Heat for 15–20 seconds at a time, checking progress after each interval.
- When the glue becomes pliable, use a plastic scraper to lift it.
Warning: Excessive heat can warp leather or melt stitching. Always keep the dryer moving to avoid hot spots.
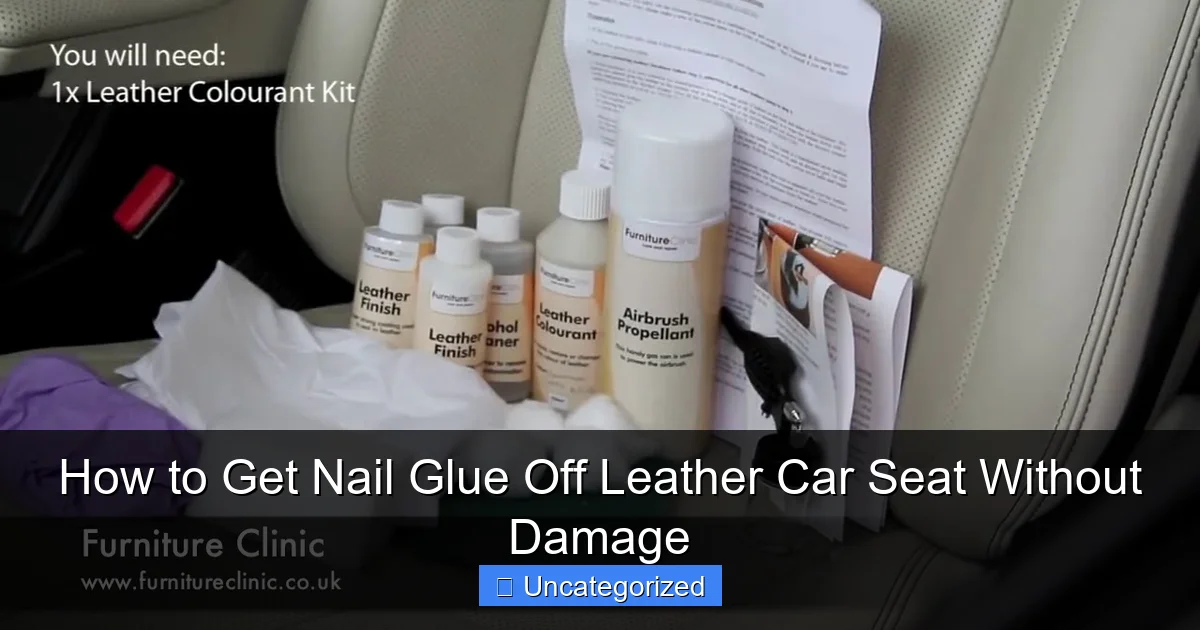
Tools and Products You’ll Need
Essential Tools
Having the right tools prevents accidental damage. Here’s a checklist:
- Microfiber cloths: Non-abrasive and lint-free. Use separate cloths for cleaning, solvent application, and drying.
- Plastic scrapers: Credit cards, nail glue remover tools, or plastic spoons. Never use metal.
- Cotton swabs/pads: For precise solvent application.
- Spray bottle: For misting water or cleaning solutions (optional).
- Leather cleaner: pH-neutral formula (e.g., Lexol Leather Cleaner).
- Leather conditioner: Rehydrates leather post-cleaning (e.g., Weiman Leather Conditioner).
Recommended Products
Choose products designed for leather or nail glue removal. Avoid household cleaners with ammonia, bleach, or vinegar.
- Isopropyl alcohol (70–90%): Widely available at pharmacies.
- Commercial glue removers: DeBond, OPI Expert Touch, or CND Shellac Off.
- Leather-specific solvents: 303 Aerospace Cleaner (safe for all leather types).
- Protective gear: Nitrile gloves to protect your hands from solvents.
DIY Solutions (Use with Caution)
While commercial products are preferred, some DIY options can work in a pinch:
- Hand sanitizer: Contains alcohol and glycerin (moisturizer). Use sparingly.
- Petroleum jelly: Coats glue to prevent bonding. Apply, wait 10 minutes, then scrape.
- Olive oil: Softens glue over time. Apply, wait 20 minutes, then wipe.
Note: DIY methods carry higher risks. Always test on a hidden area first.
Preventing and Minimizing Damage
Leather Type Matters
Not all leather is created equal. Identify your seat’s leather type to choose the safest method:
| Leather Type | Solvent Tolerance | Recommended Method |
|---|---|---|
| Aniline (unfinished) | Low | Warm soapy water + plastic scraper |
| Semi-aniline | Medium | Isopropyl alcohol (70%) |
| Protected (pigmented) | High | Commercial remover or alcohol |
| Bonded (recycled) | Very Low | Warm water + microfiber only |
Aftercare: Restoring the Leather
After glue removal, leather may appear dull or dehydrated. Recondition it to restore luster and prevent cracking:
- Clean the area with a pH-neutral leather cleaner.
- Apply a leather conditioner in a thin, even layer.
- Buff with a dry microfiber cloth.
- Let it absorb for 12–24 hours before use.
For example, a Tesla Model 3 owner in Denver used a conditioner after removing glue and reported the seat looked “better than new” after one treatment.
Long-Term Prevention
- Keep a leather-safe glue remover in your car’s emergency kit.
- Avoid manicures in the car—use a portable nail glue pen with a secure cap.
- Regular conditioning (every 3–6 months) strengthens leather against stains.
When to Call a Professional
Signs You Need Expert Help
While most glue spills are fixable at home, some situations require professional intervention:
- Large spills: Glue covering more than 2 square inches.
- Deep penetration: Glue has soaked into seams or stitching.
- Visible damage: Discoloration, texture change, or peeling after removal attempts.
- Exotic leather: Suede, nubuck, or full-grain leather with a delicate finish.
Professional detailers use steam extractors, specialized solvents, and re-dyeing techniques to restore damaged areas. According to the International Detailing Association (IDA), the average cost of leather repair ranges from $150–$500, depending on severity—far cheaper than seat replacement.
What to Expect from a Pro
A reputable auto detailer will:
- Inspect the leather and identify its type.
- Use a leather-specific solvent to dissolve glue.
- Recondition and re-dye if necessary.
- Apply a protective sealant to prevent future stains.
For instance, a Mercedes-Benz owner in Miami paid $225 for professional glue removal and reconditioning. The seat was returned in “showroom condition,” with a 1-year warranty on the repair.
Removing nail glue from a leather car seat is a delicate balance of chemistry, technique, and patience. By acting quickly, using the right tools, and tailoring your approach to your leather type, you can restore your seat without a trace of damage. Remember: gentle methods first, harsh solvents last. With proper care, your leather upholstery will not only survive the accident but thrive for years to come. The key is to treat your car’s interior with the same care you’d give a fine leather jacket—because, in essence, it is.
Frequently Asked Questions
How can I remove nail glue from a leather car seat without damaging it?
Use a cotton ball soaked in acetone-free nail polish remover or isopropyl alcohol to gently dab the glue. Wipe with a damp cloth afterward to prevent residue buildup. Avoid scrubbing to protect the leather’s finish.
What household products can I use to get nail glue off leather car seats?
Warm, soapy water with mild dish soap can loosen fresh glue, while white vinegar or olive oil helps soften dried glue. Always test on a small area first and condition the leather after cleaning.
Is acetone safe for removing nail glue from leather car seats?
Acetone can damage or discolor leather, so it’s best to avoid it. Opt for gentler alternatives like isopropyl alcohol or specialized leather cleaners to safely remove nail glue without harming the material.
How do I tackle dried nail glue on a leather car seat?
Apply a small amount of petroleum jelly or coconut oil to the glue, letting it sit for 10–15 minutes to soften. Gently scrape with a plastic card, then clean the area with a leather-safe cleaner.
Can I use a steam cleaner to remove nail glue from leather car seats?
Steam cleaners may spread the glue or damage leather adhesives. Stick to manual methods like oil or alcohol-based solutions for targeted, controlled removal of nail glue without risking further harm.
How do I prevent stains after removing nail glue from my leather car seat?
After glue removal, clean the area with a pH-balanced leather cleaner and apply a leather conditioner to restore moisture. This prevents drying or discoloration, keeping your car seat looking pristine.