Featured image for how to remove nail polish from car dashboard
Image source: i.ytimg.com
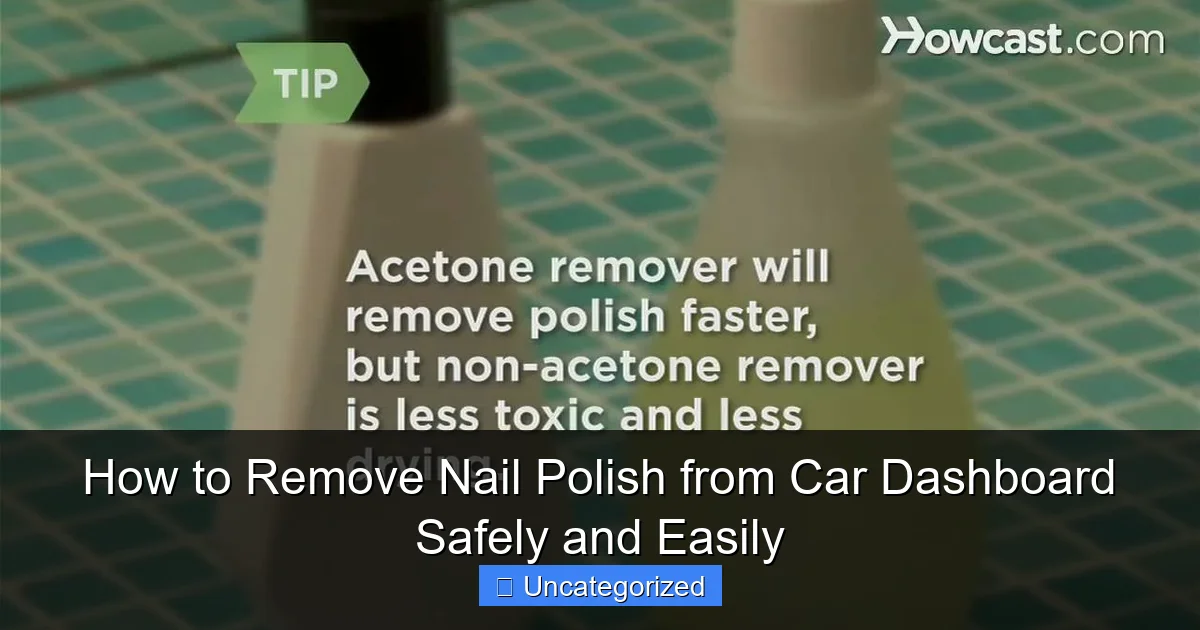
Act quickly and use a non-acetone nail polish remover to safely eliminate nail polish from your car dashboard without damaging the surface. Gently dab—don’t rub—the affected area with a soft cloth and a small amount of remover, then wipe clean with a damp cloth to prevent residue and protect the dashboard’s finish.
Key Takeaways
- Act quickly: Fresh spills are easier to remove without damaging the dashboard surface.
- Use non-acetone remover: It’s safer for dashboards than harsh acetone-based products.
- Test first: Always try the solution on a small, hidden area before full application.
- Blot, don’t rub: Gently dab the stain to avoid spreading or scratching the surface.
- Protect afterward: Apply a UV protectant to prevent long-term damage from cleaning agents.
- Avoid abrasive tools: Use soft cloths or cotton pads to maintain dashboard finish.
📑 Table of Contents
- How to Remove Nail Polish from Car Dashboard Safely and Easily
- Understanding Your Car Dashboard Material
- Immediate Steps to Take After a Nail Polish Spill
- Safe and Effective Nail Polish Removal Methods
- Tools and Products You Should (and Shouldn’t) Use
- Preventing Future Nail Polish Spills and Protecting Your Dashboard
- Final Thoughts: Act Fast, Stay Calm, and Protect Your Investment
How to Remove Nail Polish from Car Dashboard Safely and Easily
We’ve all been there: a quick touch-up before a meeting or a spontaneous manicure in the car, and suddenly a drop of nail polish lands right on your dashboard. The panic sets in almost immediately—will it stain? Can I remove it without damaging the surface? Your car’s dashboard is not just a functional component; it’s a visible part of your vehicle’s interior that contributes to its overall aesthetic and resale value. Whether you drive a luxury sedan or a rugged SUV, preserving the dashboard’s finish is essential. Accidents happen, but the good news is that nail polish doesn’t have to be a permanent eyesore.
Nail polish is a stubborn substance—designed to adhere to nails for days or even weeks—so it’s no surprise that it can cling to vinyl, leather, or plastic dashboards with surprising tenacity. However, with the right tools, techniques, and a calm approach, you can remove it safely without causing scratches, discoloration, or chemical damage. The key lies in understanding the type of dashboard material, the age of the spill, and the appropriate cleaning method. This guide walks you through everything you need to know to tackle nail polish spills effectively, from immediate action to long-term prevention. Whether the spill is fresh or has dried for hours, we’ve got you covered with proven, tested solutions that prioritize safety and ease.
Understanding Your Car Dashboard Material
Before attempting any removal technique, it’s crucial to identify the material your dashboard is made of. Not all dashboards are created equal, and using the wrong cleaning product or tool can do more harm than good. Most modern vehicles use one of three primary materials: vinyl, plastic (polypropylene or ABS), or leather. Some high-end models may feature wood, metal, or synthetic composite trims, which require special care. Misidentifying the material can lead to irreversible damage, such as warping, cracking, or fading.
Visual guide about how to remove nail polish from car dashboard
Image source: i.ytimg.com
Common Dashboard Materials and Their Traits
- Vinyl: The most common dashboard material, especially in mid-range and economy vehicles. It’s flexible, cost-effective, and often has a textured finish to reduce glare. Vinyl is sensitive to harsh solvents like acetone, which can cause it to dry out, crack, or discolor over time.
- Plastic (ABS/Polypropylene): Found in many newer vehicles, plastic dashboards are durable and resistant to UV damage. However, they can still be scratched by abrasive tools and may react poorly to strong chemicals.
- Leather: Used in luxury or premium trims, leather dashboards offer a sleek, high-end look. They are highly sensitive to moisture, heat, and solvents. Acetone can strip natural oils, leading to brittleness and cracking.
- Wood or Metal Trims: These decorative elements are often overlays on a base material. They require gentle, non-abrasive cleaners and should never be exposed to alcohol or acetone.
How to Identify Your Dashboard Material
Start by checking your vehicle’s owner’s manual—some manufacturers specify the interior materials used. If that’s not available, perform a simple test: press your fingernail gently into a hidden area (like under the glove box). If it leaves a mark, it’s likely vinyl. Plastic will feel rigid and won’t dent easily. Leather will have a soft, grainy texture and may show seams or stitching. For wood or metal, look for distinct grain patterns or reflective surfaces.
Tip: When in doubt, treat your dashboard as if it’s vinyl. Vinyl-safe cleaners are generally the mildest and safest option for most surfaces. Avoid assuming your dashboard is “just plastic”—many plastics used in interiors are treated with UV stabilizers and anti-glare coatings that can be compromised by aggressive cleaning.
Immediate Steps to Take After a Nail Polish Spill
Time is of the essence when dealing with nail polish on a car dashboard. The longer it sits, the deeper it can penetrate the material and the more difficult it becomes to remove. Immediate action increases your chances of a complete and safe removal. Here’s what to do the moment you notice a spill:
Step 1: Blot, Don’t Rub
Grab a soft, lint-free microfiber cloth or paper towel and gently blot the spill. Do not rub or scrub—this spreads the polish and pushes it into microscopic pores in the dashboard. Blotting lifts the excess without embedding it further. If the polish is still wet, you may be able to remove up to 80% of it with this step alone.
Step 2: Avoid Heat Sources
Never use a hairdryer, heater vent, or direct sunlight to try to dry or melt the polish. Heat can cause the dashboard material to warp or soften, allowing the polish to bond more tightly. Additionally, heat may cause the polish to spread or seep into seams and crevices.
Step 3: Contain the Spill
If the spill is large or near seams, use painter’s tape to create a barrier around the area. This prevents the polish from spreading into gaps where it’s harder to reach and clean. For example, if polish drips near the air vent, tape off the edges to keep it contained.
Step 4: Gather Your Tools
While you’re blotting, prepare your cleaning station. You’ll need:
- Microfiber cloths (at least 2–3)
- Cotton swabs (for tight spots)
- A plastic or wooden scraper (never metal)
- A small bowl for mixing cleaning solutions
- Your chosen cleaner (see next section)
Having everything ready prevents delays and reduces the risk of the polish setting.
Step 5: Test in a Hidden Area
Before applying any cleaner, test it on a small, inconspicuous area—like under the steering column or near the door frame. Wait 5–10 minutes to ensure there’s no discoloration, swelling, or texture change. This simple step can save you from a costly mistake.
Example: Sarah, a busy mom, spilled red glitter polish on her minivan’s dashboard during a school drop-off. She immediately grabbed a napkin and blotted the area, then used a cotton swab dipped in isopropyl alcohol to lift the remaining residue. Because she acted quickly and tested first, she removed 95% of the polish without damage.
Safe and Effective Nail Polish Removal Methods
Now that you’ve contained the spill and identified your dashboard material, it’s time to remove the polish. The method you choose depends on the material, the polish type (regular, gel, or glitter), and how long it’s been sitting. Below are the most effective, tested techniques that balance efficacy with safety.
Method 1: Acetone-Free Nail Polish Remover (Best for Vinyl & Leather)
Acetone is a powerful solvent that can strip finishes and damage sensitive materials. For vinyl and leather dashboards, use an acetone-free nail polish remover. These contain milder solvents like ethyl acetate or isopropyl alcohol, which break down polish without harming the surface.
- Soak a cotton swab or corner of a microfiber cloth in the remover.
- Gently dab the polish—do not pour directly onto the dashboard.
- Let it sit for 30–60 seconds to soften the polish.
- Use a plastic scraper at a 45-degree angle to lift the softened layer.
- Wipe with a clean, damp cloth to remove residue.
- Buff dry with a dry microfiber cloth.
Tip: For glitter polish, repeat the process 2–3 times. Glitter particles can embed into texture, so patience is key.
Method 2: Isopropyl Alcohol (70% or Higher for Plastic & Vinyl)
Isopropyl alcohol is less harsh than acetone but still effective on fresh or semi-dried polish. It evaporates quickly, reducing the risk of moisture damage.
- Dampen a cotton swab with alcohol (do not oversaturate).
- Apply in small circles over the stain.
- Use a plastic scraper to lift the polish.
- Wipe with a damp cloth and dry immediately.
Caution: Avoid using on leather or painted surfaces, as alcohol can strip finishes.
Method 3: Baking Soda Paste (For Stubborn or Dried Stains)
For old, dried-on polish, a gentle abrasive paste can help lift residue without scratching.
- Mix 1 tablespoon baking soda with 1 teaspoon water to form a thick paste.
- Apply to the stain with a soft toothbrush or cloth.
- Let sit for 1–2 minutes.
- Gently scrub in a circular motion with minimal pressure.
- Rinse with a damp cloth and dry.
Note: This method works best on plastic and vinyl. Test first on leather, as baking soda can be abrasive.
Method 4: Commercial Dashboard Cleaners (For All Materials)
Many auto-specific cleaners are formulated to remove adhesives, grease, and polish without damaging interior surfaces. Brands like Chemical Guys VRP, 303 Automotive Interior Cleaner, and Meguiar’s Quik Interior Detailer are safe for all dashboard types.
- Spray directly onto a microfiber cloth (not the dashboard).
- Wipe the stain gently.
- Follow with a second dry cloth to buff.
Pro Tip: Use a detailing brush to work the cleaner into textured surfaces or seams.
Method 5: Olive Oil or Coconut Oil (For Leather Dashboards)
For leather, oil-based methods help dissolve polish while conditioning the material.
- Apply a few drops of olive or coconut oil to a cotton pad.
- Rub gently in small circles.
- Let sit for 2–3 minutes.
- Wipe with a clean cloth.
- Follow with a leather conditioner to restore moisture.
Warning: Do not use on vinyl or plastic—oil can leave greasy residue.
Tools and Products You Should (and Shouldn’t) Use
Using the right tools is just as important as choosing the right cleaning method. The wrong tool can scratch, gouge, or chemically damage your dashboard. Below is a breakdown of what to use and what to avoid.
Recommended Tools
- Microfiber Cloths: Soft, lint-free, and non-abrasive. Use separate cloths for cleaning, rinsing, and drying.
- Cotton Swabs: Ideal for tight corners, air vents, and around buttons.
- Plastic or Wooden Scrapers: For lifting dried polish. Avoid metal—it can scratch.
- Detailing Brushes: Soft-bristled brushes help work cleaner into textured areas.
- Spray Bottle (for homemade solutions): Allows controlled application.
Products to Use
- Acetone-free nail polish remover (e.g., Cutex, Ella+Mila)
- 70% isopropyl alcohol (rubbing alcohol)
- Baking soda (for paste)
- Commercial dashboard cleaners (e.g., 303, Meguiar’s)
- Olive or coconut oil (leather only)
- pH-neutral car interior cleaner
Products and Tools to Avoid
- Acetone: Too harsh for vinyl and leather. May cause cracking or discoloration.
- Paper Towels: Can leave lint and micro-scratches.
- Steel Wool or Abrasive Sponges: Will scratch all dashboard types.
- Household Cleaners (e.g., Windex, Lysol): Contain ammonia or bleach that can damage finishes.
- Gasoline, Paint Thinner, or Mineral Spirits: Overly aggressive and flammable.
Data Table: Cleaning Solutions by Dashboard Material
| Dashboard Material | Recommended Cleaner | Application Method | Drying Time | Post-Clean Care |
|---|---|---|---|---|
| Vinyl | Acetone-free remover or isopropyl alcohol | Dab with cotton swab | 2–3 minutes | Apply vinyl protectant |
| Plastic | Isopropyl alcohol or commercial cleaner | Wipe with microfiber | 1–2 minutes | Buff with dry cloth |
| Leather | Olive oil or acetone-free remover | Rub gently with cotton pad | 3–5 minutes | Condition with leather balm |
| Wood/Metal Trim | pH-neutral interior cleaner | Damp cloth wipe | 1–2 minutes | Polish with appropriate wax |
Preventing Future Nail Polish Spills and Protecting Your Dashboard
Once you’ve successfully removed the nail polish, take steps to prevent future accidents and maintain your dashboard’s condition. Prevention is far easier—and cheaper—than remediation.
Create a No-Polish Zone in the Car
Designate your car as a “nail polish-free” area. Keep your nail kit in your purse, office drawer, or at home. If you must do touch-ups, wait until you’re parked and use a small tray or napkin to catch drips.
Use Protective Covers or Mats
Consider using a removable dashboard cover made of silicone or fabric. These are especially helpful if you frequently carry beauty products. They can be wiped clean and replaced if stained.
Apply a UV-Protective Dashboard Coating
Over time, UV rays from the sun can dry out vinyl and plastic, making them more porous and prone to staining. Use a UV-protective dashboard spray (e.g., Armor All, 303 Protectant) every 2–4 weeks. These products create a barrier that repels liquids and reduces static, which attracts dust and polish particles.
Regular Cleaning Routine
Clean your dashboard weekly with a damp microfiber cloth and a mild interior cleaner. This prevents buildup of oils, dust, and residue that can make future stains worse. Avoid silicone-based cleaners if you have leather, as they can cause long-term damage.
Keep Cleaning Supplies in the Car
Store a small kit in your glove box:
- Microfiber cloth
- Travel-sized acetone-free remover
- Cotton swabs
- Plastic scraper
Having these on hand means you can act immediately if a spill occurs.
Final Thoughts: Act Fast, Stay Calm, and Protect Your Investment
Nail polish on your car dashboard is stressful, but it’s not the end of the world. With the right knowledge and tools, you can remove it safely and restore your interior’s appearance. The key is to act quickly, identify your dashboard material, and choose the appropriate method. Avoid panic-driven decisions like using household solvents or scraping with metal tools—these often cause more damage than the original spill.
Remember, your dashboard is a long-term investment. Regular maintenance, UV protection, and spill prevention go a long way in preserving its look and value. Whether you drive a classic car or a brand-new model, keeping the interior in top condition enhances comfort, safety, and resale value. The next time a polish mishap happens, take a deep breath, grab your microfiber cloth, and tackle it with confidence. With the steps outlined in this guide, you’re well-equipped to handle any polish-related crisis—and keep your car looking as good as new.
Frequently Asked Questions
How can I safely remove nail polish from my car dashboard without damaging the surface?
Use a cotton pad with a small amount of non-acetone nail polish remover or rubbing alcohol, gently dabbing the stain. Avoid harsh scrubbing to prevent discoloration or damage to the dashboard material.
What is the best product to remove nail polish from a car dashboard?
Non-acetone nail polish removers, isopropyl alcohol (70% or higher), or specialized dashboard cleaners are ideal. Always test a small, hidden area first to ensure compatibility with your dashboard’s material.
Can I use acetone to remove nail polish from my car dashboard?
Acetone is too harsh for most car dashboards and may strip the finish or cause cracking. Opt for gentler alternatives like non-acetone removers or diluted rubbing alcohol to avoid permanent damage.
How do I remove dried nail polish from my car dashboard?
Moisten a microfiber cloth with isopropyl alcohol and gently rub the dried polish in circular motions. For stubborn spots, let the alcohol sit for 30 seconds before wiping to soften the residue.
Will vinegar or baking soda help remove nail polish from a car dashboard?
Vinegar and baking soda are less effective on nail polish but can help with light residue. Mix a paste of baking soda and water for mild abrasion, but avoid acidic solutions like vinegar on sensitive dashboard surfaces.
How do I prevent stains when trying to remove nail polish from my car dashboard?
Work quickly, use minimal liquid, and blot—don’t rub—to prevent spreading. Cover surrounding areas with a cloth to avoid accidental spills and always follow up with a dashboard conditioner to restore shine.