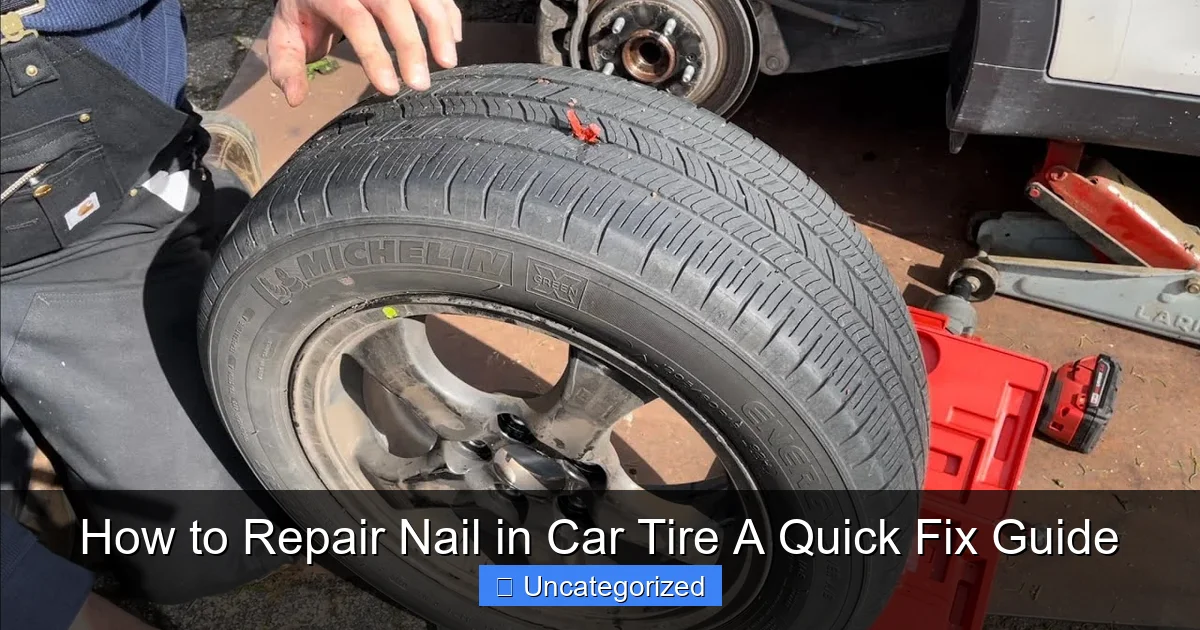
Featured image for how to repair nail in car tire
Image source: i.ytimg.com
Act fast to repair a nail in your car tire and avoid costly replacements—safety starts with a proper fix. This quick guide walks you through locating the leak, removing the nail, and sealing the puncture using a plug or patch kit, ensuring a durable, road-safe repair. With the right tools and steps, you can restore tire integrity in under 30 minutes.
Key Takeaways
- Locate the nail: Inspect tire tread carefully to find the puncture source.
- Use tire sealant: Temporarily seal small holes with a quality tire sealant.
- Reinflate safely: Refill tire to recommended PSI after sealing the leak.
- Visit a pro: Get a permanent plug-patch repair from a certified technician.
- Check pressure weekly: Monitor tire pressure to prevent further air loss.
- Replace if severe: Sidewall or large punctures require immediate tire replacement.
📑 Table of Contents
- Why You Should Never Ignore a Nail in Your Tire
- Understanding When and How a Nail Puncture Can Be Repaired
- Tools and Materials You’ll Need for a Tire Nail Repair
- Step-by-Step Guide: How to Repair a Nail in a Car Tire
- Common Mistakes and How to Avoid Them
- Long-Term Maintenance and When to Seek Professional Help
Why You Should Never Ignore a Nail in Your Tire
Imagine this: You’re driving down the highway, enjoying the breeze and your favorite playlist, when suddenly your dashboard lights up with a tire pressure warning. You pull over, inspect the tire, and spot a rusty nail lodged deep into the tread. Your heart sinks—this isn’t just a nuisance; it’s a potential safety hazard. A nail in a car tire is one of the most common causes of slow leaks, and if left untreated, it can lead to a flat tire, reduced fuel efficiency, or even a dangerous blowout at high speeds. The good news? Most nail punctures can be repaired safely and affordably if caught early. This guide will walk you through every step of how to repair a nail in a car tire, from identifying the puncture to completing a permanent fix.
Contrary to popular belief, not every nail in a tire means a trip to the mechanic or an immediate tire replacement. According to the U.S. Tire Manufacturers Association (USTMA), over 80% of punctures in the tread area can be safely repaired using industry-standard methods. The key lies in understanding the location, size, and depth of the puncture. Whether you’re a DIY enthusiast or just want to be prepared, knowing how to handle this common issue empowers you to act quickly, save money, and maintain your vehicle’s safety. In this comprehensive guide, we’ll cover everything from tools and safety precautions to step-by-step repair techniques and long-term maintenance tips.
Understanding When and How a Nail Puncture Can Be Repaired
Identifying the Location of the Puncture
Not all tire punctures are created equal. The repairability of a nail in your car tire depends largely on where the nail is located. The tire is divided into three main zones: the tread (center), the shoulder (edge of the tread), and the sidewall (the curved side of the tire). Only punctures in the tread area—specifically within the central 80% of the tread width—are considered safe for repair. Punctures in the shoulder or sidewall compromise the structural integrity of the tire and cannot be repaired safely. For example, if a nail is embedded near the sidewall where the tire flexes the most, the repair will likely fail under pressure, leading to a blowout.
Visual guide about how to repair nail in car tire
Image source: i.ytimg.com
Assessing the Size and Depth of the Nail
The size of the puncture also matters. Industry standards, such as those from the USTMA, state that punctures up to 1/4 inch (6 mm) in diameter can be repaired using a plug-patch combination. Nails, screws, and small bolts typically fall within this range. However, if the object is larger—like a large nail or a piece of rebar—the damage may be too extensive. Additionally, the depth of penetration is critical. A shallow nail may not have breached the internal steel belts, while a deep one could have damaged internal layers. Use a tire depth gauge or a small probe to gently measure how far the nail has gone. If you can’t easily remove it or see signs of air leaking (hissing sound, bubbling with soapy water), it’s likely deep and repairable.
Signs That a Tire Cannot Be Repaired
There are several red flags that indicate a nail puncture cannot be safely repaired:
- Location in the sidewall or shoulder: These areas endure the most stress and are not repairable.
- Multiple punctures: If there are more than two punctures in the same tire, especially close together, repair is not recommended.
- Previous repairs: Tires with prior plug or patch repairs may not support a second fix.
- Visible damage to steel belts: If the internal cords or steel belts are cut or frayed, the tire must be replaced.
- Age or wear: Tires older than 6 years or with tread depth below 2/32 inch should not be repaired.
For instance, a driver in Denver once attempted to repair a nail near the shoulder of a 7-year-old tire. The repair failed within a week, causing a sudden blowout on I-25. Always err on the side of caution—when in doubt, consult a professional.
Tools and Materials You’ll Need for a Tire Nail Repair
Essential Tools for a DIY Tire Repair
Before you begin, gather the right tools. A proper repair requires precision and the correct equipment. Here’s a list of essential tools:
- Tire pressure gauge: To check current pressure and monitor for leaks.
- Soapy water spray bottle: For detecting air leaks (bubbles appear at the puncture).
- Nail removal pliers or locking pliers: To extract the nail carefully without damaging the tire.
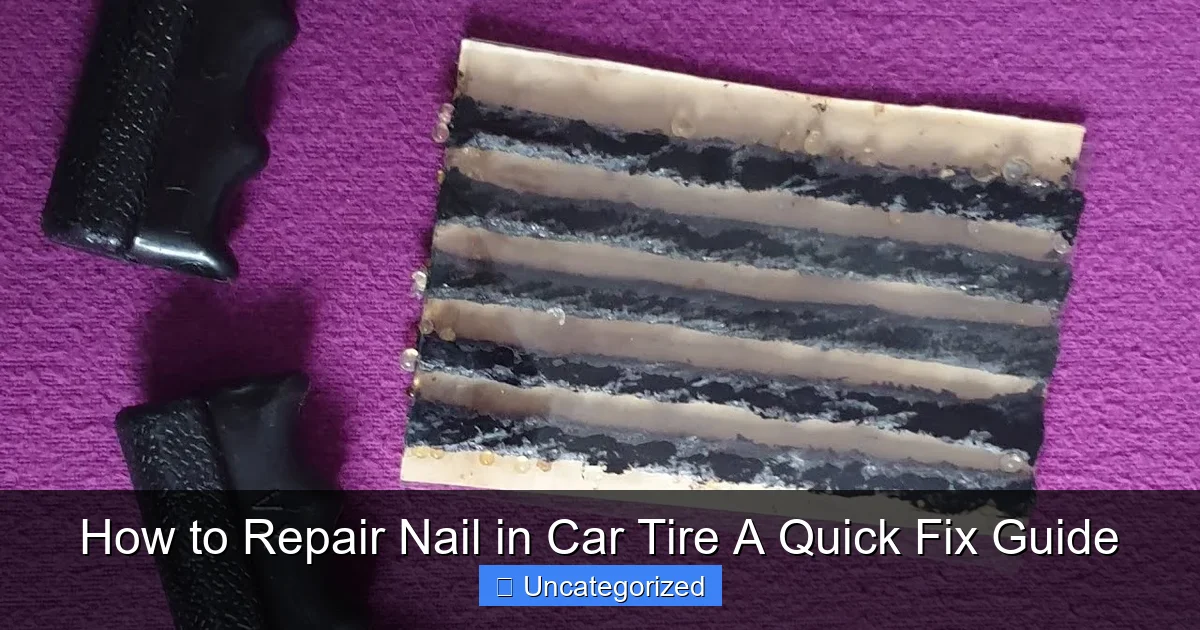
- Tire repair kit: Includes a reaming tool, insertion tool, and rubber plug strips. Kits like the Slime 50107 Tire Plug Kit or ARB 10000011 are reliable.
- Air compressor or portable inflator: To reinflate the tire after repair.
- Valve core removal tool: To deflate the tire completely before starting.
- Jack and lug wrench: If you plan to remove the tire for a patch-plug combo (recommended for long-term durability).
Pro tip: Invest in a high-quality kit with multiple plug strips and a durable insertion tool. Cheap kits often break during use, leaving you stranded.
Understanding Plug vs. Patch-Plug Repairs
There are two primary repair methods: plug-only and patch-plug combo.
- Plug-only: Involves inserting a rubber plug into the puncture from the outside. Quick and convenient, but less secure. Best for temporary fixes.
- Patch-plug combo: Requires removing the tire from the rim. A patch is applied to the inside, and a plug is inserted from the outside. This method is more durable and is the industry standard for permanent repairs.
For example, a plug-only repair might last 3–6 months, while a patch-plug combo can last the remaining life of the tire (typically 5–7 years). If you’re doing a roadside fix, a plug is acceptable. But for a long-term solution, a patch-plug is superior.
Safety Gear and Precautions
Never compromise on safety. Always:
- Wear work gloves to protect your hands from sharp objects.
- Use eye protection when inflating the tire—a sudden rupture can cause injury.
- Work on a flat, stable surface (e.g., driveway, not a sloped road).
- Engage the parking brake and chock the wheels if working on a lift.
- Never repair a tire with a bulge, crack, or dry rot—these indicate advanced wear.
Remember: A DIY repair is not a substitute for professional inspection. After completing the fix, have a tire technician verify the repair within a week.
Step-by-Step Guide: How to Repair a Nail in a Car Tire
Step 1: Locate and Remove the Nail
Start by parking your vehicle on a flat surface and engaging the parking brake. Use a tire pressure gauge to check the current pressure—note if it’s below the recommended PSI (found in your car’s manual or door jamb). Spray soapy water around the suspected area. Bubbles will form at the puncture site. Once located, use pliers to grip the nail and pull it straight out. Avoid wiggling it, as this can enlarge the hole.
Example: A driver in Austin found a nail in the rear passenger tire. After removing it, the tire lost air at a rate of 5 PSI per hour—confirming a slow leak.
Step 2: Prepare the Puncture Hole
Insert the reaming tool (a spiral metal rod) into the puncture and twist it back and forth 10–15 times. This cleans out debris, roughens the hole, and creates a snug fit for the plug. Remove the tool and blow compressed air into the hole to clear any rubber shavings. This step is critical—a poorly prepared hole leads to air leaks.
Step 3: Insert the Rubber Plug
Take a rubber plug strip from your kit. Thread it through the insertion tool so the center is aligned. Apply tire lubricant (usually included in the kit) to the plug. Insert the tool into the puncture, pushing it all the way in until about 1 inch protrudes from the tire. Hold the tool steady and pull it straight out—the plug should remain in place. Trim the excess plug flush with the tread using a utility knife.
Tip: If the plug pulls out, the hole may be too large. Use a larger plug or consider a patch-plug combo.
Step 4: Inflate and Test for Leaks
Reinflate the tire to the manufacturer’s recommended PSI. Spray soapy water over the repair site. If no bubbles appear after 30 seconds, the repair is successful. If bubbles form, the plug may need reinsertion or the tire may require a patch-plug combo. Let the tire sit for 24 hours and recheck pressure. A drop of more than 2 PSI indicates a failed repair.
Step 5: For a Patch-Plug Combo (Recommended for Durability)
If removing the tire:
- Deflate the tire completely and remove the valve core.
- Use a tire iron to break the bead and remove the tire from the rim.
- Locate the puncture from the inside and mark it.
- Sand the inner surface around the puncture with a buffing tool.
- Apply vulcanizing cement and let it dry for 30 seconds.
- Press the patch firmly over the puncture and roll it with a roller tool.
- Reinsert a plug from the outside (as in Step 3).
- Reinstall the tire, inflate, and test for leaks.
This method seals the puncture from both sides, preventing air and moisture from entering.
Common Mistakes and How to Avoid Them
Using a Plug Without Proper Preparation
One of the biggest mistakes is skipping the reaming step. A clean, roughened hole ensures the plug bonds securely. A driver in Phoenix inserted a plug without reaming, and it failed within a week, causing a roadside flat. Always ream the hole—it takes less than a minute but makes all the difference.
Overinflating the Tire After Repair
Inflating the tire beyond the recommended PSI (e.g., 40 PSI instead of 32) stresses the repair site. Use a reliable gauge and follow your car’s specifications. Overinflation can also lead to uneven tread wear and reduced traction.
Ignoring the Tire’s Age and Condition
Repairing a 10-year-old tire or one with dry rot is a recipe for disaster. The rubber becomes brittle, and even a small puncture can lead to a catastrophic failure. Always check the DOT code (e.g., “DOT 2221” means made in week 22 of 2021). Tires older than 6 years should be replaced, not repaired.
Repairing the Sidewall or Shoulder
Some DIYers attempt to plug sidewall punctures, but this is unsafe. The sidewall flexes constantly, and a plug cannot withstand the stress. A driver in Miami ignored this rule and suffered a blowout on the highway. If the puncture is within 1 inch of the sidewall, replace the tire.
Skipping the Leak Test
Never assume the repair worked. Always test with soapy water and monitor pressure for 24 hours. A missed leak can lead to a dangerous situation.
Long-Term Maintenance and When to Seek Professional Help
Post-Repair Care and Monitoring
After repairing a nail in your car tire:
- Check tire pressure weekly for the first month.
- Inspect the repair site for signs of bubbling, cracking, or air loss.
- Rotate the tires every 5,000–7,000 miles to ensure even wear.
- Have a professional inspect the repair within 7–10 days.
For example, a driver in Seattle repaired a nail and had it inspected at a local shop. The technician found a small air leak that wasn’t visible during the DIY test and resealed it properly.
When to Replace the Tire Instead of Repairing
Replace the tire if:
- The tread depth is below 2/32 inch (use a tread depth gauge).
- There’s visible damage to the steel belts (e.g., fraying, bulges).
- The tire is older than 6 years.
- You’ve had multiple repairs on the same tire.
Data shows that tires with tread depth below 2/32 inch are 3 times more likely to fail after a repair.
Professional Repair vs. DIY: Pros and Cons
| Factor | DIY Repair | Professional Repair |
|---|---|---|
| Cost | $10–$20 (kit) | $15–$30 (per tire) |
| Time | 30–45 minutes | 15–20 minutes |
| Durability | Good (if done correctly) | Excellent (patch-plug combo) |
| Warranty | None | Often includes a 1–2 year warranty |
| Risk | Higher (if mistakes are made) | Lower (trained technician) |
While DIY repairs save money, professionals use specialized tools (e.g., bead breakers, vulcanizers) and follow strict safety standards. For a permanent, warranty-backed fix, professional repair is worth the cost.
Repairing a nail in a car tire is a valuable skill that combines safety, savings, and self-reliance. By understanding the repair process, using the right tools, and avoiding common pitfalls, you can address most punctures effectively. However, always prioritize safety—when in doubt, consult a certified tire technician. A well-repaired tire can last for thousands of miles, but a poorly repaired one can lead to costly and dangerous consequences. Equip yourself with knowledge, respect the limits of tire repair, and keep your vehicle rolling safely on the road.
Frequently Asked Questions
Can I repair a nail in my car tire myself?
Yes, you can repair a nail in your car tire yourself if the puncture is in the tread area and not on the sidewall. Use a tire repair kit with a plug or patch, but ensure the damage isn’t too large or near the edge.
What tools do I need to fix a nail in a tire?
You’ll need a tire repair kit (with rubber plugs, insertion tool, and reamer), pliers, tire pressure gauge, and soapy water to check for leaks. Some kits also include a plugger for a more secure “how to repair nail in car tire” solution.
How long does a tire plug repair last?
A properly installed tire plug can last the remaining life of the tire, often 5-7 years. However, it’s wise to monitor the repair and consider a professional patch for added safety on high-mileage tires.
Is it safe to drive with a nail in my tire?
Driving with a nail in your tire is risky—it can lead to slow leaks, blowouts, or further damage. If you notice a nail, repair it immediately or drive slowly to a nearby shop to avoid a flat tire.
Can I repair a nail in the tire sidewall?
No, never repair a nail in the tire sidewall—this area is structurally weak, and repairs won’t hold. Replace the tire immediately to avoid dangerous blowouts or accidents.
How do I know if my tire repair is successful?
After repairing a nail in your car tire, inflate the tire and spray soapy water over the repair. If no bubbles form, the repair is airtight. Recheck pressure after 24 hours to confirm it’s holding.