
Featured image for how to sanitize nail care tools
Image source: i.ytimg.com
Properly sanitizing nail care tools is essential to prevent infections and maintain hygiene at home. Always clean tools with soap and water first, then disinfect using 70% isopropyl alcohol or a UV sterilizer for at least 10 minutes to kill bacteria and viruses. This simple routine ensures safe, salon-quality care without the risk of cross-contamination.
Key Takeaways
- Wash tools first: Clean with soap and water to remove debris before sanitizing.
- Use 70% isopropyl alcohol: Soak tools for 10 minutes to kill germs effectively.
- Boil metal tools: Sterilize by boiling for 5–10 minutes, then air-dry.
- Disinfect non-metal items: Wipe with alcohol or UV light for safe sanitation.
- Store in clean cases: Keep sanitized tools in sealed containers to avoid contamination.
- Sanitize after each use: Prevent infections by cleaning tools post-client or self-use.
📑 Table of Contents
- Why Sanitizing Nail Care Tools Is Crucial for Healthy Nails
- Understanding the Risks: When Dirty Tools Become Health Hazards
- Step-by-Step Guide to Sanitizing Nail Tools at Home
- Choosing the Right Sanitization Method for Different Tools
- Creating a Sanitization Routine: Best Practices for Consistency
- Advanced Tips: Professional-Grade Sanitization for Home Users
- Conclusion: Sanitize for Strong, Healthy Nails
Why Sanitizing Nail Care Tools Is Crucial for Healthy Nails
Imagine this: you’re treating yourself to a relaxing at-home manicure, carefully shaping your nails and painting them in your favorite shade. It feels luxurious, almost spa-like—until you notice a small red bump near a cuticle. Days later, it’s swollen, painful, and oozing. What went wrong? The answer might lie in a seemingly harmless tool: your nail clipper, cuticle pusher, or nail file.
Every time we use nail care tools, we’re potentially transferring bacteria, fungi, and even viruses from one surface to another. These microorganisms can thrive on metal, plastic, and even wood, especially when exposed to moisture. According to the Centers for Disease Control and Prevention (CDC), improperly cleaned nail tools are a leading cause of nail infections, including paronychia (a painful nail fold infection) and fungal infections like onychomycosis. Even minor nicks or micro-cuts from tools can become gateways for pathogens. This is why sanitizing nail care tools isn’t just a good habit—it’s a necessity for safe, healthy nail hygiene at home. Whether you’re a DIY manicure enthusiast or share tools with family members, proper sanitation prevents cross-contamination and promotes long-term nail wellness.
Understanding the Risks: When Dirty Tools Become Health Hazards
The human nail environment is surprisingly vulnerable. The skin around the nail (the nail fold and cuticle) is delicate and easily compromised. When tools aren’t sanitized, they can carry Staphylococcus aureus, Streptococcus, Candida (yeast), and dermatophytes (fungi responsible for nail fungus). These pathogens can survive on surfaces for hours to days, depending on the material and environmental conditions.
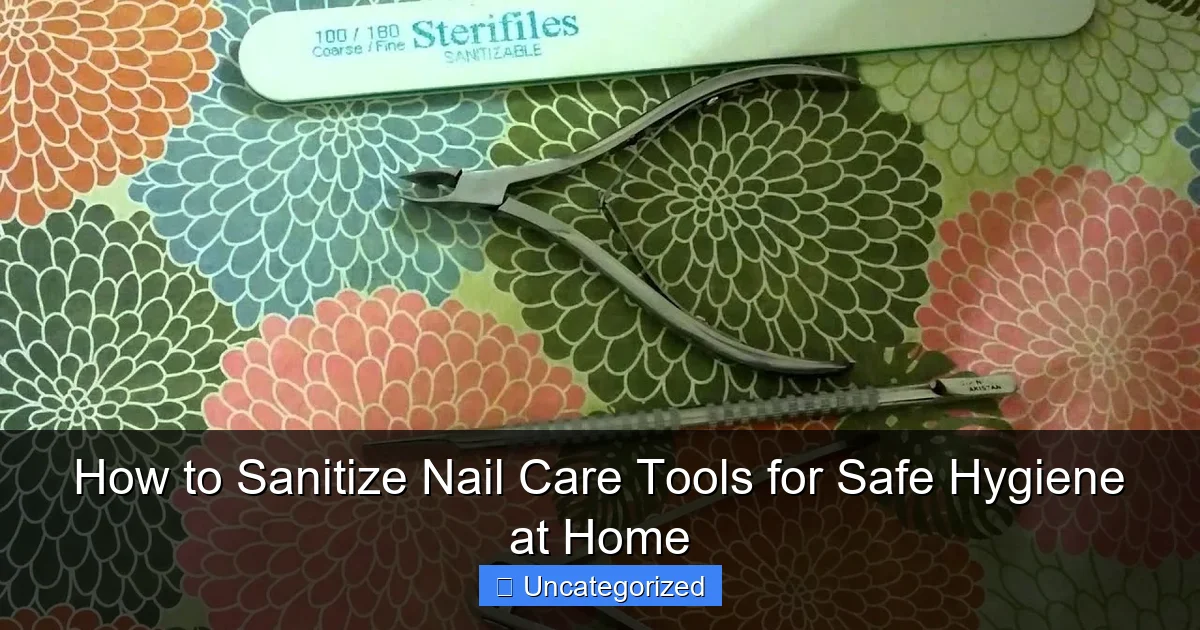
Visual guide about how to sanitize nail care tools
Image source: i.ytimg.com
Common Infections Linked to Unsanitized Tools
- Paronychia: A bacterial or fungal infection of the nail fold, often caused by Staph or Candida. Symptoms include redness, swelling, pus, and tenderness.
- Onychomycosis: A fungal nail infection that leads to thickened, discolored, and brittle nails. It spreads easily via contaminated files and clippers.
- Herpes Simplex Virus (HSV): Cold sores can spread to the nail area (herpetic whitlow) if tools come into contact with an active lesion.
- Warts (HPV): Human papillomavirus can be transmitted through micro-abrasions caused by dirty tools.
According to a 2022 study published in the Journal of the American Academy of Dermatology, 1 in 4 people who perform at-home manicures without proper tool sanitation reported at least one nail infection in the past year. This statistic underscores the importance of routine sanitation—especially for those with compromised immune systems, diabetes, or poor circulation, who are at higher risk of complications.
How Tools Become Contaminated
Nail tools pick up pathogens from:
- Contact with skin, sweat, or blood during use
- Storage in damp, unhygienic environments (e.g., bathroom drawers)
- Sharing with others (even family members)
- Touching contaminated surfaces before or after use
For example, using the same cuticle pusher on multiple people—or even on your own hands and feet—without cleaning in between can transfer bacteria from the feet (a common site for fungi) to the hands. This is why sanitizing nail care tools after every use is non-negotiable for infection prevention.
Step-by-Step Guide to Sanitizing Nail Tools at Home
Sanitizing nail tools doesn’t require a professional salon setup. With a few household items and a consistent routine, you can achieve hospital-grade cleanliness at home. The key is to follow a three-step process: clean, disinfect, and sterilize, tailored to the tool type and material.
Step 1: Pre-Cleaning (Removing Debris and Organic Matter)
Before disinfection, tools must be free of visible dirt, nail clippings, skin flakes, and polish residue. This step is crucial because organic matter can shield bacteria from disinfectants.
- For metal tools (clippers, scissors, cuticle nippers): Soak in warm, soapy water for 10–15 minutes. Use a soft-bristled brush (like an old toothbrush) to scrub crevices. Rinse thoroughly with clean water.
- For plastic or wooden tools (cuticle pushers, nail files): Wipe with a damp cloth and mild soap. Avoid soaking wood, as it can warp. For files, gently scrape off debris with a clean nail file or brush.
- For emery boards (disposable): Discard after one use or if visibly soiled. Never attempt to sanitize and reuse them.
Pro Tip: Clean tools immediately after use to prevent residue from hardening. A 5-minute post-manicure cleanup prevents buildup and makes disinfection more effective.
Step 2: Disinfection (Killing Germs on Surfaces)
Disinfection reduces the number of viable microorganisms to a safe level. Use EPA-registered disinfectants or household alternatives.
- Isopropyl Alcohol (70% or higher): Soak metal tools for 10 minutes. For non-metal tools, wipe with a cloth soaked in alcohol and let air dry.
- Hydrogen Peroxide (3%): Soak for 15 minutes. Effective against viruses and bacteria. Rinse with water after soaking.
- White Vinegar Solution (1:1 with water): Soak for 20 minutes. Vinegar is a natural disinfectant but less effective against some fungi. Best used as a secondary step.
- Commercial Disinfectants: Products like Barbicide (used in salons) are ideal. Follow label instructions for dilution and soak time (usually 10 minutes).
Caution: Never mix bleach with vinegar or ammonia—it creates toxic fumes. Also, avoid bleach on metal tools, as it can cause corrosion.
Step 3: Sterilization (Eliminating All Microorganisms)
Sterilization is the gold standard, especially for tools that break the skin (e.g., cuticle nippers). It ensures no viable pathogens remain.
- Boiling: Submerge metal tools in boiling water for 10 minutes. Use tongs to remove and let air dry on a clean towel. Not suitable for plastic or wooden tools.
- Autoclave (for advanced users): If you have access to a pressure cooker with an autoclave function, sterilize tools at 121°C (250°F) for 15–20 minutes.
- UV Sterilizer Boxes: Home UV-C devices (e.g., UV Care, Philips UV-C) emit ultraviolet light to kill microbes. Place tools inside for 5–10 minutes per cycle. Ensure all surfaces are exposed to light.
Pro Tip: After sterilization, store tools in a sealed, dry container to prevent recontamination. A small zip-top bag or dedicated tool roll works well.
Choosing the Right Sanitization Method for Different Tools
Not all tools are created equal—and neither are their sanitization needs. The method you choose should depend on the material, frequency of use, and risk level (e.g., tools that cut skin vs. those that only touch the surface).
Metal Tools (High-Risk, Reusable)
These include nail clippers, cuticle nippers, nail scissors, and metal pushers. Since they can break the skin, they require sterilization after every use, especially if you or someone else has cuts, hangnails, or infections.
- Best Method: Boiling (for heat-tolerant tools) or UV sterilization.
- Alternative: Soak in 70% isopropyl alcohol for 15 minutes, then air dry.
- Storage: Keep in a dry, ventilated area. Avoid damp bathrooms.
Example: If you use cuticle nippers to remove a hangnail, sterilize them immediately afterward. Even a tiny speck of blood can harbor pathogens.
Plastic and Wooden Tools (Low-Risk, Reusable)
These include plastic cuticle pushers, wooden nail files, and orange sticks. They rarely break the skin but can still transfer germs.
- Best Method: Wipe with 70% alcohol or hydrogen peroxide after each use. For deep cleaning, soak plastic tools (not wood) in a vinegar solution for 10 minutes.
- Wooden Tools: Never soak—wipe only. Replace if cracked or splintered, as bacteria can hide in crevices.
- Storage: Store in a breathable pouch to prevent mold.
Disposable Tools (One-Time Use)
Emery boards, foam buffers, and single-use files should never be sanitized and reused. The porous material traps debris and microbes, making disinfection ineffective.
- Rule of Thumb: Use once, then discard. Label reusable vs. disposable tools clearly.
- Eco-Friendly Tip: Choose biodegradable emery boards (e.g., glass or ceramic files) to reduce waste.
Electric and Battery-Powered Tools
Nail drills, electric filers, and LED curing lamps require special care.
- Drill Bits: Remove and sanitize like metal tools. Soak in alcohol or boil.
- Handpiece: Wipe with alcohol wipes. Never immerse in liquid.
- LED Lamps: Clean the interior with a microfiber cloth and alcohol. Avoid moisture near electrical components.
Pro Tip: For electric tools, refer to the manufacturer’s cleaning guidelines. Over-sanitizing can damage sensitive electronics.
Creating a Sanitization Routine: Best Practices for Consistency
Sanitization is only effective if done regularly and correctly. A consistent routine prevents lapses and ensures tools remain safe for use.
Daily vs. Weekly vs. Monthly Cleaning
| Frequency | Action | Tools Affected |
|---|---|---|
| After Every Use | Pre-clean with soap and water, then disinfect with alcohol or hydrogen peroxide. | All tools (metal, plastic, wood) |
| Weekly | Sterilize metal tools (boil or UV). Deep clean plastic/wooden tools with vinegar soak (if applicable). | Metal, plastic, wood |
| Monthly | Inspect for damage (rust, cracks, splinters). Replace worn-out tools. Sanitize storage containers. | All tools and storage |
Storage and Handling Tips
- Use a Dedicated Tool Kit: Store sanitized tools in a clean, dry container (e.g., a labeled metal tin or fabric roll).
- Label Tools: If sharing with family, use colored tape or tags to identify personal tools.
- Avoid Cross-Contamination: Never lay tools directly on bathroom counters. Use a clean towel or tray.
- Wash Hands First: Always wash your hands before and after using nail tools to reduce germ transfer.
Travel Sanitization
Taking your nail kit on the go? Pack a mini sanitization kit:
- Small bottle of 70% isopropyl alcohol
- Alcohol wipes
- Disposable emery boards
- Sealable plastic bag for storage
Pro Tip: After a trip, sanitize all tools—even if they weren’t used—as they may have picked up germs from hotel bathrooms or airport surfaces.
Advanced Tips: Professional-Grade Sanitization for Home Users
Want salon-level hygiene at home? These advanced techniques go beyond basic cleaning.
UV-C Sterilization
UV-C light (254 nm wavelength) disrupts microbial DNA, making it a powerful sterilization tool. Home UV sterilizer boxes are affordable (ranging from $30–$100) and easy to use.
- How to Use: Place tools inside, close the lid, and run a 5–10 minute cycle. Rotate tools halfway for full exposure.
- Effectiveness: Kills 99.9% of bacteria, viruses, and fungi, including MRSA and Candida.
- Limitations: Light can’t penetrate shadows or crevices. Ensure tools are pre-cleaned.
Chemical Sterilants (For High-Risk Situations)
In rare cases (e.g., after treating an infected nail), consider using glutaraldehyde or ortho-phthalaldehyde (OPA) solutions. These are hospital-grade sterilants but require careful handling due to toxicity.
- Glutaraldehyde (2%): Soak tools for 10 hours for full sterilization. Rinse thoroughly with sterile water.
- OPA (0.55%): Soak for 12 minutes. Less toxic than glutaraldehyde but still requires ventilation.
Warning: These chemicals are not for routine use. Always wear gloves and work in a well-ventilated area. Follow manufacturer instructions precisely.
DIY Sanitization Station
Create a dedicated sanitization station in your bathroom or vanity:
- Materials: Small tray, alcohol spray bottle, clean towels, labeled containers for clean/dirty tools.
- Process: After each manicure, place used tools in the “dirty” bin. At the end of the day, clean, disinfect, and store them in the “clean” bin.
This system ensures no tool is ever used twice without sanitization.
Conclusion: Sanitize for Strong, Healthy Nails
Sanitizing nail care tools isn’t just about cleanliness—it’s about protecting your health. From preventing painful infections to extending the life of your tools, proper sanitation is a small investment with big returns. By following a structured routine—cleaning after every use, disinfecting weekly, and sterilizing high-risk tools—you create a safe environment for beautiful, healthy nails.
Remember, the goal isn’t perfection but consistency. Whether you’re using a simple alcohol wipe or a UV sterilizer, the act of sanitizing sends a powerful message: you value your nail health. Over time, this habit becomes second nature, just like brushing your teeth or washing your hands.
So the next time you reach for your nail clippers, ask yourself: Are these tools safe to use? With the steps outlined in this guide, the answer will always be yes. Prioritize sanitizing nail care tools—not just for aesthetics, but for lasting wellness. Your nails (and your immune system) will thank you.
Frequently Asked Questions
Why is it important to sanitize nail care tools regularly?
Sanitizing nail care tools prevents the spread of bacteria, fungi, and infections, especially when tools are reused or shared. Proper sanitation ensures safe hygiene at home and protects against nail-related health issues.
What is the best way to sanitize nail care tools at home?
The most effective method is soaking tools in 70% isopropyl alcohol for 10-15 minutes or using a UV sterilizer. For extra protection, clean tools with soap and water first to remove debris before disinfecting.
How often should I sanitize my nail tools to maintain hygiene?
Sanitize tools after every use if you’re sharing them or after each client in a professional setting. For personal use, clean and disinfect them weekly or before each new manicure/pedicure session.
Can I use household cleaners to sanitize nail care tools?
No, harsh household cleaners like bleach can damage tools and irritate skin. Instead, use a proper nail tool sanitizer like isopropyl alcohol or EPA-registered disinfectants designed for salon equipment.
Is boiling water effective for sanitizing nail clippers and files?
Boiling water can disinfect metal tools like clippers, but avoid using it on plastic, rubber, or porous items. Always dry tools thoroughly after boiling to prevent rust and maintain longevity.
How do I store sanitized nail tools to keep them germ-free?
Store disinfected tools in a clean, dry container or sealed pouch to avoid contamination. Keep them away from moisture and dust, and consider using a UV storage case for added protection.