Featured image for how to take care of acrylic nail brushes
Image source: i.ytimg.com
Proper cleaning after every use is the most critical step in extending the life of your acrylic nail brush, preventing product buildup and bristle damage. Rinse with a gentle brush cleaner or monomer, then reshape and store upright to maintain the tip’s precision and prevent fraying—simple habits that ensure long-lasting performance and flawless application.
Key Takeaways
- Clean brushes immediately after use to prevent acrylic buildup and damage.
- Use monomer for cleaning to dissolve residue without harming bristles.
- Store vertically with bristles facing up to maintain shape and prevent fraying.
- Never soak brushes in acetone or harsh chemicals to avoid bristle loss.
- Inspect regularly for frayed or loose bristles and replace when needed.
- Cap after cleaning to protect bristles and maintain hygiene between uses.
📑 Table of Contents
- Why Proper Care of Acrylic Nail Brushes Is Essential
- Understanding Your Acrylic Nail Brush: Anatomy and Materials
- Daily Cleaning Routine: The Key to Brush Longevity
- Proper Storage: Preventing Damage and Contamination
- Common Mistakes That Ruin Acrylic Nail Brushes
- When to Replace Your Acrylic Nail Brush: Signs of Wear
- Conclusion: Invest in Care for Professional Results
Why Proper Care of Acrylic Nail Brushes Is Essential
Acrylic nail brushes are the unsung heroes of the nail art world. These delicate tools, often crafted with natural or synthetic bristles, are responsible for creating flawless acrylic applications, intricate designs, and smooth finishes. Yet, despite their importance, many nail technicians and DIY enthusiasts neglect proper brush care, leading to frayed bristles, product buildup, and shortened tool lifespan. A single high-quality acrylic nail brush can last for months—or even years—with the right maintenance, saving both time and money in the long run.
Taking care of your acrylic nail brushes isn’t just about preserving your investment; it’s about maintaining hygiene, ensuring precision, and delivering consistent results. When a brush is clogged with dried acrylic or contaminated with bacteria, it can ruin your manicure, spread infection, or even damage the natural nail. Whether you’re a professional nail artist or someone who loves doing acrylics at home, understanding how to clean, store, and maintain your brushes is crucial. In this comprehensive guide, we’ll walk you through everything you need to know to keep your acrylic nail brushes in top condition for long-lasting use.
Understanding Your Acrylic Nail Brush: Anatomy and Materials
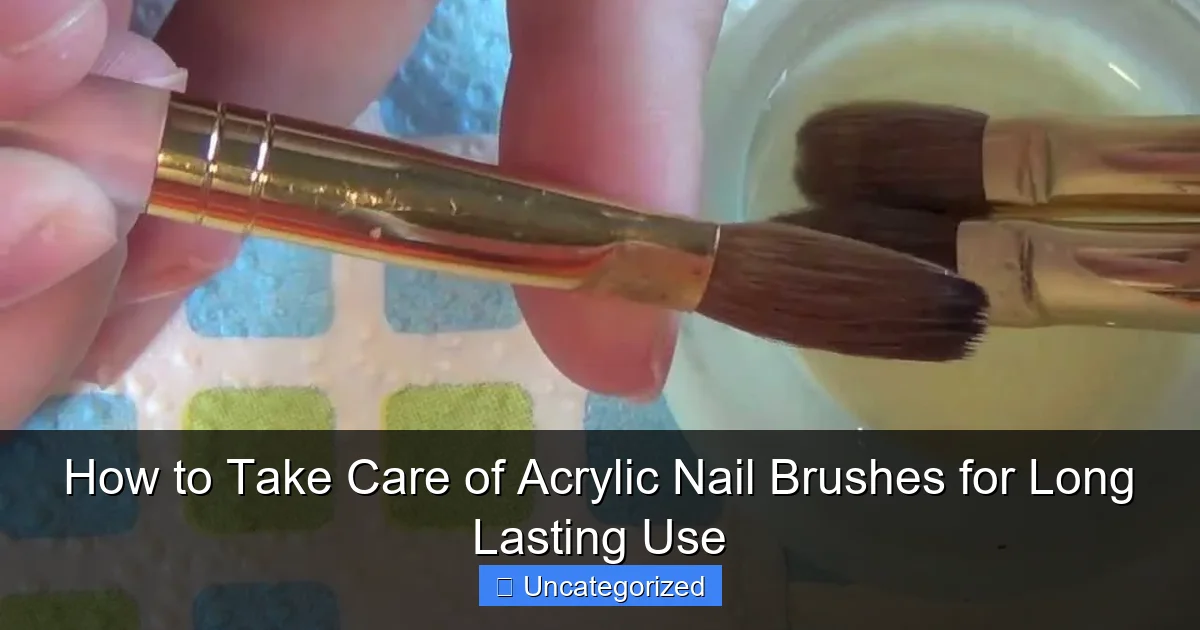
Before diving into care techniques, it’s essential to understand the components and materials that make up your acrylic nail brush. Not all brushes are created equal, and knowing what you’re working with will help you tailor your maintenance routine effectively.
Visual guide about how to take care of acrylic nail brushes
Image source: i.ytimg.com
Brush Handle and Ferrule
The handle of an acrylic nail brush is typically made from wood, acrylic, or metal, while the ferrule—the metal band that holds the bristles—is usually brass, aluminum, or stainless steel. The ferrule is crimped to secure the bristles and must remain tightly sealed to prevent water or product from seeping into the base, which can cause swelling, splitting, or bristle loss.
- Wooden handles: Lightweight and comfortable but can absorb moisture if not properly sealed. Avoid prolonged soaking.
- Acrylic/metal handles: More durable and water-resistant, ideal for frequent use and cleaning.
- Ferrule quality: Higher-end brushes often use seamless brass ferrules, which are more resistant to corrosion and provide a tighter bristle hold.
Tip: Always inspect the ferrule for signs of rust or looseness. A loose ferrule can lead to bristle shedding, making the brush unusable.
Bristle Types: Natural vs. Synthetic
The bristles are the heart of the brush, and their material significantly affects performance and care requirements.
- Natural bristles (e.g., kolinsky sable): Made from animal hair, these are the gold standard for acrylic application. They hold liquid well, create fine lines, and are extremely durable when cared for. However, they are more expensive and require gentler cleaning.
- Synthetic bristles (e.g., nylon, polyester): More affordable and cruelty-free, synthetic brushes are ideal for beginners or those with allergies. They’re less absorbent but can degrade faster if exposed to harsh chemicals or excessive heat.
Example: A kolinsky sable brush can last up to 2 years with daily use if cleaned properly, while a synthetic brush may need replacement every 6–8 months under the same conditions.
Brush Shapes and Sizes
Acrylic brushes come in various shapes—round, oval, flat, and liner—each designed for specific tasks. A round brush (e.g., size #6–#10) is most common for bead formation, while a liner brush is used for detailing. The size affects how much product you can carry and how precise your application will be.
Pro tip: Label your brushes by size and use to avoid cross-contamination (e.g., one for acrylic, one for gel, one for polish).
Daily Cleaning Routine: The Key to Brush Longevity
Cleaning your acrylic nail brush after every use is non-negotiable. Dried acrylic is the #1 cause of brush damage, as it hardens inside the bristles and ferrule, making future cleaning nearly impossible. A consistent daily routine prevents buildup and preserves bristle integrity.
Step-by-Step Cleaning Process
- Wipe off excess product: Immediately after use, gently wipe the bristles on a lint-free towel or paper towel to remove wet acrylic. Avoid pressing too hard to prevent bristle bending.
- Use brush cleaner or monomer: Dip the bristles (only the tip, never the ferrule) into a brush cleaner or a small amount of monomer. Swirl the brush gently in the liquid to dissolve residual acrylic. Note: Monomer is a solvent and should not be used excessively on natural bristles, as it can dry them out.
- Shape and dry: After cleaning, use your fingers or a brush shaper to re-form the bristle tip into a fine point. Lay the brush flat on a clean towel or in a brush holder with the bristles facing up to air-dry completely (1–2 hours).
Warning: Never leave your brush soaking in monomer or cleaner for more than 10 minutes. Prolonged exposure can weaken the adhesive holding the bristles and damage the ferrule.
Choosing the Right Cleaner
- Brush cleaner (recommended): Specially formulated to dissolve acrylic without harsh solvents. Safe for both natural and synthetic bristles.
- Monomer (use sparingly): Effective but drying. Best for quick cleanups or synthetic brushes. Avoid with kolinsky sable.
- Isopropyl alcohol (70% or higher): A budget-friendly option, but can strip natural bristles over time. Use only once a week as a deep clean.
Example: A professional nail tech using a #8 kolinsky brush cleans it with a dedicated brush cleaner after each client, wipes it with a towel, and stores it upright in a ventilated holder. This routine extends the brush’s life by up to 300%.
Deep Cleaning Weekly or Monthly
Even with daily cleaning, residue can accumulate. Perform a deep clean every 1–2 weeks:
- Fill a small glass with brush cleaner or warm water (for synthetic brushes only).
- Swirl the brush gently for 1–2 minutes.
- Rinse with lukewarm water (avoid hot water—it can loosen the adhesive).
- Reshape and dry completely.
Bonus tip: For stubborn buildup, use a soft toothbrush (dedicated to this purpose) to gently scrub the base of the bristles.
Proper Storage: Preventing Damage and Contamination
How you store your brushes when not in use is just as important as how you clean them. Improper storage can lead to bristle deformation, mold growth, and bacterial contamination.
Ideal Storage Conditions
- Upright or horizontal: Store brushes with bristles facing up (in a brush holder) or lying flat on a clean surface. Never store them bristles-down—this causes bending and weakens the tip.
- Ventilated area: Use a breathable container or holder to allow air circulation. Plastic cases can trap moisture and promote mold.
- Cool, dry place: Avoid bathrooms or damp areas. Humidity can warp wooden handles and degrade bristles.
Example: A nail artist keeps her brushes in a wooden brush roll with individual pockets, allowing each brush to dry completely between uses. This prevents cross-contamination and maintains bristle shape.
Brush Holders and Cases
Invest in a quality storage solution:
- Brush rolls: Made of fabric or leather, these are portable and allow airflow. Ideal for travel.
- Acrylic brush holders: Clear, ventilated stands that keep brushes organized and visible.
- Magnetic cases: Secure bristles in place, but ensure the magnets don’t pull on the bristles.
Pro tip: Label each slot with the brush size and use (e.g., “#8 – Acrylic Application”) to avoid mix-ups.
Travel and On-the-Go Care
For mobile nail techs or travel:
- Use a brush guard (a plastic sleeve that fits over bristles) to prevent crushing.
- Pack a mini brush cleaner and lint-free cloth in your kit.
- Never toss loose brushes into a bag—they’ll get tangled and damaged.
Tip: After a client session, clean brushes immediately and store them in a sealed, ventilated pouch to prevent dust accumulation.
Common Mistakes That Ruin Acrylic Nail Brushes
Even experienced nail artists can make errors that shorten their brush’s lifespan. Awareness of these pitfalls can save you from costly replacements.
Soaking Brushes in Monomer or Water
Soaking the entire brush—especially the ferrule and handle—is a common mistake. Water or monomer can:
- Swelling wooden handles, causing cracks.
- Dissolve the adhesive, leading to bristle loss.
- Corrode metal ferrules, especially if they’re low-quality.
Solution: Only submerge the bristles (up to the ferrule) for a maximum of 5–10 minutes. Use a shallow dish to minimize liquid contact.
Using Harsh Chemicals or Heat
Avoid:
- Acetone: Too strong—it can dissolve synthetic bristles and strip natural ones.
- Hot water: Can warp bristles and loosen the ferrule.
- Hair dryers: High heat damages both natural and synthetic bristles. Air-dry only.
Improper Shaping
Failing to reshape bristles after cleaning leads to:
- Split tips, making fine lines impossible.
- Flattened bristles, reducing product pickup.
Solution: Use a brush shaper or your fingers to gently roll the bristles into a cone shape before drying.
Neglecting Hygiene
Dirty brushes can harbor bacteria and fungi. Signs of contamination include:
- Foul odor.
- Discoloration or slimy residue.
- Allergic reactions in clients.
Solution: Deep clean brushes monthly with a mild antibacterial soap (for synthetic) or brush cleaner. Replace any brush showing signs of mold or persistent odor.
When to Replace Your Acrylic Nail Brush: Signs of Wear
No brush lasts forever. Knowing when to retire your tool ensures consistent performance and client satisfaction.
Physical Signs of Damage
- Split or splayed bristles: Even after reshaping, the tip won’t form a point.
- Loose bristles: More than 5–10 hairs fall out per session.
- Rust or corrosion on the ferrule.
- Cracked or warped handle.
Performance Issues
- Uneven acrylic application.
- Difficulty forming clean bead shapes.
- Excessive product absorption (brush soaks up too much monomer).
Example: A brush that once created smooth, even layers now leaves streaks or clumps—this is a clear sign it needs replacement.
Lifespan Expectations
| Brush Type | Daily Use (Professional) | Occasional Use (DIY) | Replacement Signs |
|---|---|---|---|
| Kolinsky Sable | 12–24 months | 2–4 years | Split tip, bristle loss, odor |
| Synthetic (Nylon/Polyester) | 6–12 months | 1–2 years | Fraying, stiffness, discoloration |
| Mixed Bristle | 8–15 months | 1.5–3 years | Uneven wear, shedding |
Note: These estimates assume proper care. Neglect can cut lifespan in half.
Conclusion: Invest in Care for Professional Results
Acrylic nail brushes are precision instruments that demand respect and attention. By understanding their anatomy, committing to a daily cleaning routine, storing them properly, avoiding common mistakes, and replacing them when necessary, you’ll extend their lifespan, maintain hygiene, and deliver flawless results every time. Whether you’re a seasoned nail tech or a passionate hobbyist, the effort you put into brush care directly impacts the quality of your work.
Remember: a well-maintained brush doesn’t just save money—it elevates your artistry. A sharp, clean tip allows for intricate designs, smooth applications, and client trust. Make brush care a ritual, not an afterthought. Your tools are an extension of your skill, and with the right care, they’ll serve you for years to come. So, clean with care, store with purpose, and replace with confidence. Your future self—and your clients—will thank you.
Frequently Asked Questions
How do I clean acrylic nail brushes properly?
To clean acrylic nail brushes, rinse them with warm water immediately after use to remove residue, then gently swirl the bristles in a brush cleaner or monomer solution. Avoid soaking the brush for too long to prevent bristle damage.
Can I use acetone to clean my acrylic nail brushes?
While acetone can remove tough product buildup, it’s harsh on bristles and can shorten their lifespan. Instead, use a gentle brush cleaner or monomer to preserve the brush’s integrity and ensure long-lasting use.
How often should I clean my acrylic nail brushes?
Clean your acrylic nail brushes after every use to prevent product buildup and maintain their shape. Regular cleaning also ensures precise application and extends the brush’s lifespan.
How do I store acrylic nail brushes to prevent damage?
Store your brushes upright or flat in a clean, dry container to protect the bristles from bending or fraying. Keeping them away from dust and direct sunlight helps maintain their quality.
Why is my acrylic nail brush losing bristles?
Excessive soaking, harsh chemicals, or improper cleaning can cause bristle loss. To avoid this, use gentle cleaners, avoid twisting the bristles, and store the brush properly after each use.
How can I extend the life of my acrylic nail brushes?
To extend the life of your acrylic nail brushes, clean them regularly, avoid harsh chemicals, and handle them gently. Proper care ensures smooth application and long-lasting performance.