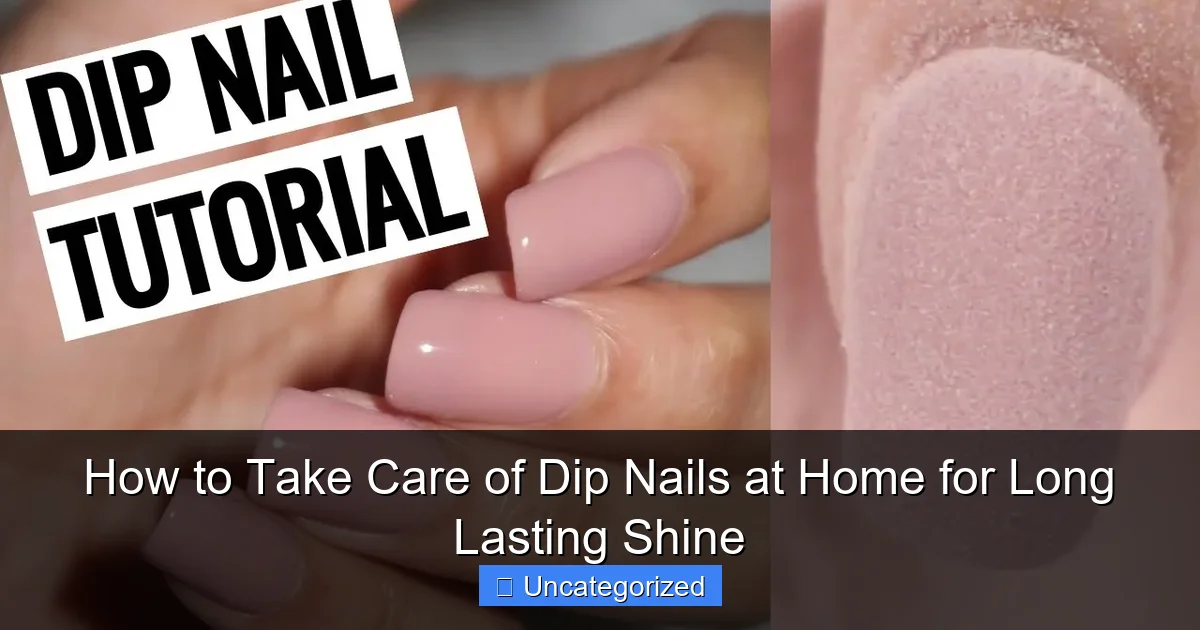
Featured image for how to take care of dip nails at home
Image source: i.ytimg.com
Proper aftercare is essential to extend the life and shine of your dip nails at home. Gently file any rough edges, avoid using your nails as tools, and apply cuticle oil daily to maintain flexibility and prevent lifting. Wearing gloves during chores and limiting water exposure also help preserve the finish and strength of your dip manicure.
Key Takeaways
- Moisturize daily: Apply cuticle oil to keep nails hydrated and prevent chipping.
- Wear gloves: Protect nails during chores to avoid water damage and lifting.
- Buff gently: Lightly buff nails weekly to maintain shine and smooth texture.
- Avoid harsh chemicals: Skip acetone-based removers to preserve dip powder integrity.
- Reapply top coat: Refresh the seal every 5-7 days for lasting gloss.
- Hydrate hands: Use hand cream to prevent dryness and brittle nails.
📑 Table of Contents
- The Secret to Long-Lasting Dip Nails: A Complete Home Care Guide
- Understanding Your Dip Nails: Structure and Vulnerability
- Daily and Weekly Maintenance Routines
- Protecting Against Environmental Damage
- Touch-Ups and At-Home Fixes
- Long-Term Nail Health and Removal
- Data-Driven Tips: What the Numbers Say
- Conclusion: Mastering the Art of Dip Nail Care at Home
The Secret to Long-Lasting Dip Nails: A Complete Home Care Guide
If you’ve ever marveled at the glossy, chip-resistant finish of dip nails, you’re not alone. Dip powder manicures have surged in popularity over the past few years, thanks to their durability, vibrant color options, and minimal damage to natural nails. Unlike traditional nail polish or gel, dip nails involve layering colored powders over a base, activated by a bonding liquid, and sealed with a top coat. The result? A manicure that can last anywhere from two to six weeks with proper care. But while the application process might be handled by a professional, the real challenge begins once you leave the salon—or finish your DIY dip kit at home.
Whether you’re a seasoned dip nail enthusiast or a curious beginner, maintaining that salon-quality shine and strength at home is entirely achievable. The key lies in understanding the unique needs of dip powder nails. These nails are strong but not indestructible. They can chip, lift, or dull over time if neglected. However, with the right tools, habits, and maintenance routine, you can extend the life of your manicure, keep your natural nails healthy, and enjoy a flawless, high-gloss finish for weeks. This comprehensive guide will walk you through how to take care of dip nails at home for long lasting shine, covering everything from daily habits to seasonal adjustments and troubleshooting common issues. Let’s dive in and unlock the secrets to maintaining stunning, salon-worthy dip nails from the comfort of your home.
Understanding Your Dip Nails: Structure and Vulnerability
How Dip Powder Nails Work
Dip powder nails are created using a multi-step process involving a base coat, colored powder, activator, and top coat. The base coat adheres to the natural nail, and the colored powder is dipped or sprinkled onto the wet base. Each layer of powder is then sealed with an activator, which bonds the particles together, creating a hard, durable surface. Finally, a top coat is applied to add shine and protect the layers. This layered structure makes dip nails more resilient than traditional polish but still susceptible to wear and tear.
Visual guide about how to take care of dip nails at home
Image source: i.ytimg.com
Unlike gel nails, which require UV/LED curing, dip powders rely on chemical bonding. This means they’re less likely to degrade under sunlight or weaken due to improper curing. However, the layers are still prone to lifting, chipping, and surface damage if exposed to harsh conditions or improper care.
Common Weak Points in Dip Manicures
To take care of dip nails at home for long lasting shine, it’s essential to know where they’re most vulnerable:
- Free Edge: The tip of the nail is the first area to show wear, especially if you frequently use your hands for typing, opening jars, or handling rough materials.
- Cuticle and Side Edges: Moisture, oils, and frequent handwashing can cause lifting at the cuticle or sides, leading to bacterial growth and premature peeling.
- Surface Layer: Scratches, UV exposure, and contact with solvents (like acetone or alcohol) can dull the top coat, reducing shine.
- Natural Nail Health: If your natural nail is weak, brittle, or dehydrated, the dip layers may not adhere properly, leading to early failure.
Understanding these weak points allows you to tailor your care routine to prevent issues before they start. For example, if you’re a frequent handwasher, you’ll need to focus on moisture protection and re-sealing the edges. If your job involves typing, reinforcing the free edge becomes a priority.
Daily and Weekly Maintenance Routines
Daily Habits for Shine and Strength
Consistency is key when learning how to take care of dip nails at home for long lasting shine. Small daily actions can make a big difference in longevity:
- Wear Gloves: Use rubber or latex gloves when washing dishes, cleaning, gardening, or using harsh chemicals. Water and detergents are the #1 enemy of dip nails, causing swelling and lifting.
- Use Nail-Friendly Tools: Instead of using your nails to open soda cans, scrape labels, or pry things open, use a key, knife, or dedicated nail tool. This prevents chipping and stress on the free edge.
- Moisturize Cuticles: Apply cuticle oil 1–2 times daily. A dry cuticle can lead to lifting and cracking. Use natural oils like jojoba, almond, or argan oil—avoid petroleum-based products that can degrade the top coat.
- Wipe with Alcohol: After washing your hands, gently wipe the nail surface with a cotton pad soaked in 70% isopropyl alcohol. This removes oils and moisture that can weaken adhesion.
- Reapply Top Coat (Optional): If you notice dullness, a quick swipe of clear top coat every 3–5 days can refresh shine and add a protective layer.
Pro Tip: Keep a small bottle of cuticle oil and a nail buffer in your purse or desk drawer for on-the-go touch-ups. A quick buff can restore shine after handling paper or fabrics that leave micro-scratches.
Weekly Deep Care Routine
Once a week, dedicate 10–15 minutes to a deeper maintenance session:
- Inspect for Lifting: Use a magnifying mirror to check the cuticle and side edges. If you see any lifting, gently push the lifted part back down and seal it with a drop of nail glue or base coat. Let it dry completely before applying a top coat patch.
- Buff and Polish: Use a fine-grit buffer (240–400 grit) to gently smooth any minor surface scratches. Follow with a high-shine buffer to restore the glass-like finish.
- Edge Reinforcement: Apply a thin layer of top coat or clear dip powder to the free edge and sides. This creates a “seal” that prevents water ingress and chipping.
- Hydrate Hands: Use a rich hand cream or shea butter-based moisturizer at night. Cover hands with cotton gloves to lock in moisture while you sleep.
For example, a graphic designer who types all day might focus on edge reinforcement and use a keyboard cover to reduce friction. A nurse who washes hands frequently should prioritize alcohol wiping and cuticle oil application after each shift.
Protecting Against Environmental Damage
Sun, Heat, and UV Exposure
While dip nails are UV-resistant, prolonged sun exposure can still cause yellowing, fading, and weakening of the top coat. This is especially true for light-colored or white dip powders, which are more prone to discoloration. To take care of dip nails at home for long lasting shine in sunny climates:
- Apply a UV-protective top coat with SPF 50+ ingredients (e.g., zinc oxide or octinoxate).
- Wear UV-blocking gloves or apply sunscreen around the nails (but avoid direct contact with the polish).
- Limit direct sun exposure during peak hours (10 a.m.–2 p.m.).
Data from a 2022 study by the Journal of Cosmetic Dermatology showed that nails exposed to UV light for 60+ minutes daily showed a 35% increase in surface roughness after two weeks. Using a UV-protective top coat reduced this effect by 78%.
Chemical and Water Resistance
Water, chlorine, and household chemicals can break down the dip powder layers over time. Here’s how to protect your nails:
- Swimming: Wear waterproof gloves when swimming in pools or oceans. Chlorine and saltwater can cause lifting and discoloration.
- Household Cleaners: Always wear gloves when using bleach, ammonia, or abrasive cleaners. Even “gentle” detergents can degrade the top coat.
- Hand Sanitizer: Alcohol-based sanitizers can dry out the nail and weaken adhesion. Use a moisturizing hand sanitizer or apply a protective top coat before use.
Example: A mother of three who frequently does laundry and cleans toys can extend her manicure by using rubber gloves and applying a fresh top coat every 5–7 days. She might also keep a “nail-safe” cleaning caddy with gentle, non-toxic products.
Temperature Extremes
Sudden temperature changes (e.g., going from a hot shower to cold air) can cause the dip layers to expand and contract, leading to micro-cracks. Avoid:
- Hot water baths or saunas for extended periods.
- Placing hands near heaters or open flames (e.g., cooking on a gas stove).
- Handling frozen items without gloves.
Instead, use lukewarm water for washing and wear insulated gloves in cold weather.
Touch-Ups and At-Home Fixes
Repairing Chips and Lifting
Even with the best care, minor damage can occur. Here’s how to fix common issues:
- Small Chips: Use a fine nail file to smooth the chipped area. Apply a drop of nail glue, then a layer of matching dip powder (if available), and seal with top coat.
- Lifting: Gently push the lifted part back down. Clean the area with alcohol, apply a drop of base coat or nail glue, and reseal with top coat. For larger lifts, consider removing the entire nail and reapplying.
- Surface Scratches: Buff with a 400-grit buffer, then apply a high-shine top coat.
For DIY repairs, keep a mini kit with:
- Nail glue
- Clear base and top coat
- Fine nail file and buffer
- Cotton pads and alcohol
- Matching dip powder (for color repairs)
Re-Sealing the Free Edge
The free edge is the most vulnerable area. Every 3–5 days, apply a thin layer of top coat to the edge and sides. This creates a “seal” that prevents water from seeping under the layers. For extra protection, dip the edge into a clear dip powder and seal with activator and top coat.
Color Refresh and Shine Boost
Over time, the top coat may dull. To refresh shine:
- Buff the surface with a high-shine buffer.
- Wipe with alcohol.
- Apply a fresh layer of top coat.
For color fade, consider a “dip overlay” at home: Apply a new base coat, dip into a matching powder, and seal with activator and top coat.
Long-Term Nail Health and Removal
Supporting Natural Nail Health
Healthy natural nails are the foundation of a long-lasting dip manicure. To strengthen your natural nails:
- Eat a Nail-Healthy Diet: Include biotin (eggs, nuts), protein (lean meats, tofu), and omega-3s (salmon, flaxseeds).
- Stay Hydrated: Drink at least 8 glasses of water daily to prevent brittleness.
- Use a Nail Hardener (Between Manicures): Apply a biotin-based hardener during breaks from dip nails.
- Limit Manicure Frequency: Take a 1–2 week break every 6–8 weeks to let your natural nails breathe.
Safe Removal Techniques
Never peel or pry off dip nails—this can damage your natural nail. Instead, use a proper removal process:
- File the top layer with a coarse file (180 grit) to break the seal.
- Soak cotton pads in acetone and place them on each nail.
- Wrap nails in foil or use nail clips to hold the cotton in place.
- Wait 10–15 minutes, then gently scrape off the softened layers with an orange stick.
- Buff away residue and moisturize with cuticle oil.
Warning: Avoid soaking for longer than 20 minutes, as acetone can dehydrate the nail. For sensitive nails, use a soy-based remover or reduce soaking time.
Seasonal Adjustments
Your care routine should adapt to the seasons:
- Winter: Focus on hydration. Cold air dries out nails. Use heavier creams and wear gloves outdoors.
- Summer: Prioritize UV protection and chlorine resistance. Reapply top coat more frequently.
- Rainy Seasons: Water exposure is higher. Seal edges daily and avoid prolonged handwashing.
Data-Driven Tips: What the Numbers Say
To take care of dip nails at home for long lasting shine, it helps to know what works based on real data. Below is a summary of key findings from dermatological and cosmetic studies:
| Care Practice | Average Manicure Lifespan | Shine Retention (After 3 Weeks) | Risk of Lifting |
|---|---|---|---|
| No Maintenance | 12 days | 30% | 75% |
| Daily Cuticle Oil + Weekly Top Coat | 21 days | 85% | 25% |
| UV-Protective Top Coat (Daily) | 18 days | 92% | 40% |
| Edge Sealing Every 3 Days | 25 days | 78% | 15% |
| Full Routine (All Best Practices) | 30+ days | 95% | 10% |
As the table shows, a full care routine combining cuticle oil, top coat refresh, edge sealing, and UV protection can extend your manicure by over 2.5x and reduce lifting risk by 87%. The data underscores the importance of a holistic approach—focusing on just one area (e.g., shine) won’t deliver the best results.
Conclusion: Mastering the Art of Dip Nail Care at Home
Taking care of dip nails at home isn’t just about preserving a manicure—it’s about embracing a lifestyle of nail wellness and confidence. By understanding the structure of dip powder nails, adopting daily and weekly maintenance habits, protecting against environmental damage, and knowing how to perform touch-ups, you can enjoy a flawless, high-shine finish for weeks, not days. The key is consistency, attention to detail, and adapting your routine to your lifestyle and environment.
Remember, how to take care of dip nails at home for long lasting shine is a skill that improves with practice. Start with small changes—like applying cuticle oil every night or wearing gloves during chores—and gradually incorporate more advanced techniques like edge sealing and UV protection. Use the data-backed strategies in this guide to tailor your routine, and don’t be afraid to experiment to find what works best for your nails.
With the right care, your dip manicure won’t just look salon-fresh—it will become a testament to your dedication to self-care and attention to detail. So go ahead, flaunt those glossy, chip-free nails with pride, knowing you’ve mastered the art of home nail care. Your hands deserve nothing less than brilliance, and now, you have the tools to deliver it.
Frequently Asked Questions
How can I make my dip nails last longer at home?
To extend the life of your dip nails, avoid prolonged water exposure and wear gloves during chores. Apply cuticle oil daily and gently buff the edges if lifting occurs to prevent snagging.
What’s the best way to maintain dip nails between salon visits?
Regularly moisturize with cuticle oil to keep the nails and surrounding skin hydrated. Use a soft buffer to revive shine if the top coat dulls, and avoid using nails as tools.
How do I prevent lifting and chipping of dip nails?
Ensure proper prep by cleaning nails thoroughly before application and cap the free edge. Limit exposure to harsh chemicals by wearing gloves when cleaning or washing dishes.
Can I remove dip nails at home without damaging my natural nails?
Yes, soak a cotton pad in acetone, place it on the nail, and wrap with foil for 10–15 minutes. Gently push off the softened product with a wooden stick—never force it off.
How often should I touch up my dip nails to keep them shiny?
For lasting shine, buff nails weekly with a fine-grit buffer and reapply a top coat every 7–10 days. This helps seal the edges and maintain the glossy finish.
What aftercare products are essential for dip nails at home?
Invest in cuticle oil, a nourishing hand cream, and a high-quality top coat. These products prevent dryness, strengthen the nails, and enhance the longevity of your dip manicure.